The TurboTail is a cost-effective, externally mounted fixture designed to counter the tremendous pull of the strings on fixed-bridge guitars, reducing or replacing the need for soundboard bracing. As an educational tool, the TurboTail offers insight into long-held beliefs regarding the soundboard's role in resisting string tension.
Question: What is the TurboTail?
Answer: According to its inventor:
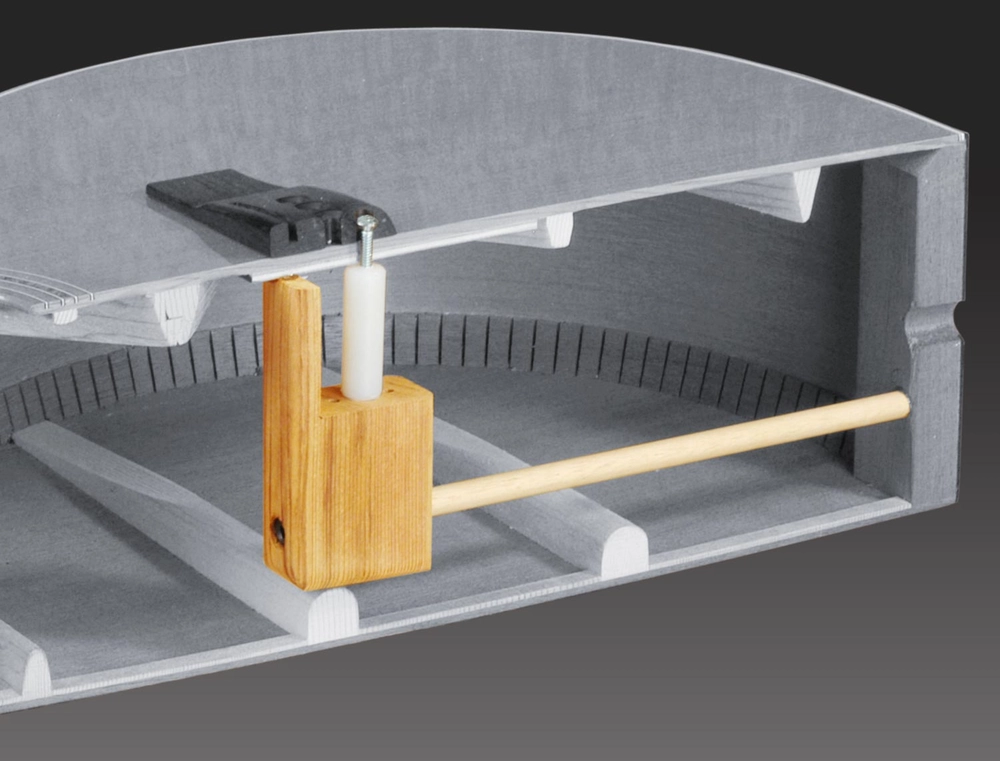
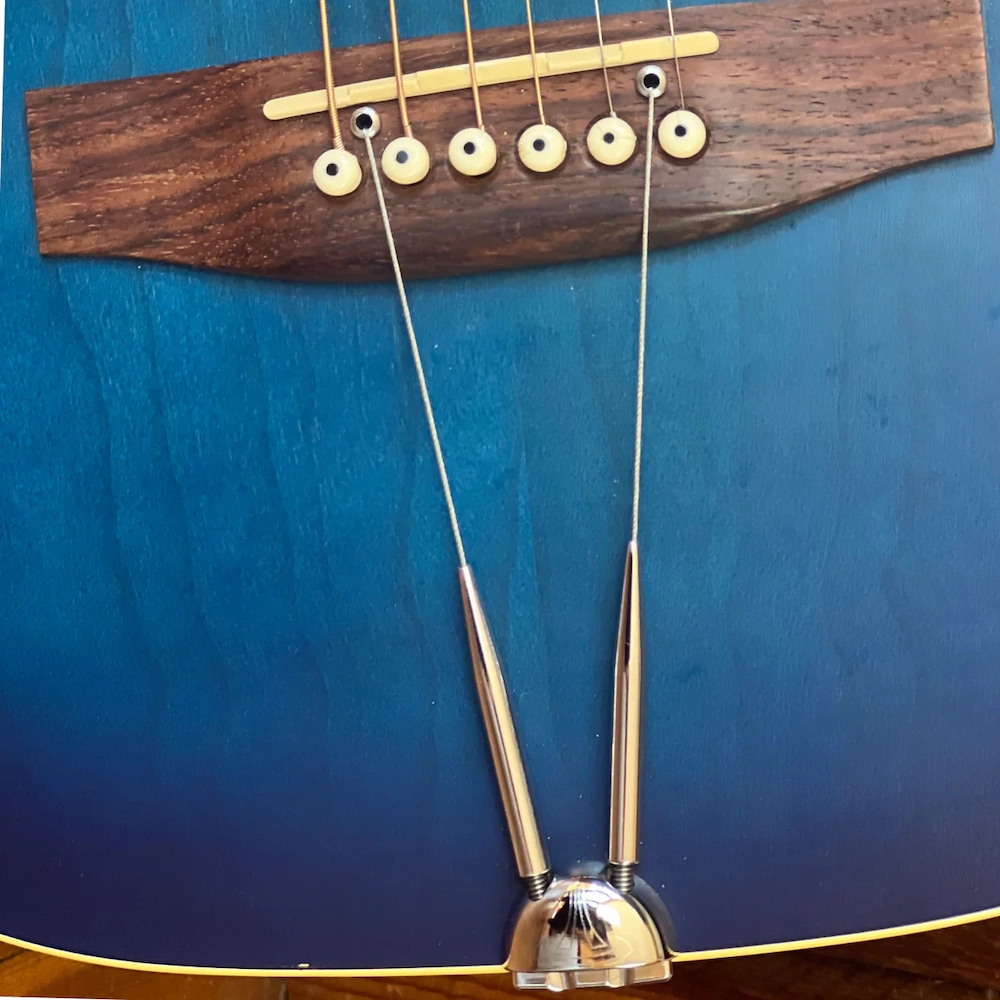
"The TurboTail is a simple, elegant device that diverts the tension of the guitar strings from the soundboard to the structural tail block of the guitar. All of the vibrations of the guitar strings are still transferred directly to the soundboard to produce sound. But the tension load is diverted to the tail block, leaving the delicate soundboard free to vibrate optimally. The result is that the guitar soundboard can do what it was intended to: Amplify and temper the vibrations of the guitar strings without having to provide a structural anchor for the strings."
Visit the TurboGuitar website where you can also find several YouTube product demonstration videos.
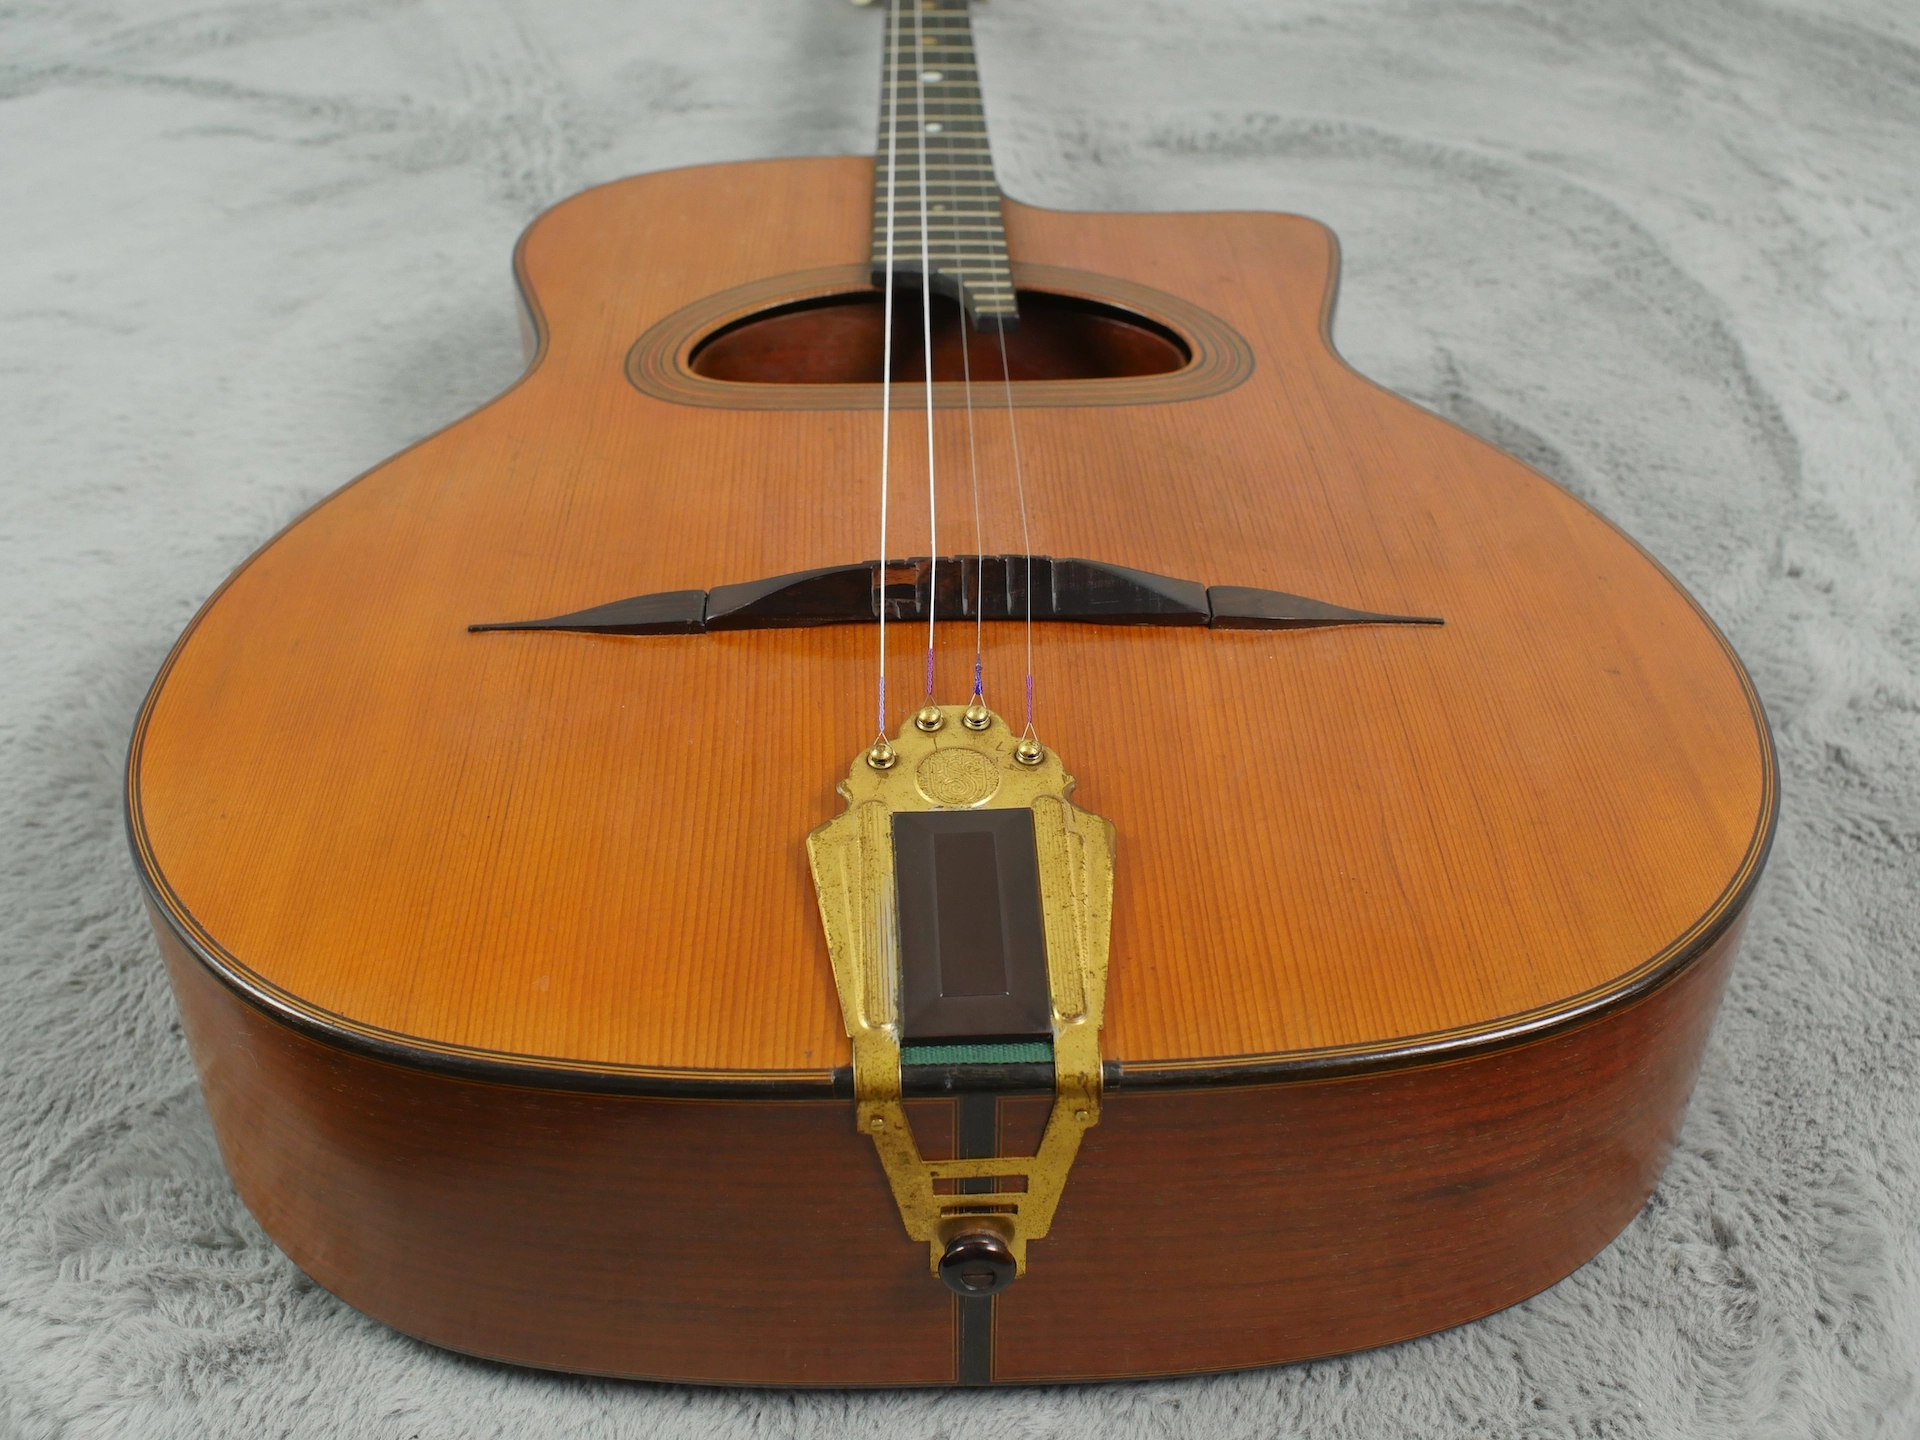
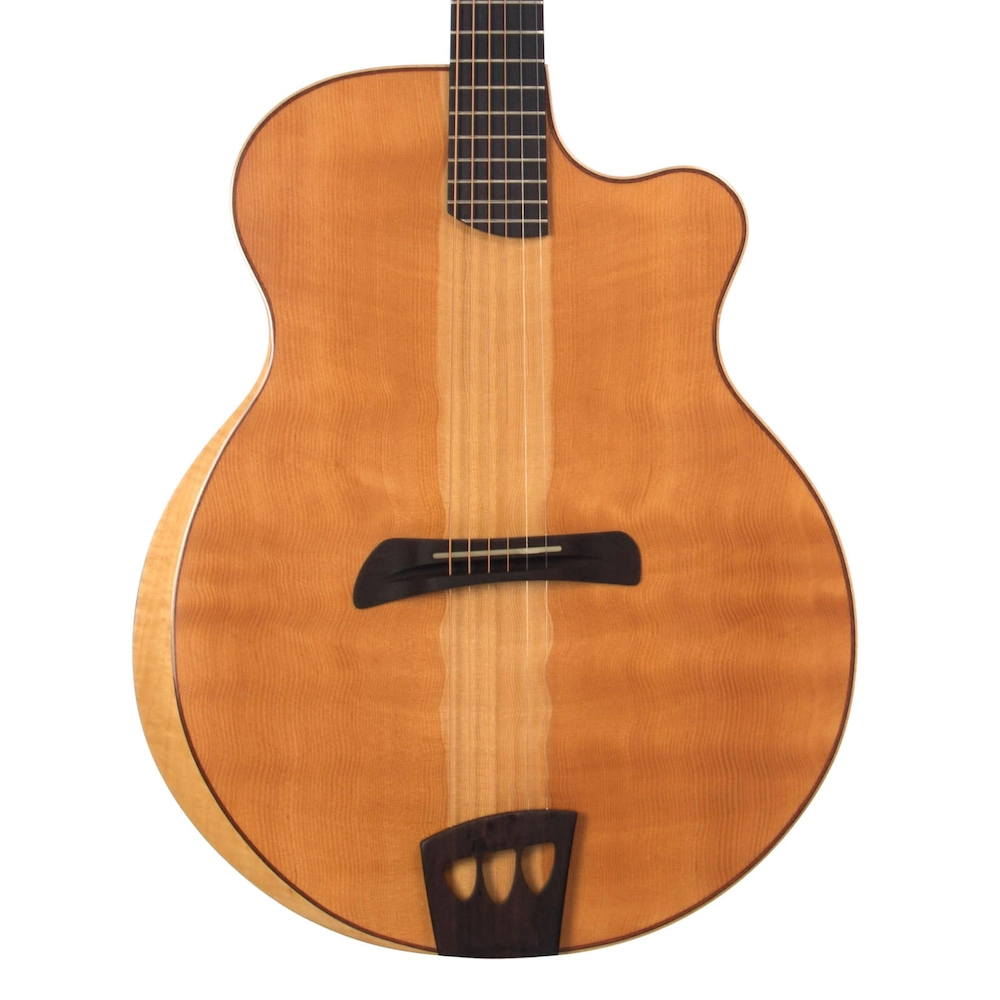
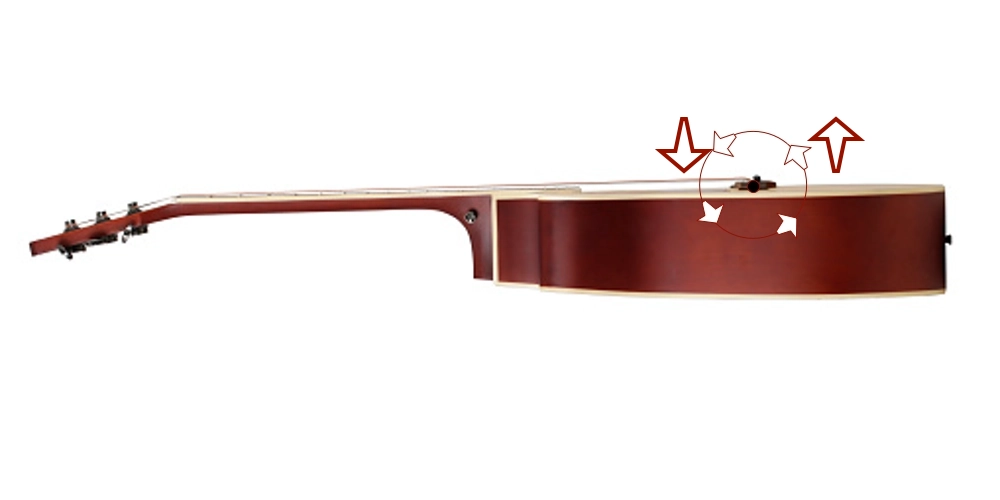
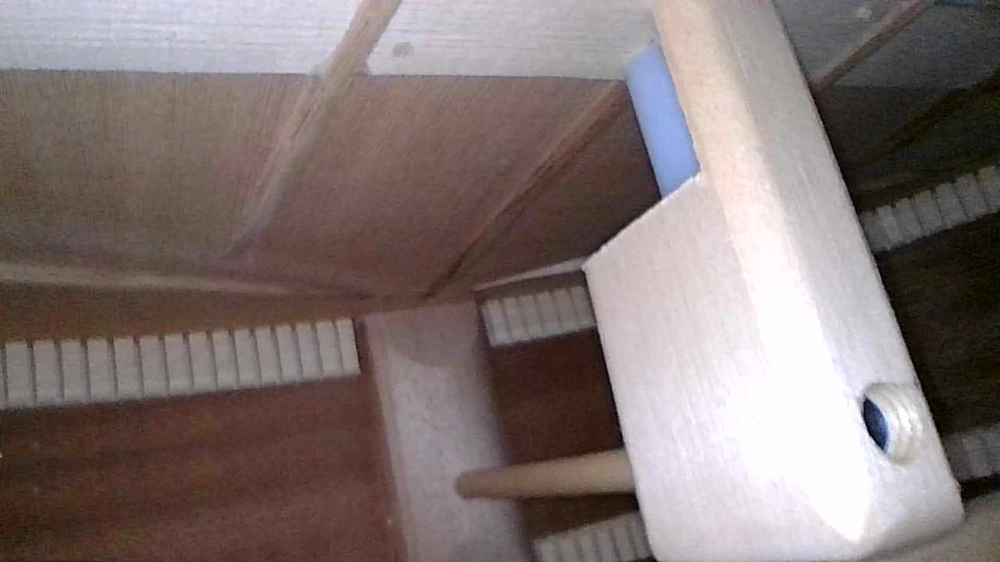
In early 2025 I was contacted by the folks at TurboGuitar who introduced me to their product, a fixture they called the TurboTail. I spoke at length with the inventor and watched a video that effectively demonstrated the results of having retrofitted an inexpensive, lightly-braced, nylon string guitar with a TurboTail so that it could be confidently strung up with steel strings. It made for a rather responsive steel string acoustic.
Repeating their success, more of these instruments were modified even further by reducing fretboard width and lowering actions. Placed in the hands of seasoned players, the reactions to these guitars were overwhelmingly positive, confirming that when higher tension strings were installed on a guitar built for lower tension strings, but supported by the TurboTail, the guitar demonstrated the potential to excel in both tone and volume.
While the TurboTail was not directly invented for the purpose of converting nylon string fan-braced guitars to steel string guitars, such successful conversions readily demonstrate the opportunity to re-think the role of the soundboard in today's acoustic guitar designs.
For some background on this topic, including a brief history of the guitar, see my article » The Truss Rod; specifically a section titled, "A Simplified History of Strings and Guitars".
Multiple steel strings are pulling on the fixed bridge in the direction of the headstock. The TurboTail counters that pull by attaching two (2) high-test cables to the bridge that are secured to the tail block.
The torque of the strings across the crest of the saddle is constantly working to rotate the bridge forward. The builder must ensure a sufficient bond exists between the bridge and the soundboard to prevent the strings from tearing the bridge loose. The soundboard must have sufficient integrity to resist being (literally) torn off the guitar. The soundboard must maintain a sufficient bond with the bracing beneath it, and the bracing must be sufficient to minimize the rotation.
Assuming we have all successfully accomplished these feats, our bridges still rotate forward, creating a depression in the soundboard in front of the bridge and a rise, or "belly", behind it. The resulting "S" curve in the soundboard, viewable from the side, is an after-the-fact distortion of what began as a flat (or slightly convex) plane. Some appear to be under the delusion that this wavy top that occurs over time on acoustic guitars was an intentional design thought up by a brilliant luthier, long ago.
Breaking news: We live with soundboard deformation as a result of the forces at work and our intentional re-creation of the design that permits it. Rather than work to alter the role of the soundboard as a mitigator of collapse, we prefer to think of the deformation as a good thing.
The TurboTail does not remove the torque at the saddle; it eliminates the deformation of the soundboard.
Question: Why do this? Aren't guitar soundboards supposed to be deformed?
Answer: Imagine setting the soundboard free of its role as a structural platform. What if it could just be the best sound generator, ever, without having to undergird it to prevent it from collapsing!
Traditional and conventional guitar makers, wittingly or not, build in accordance with a simple maxim: The soundboard bracing must provide the much needed structural support to resist the pull of the strings while minimizing such support's negative impact on the vibration of the top. A balance must be struck between being over-built and under-built, between overly sturdy and overly fragile.
Question: What if it was possible to support the pull of the strings without having to glue a bunch of sticks to the backside of the sound generator?
Guitars built more structurally sound are generally more affordable. By contrast, guitars built the most cautiously and delicately do not typically accompany you on camping trips, safaris or great outdoor adventures. But when I am after that special sound, that whisper from the wood, I build lighter and lighter. From years of experimentation and at great personal expense I can attest that a guitar sounds its best just prior to the catastrophic failure that occurs when I reach the point of, "Oops! I built that one a little too lightly!" For many so-called "boutique" builders, the goal has become to build right up to that point of failure and then back off just a little bit. 😜
The prospect of being able to pay significantly less attention to, if not ignore entirely, the structural role of the soundboard and, instead, pursue its sonic potential motivated me to purchase several of these TurboTail fixtures for my shop. The TurboTail installs on a completed instrument, so I purchased two inexpensive nylon string guitars in order to conduct my own tests.
The results of those tests, which I have included toward the end of this article, confirm both the inventor's claims as well as my own hypotheses. Read on to learn more about the TurboTail, or jump to the tests by clicking the button, below:
My goal was never to see if I could convert a nylon string guitar to steel strings. I already knew that was possible. As viable as these nylon to steel conversions may be, structurally, they simply do not produce the sound I am after. I knew I would need to construct a custom instrument in the hopes of discovering that.
The principle behind the TurboTail is so simple, so straightforward, that I didn't require further convincing of its efficacy. Being familiar with the well-established commercial approach to countering bridge rotation, that of the JLD Bridge Doctor, I wanted to conduct head-to-head experiments using both of these fixtures and document the test results. I had some suspicions that I wished to either prove or disprove, once and for all. In the end, I knew I would gain additional knowledge and experience in my quest to learn how best to incorporate the TurboTail into my own steel string guitar builds.
I accomplished my goal(s). I designed and constructed the first steel string acoustic guitar using the TurboTail, completing it toward the end of Summer, 2025. My build article is here » The First TurboTail Guitar.
Read on to discover more of my understanding of the purpose and benefit of the TurboTail.
A casual observer might confuse the TurboTail with a conventional tailpiece, such as may be seen on an acoustic archtop or Gypsy Jazz guitar.
BIG DIFFERENCE: For any who might not be familiar, a tailpiece anchors an instrument's strings to its tail block as opposed to anchoring the strings into or onto the bridge. More on this, in a moment ...
Tailpieces are commonly found on mandolins and banjos, as well as the bowed stringed instruments, including acoustic upright bases, cellos, violas and violins. The bridges on these instruments typically float (remain moveable) on the surface and are held in place by the downward pressure of the strings. While less common, a guitar fitted with a tailpiece may include a fixed bridge (glued-on), as we see in this 1932 Maccaferri tenor (4-string) guitar.
In a modern example of an acoustic guitar fitted with a tailpiece and fixed bridge, the Batson brothers addressed all the pertinent issues including string anchoring and saddle torque, going even farther to redesign the soundboard, relocating the soundhole and altering the bracing pattern.
In order to generate sufficient energy down through the saddle, into the bridge and out onto the soundboard that will result in audible tone, the strings of most acoustic instruments fitted with a tailpiece tend to crest the saddle relatively high off the surface of the soundboard, higher than you may find on your typical acoustic guitar having bridge-anchored strings.
To mitigate collapse of the soundboard from the downward force of the strings, the soundboard is typically domed, or "arched". This arch is formed either by carving the desired contour from a thicker billet of wood or by bowing, bending or pressing a thinner plate into shape and fixing it in place with radiused bracing.
NOTE: Failure to provide sufficient structural support to a soundboard of an acoustic guitar fitted with a tailpiece will result in collapse!
If the definition of a tailpiece is a "piece" that mounts to the "tail" of the guitar, then the TurboTail qualifies as a tailpiece.
HOWEVER: There is a significant difference between a guitar fitted with a tailpiece and a guitar built to take advantage of the principles behind the TurboTail, when installed as intended.
The TurboTail is specifically designed to work with guitars having fixed bridges onto/into which the strings are secured. On such guitars, the strings enter the bridge at an acute angle behind the saddle and generate a significant amount of torque (rotational force) at the crest of the saddle. Two thin cables tie the bridge to the tail block. The tension on these cables is adjustable and directly affects the load placed on the soundboard. "Adjusting the tension" of a conventional tailpiece simply alters the tuning.
| Conventional Tailpiece Guitar | Guitar fitted with a TurboTail |
|---|---|
| Tailpiece-anchored strings | Bridge-anchored strings |
| Floating bridge | Fixed bridge |
| Low-torque saddle | High-torque saddle |
| No bridge rotation to counter | Significant forward bridge rotation to deal with |
| Archtop and/or braced soundboard required | Without TurboTail: Bracing requirement With TurboTail: No bracing requirement |
A set of nylon strings may range from 60 lbs to 100 lbs of tension, comparable to the weight of a small ballerina standing on the back of the bridge. The total tension of six steel guitar strings might range between 140 and 190 pounds, depending upon the string gauge. 12-string guitar string tension can exceed 250 pounds, enough to lift your average NFL player off the ground.
Anchored toward the back of the bridge, the strings pass up and over the saddle on their path up the neck to the headstock. Due to the intrinsic lever action of the fixed bridge/saddle design, its tendency is to rotate forward under string tension.
This forward rotation can be visualized as setting up a block and tackle to remove the stump of a fallen tree.
The stump is not airlifted straight up and out of the ground but, rather, tilts forward under the pull of the cable or chain. In the same manner, the glued-on bridge of the acoustic guitar rotates forward under the pull of the strings. Just as the ground behind the tree stump begins to rise as you rotate the stump forward, so the soundboard behind the bridge will lift, or "belly" upwards as the bridge rotates. Pull on that bridge hard enough and it is quite possible to complete the analogy with the stump: you can literally tear the bridge (and, in some cases, the soundboard with it) right off the surface of the instrument. I speak from experience, having personally accomplished this feat! Twice!
As repair shops throughout the Earth will attest, if the soundboard and bracing are not deliberately functioning to prevent the front of the bridge from sinking below the surface plane established when the instrument was constructed, the forward rotation of the bridge will cause a depression and may eventually collapse the soundboard. If the soundboard and bracing provide insufficient support behind the bridge, this same forward rotation will raise the back of the bridge, and the soundboard it is glued to will raise right along with it.
A side view of an acoustic guitar under string tension will reveal a soundboard profile that resembles a gentle wave, or a shallow "S" curve. This deformation of what began as a flat plane is the result of the torque of that fixed bridge. In other words, we live with the results of the forces being applied.
Over the last half a century, I have encountered guitars with varying degrees of raised soundboards, or bellies. Many of them, though not all, sounded great to my ears, seemingly confirming the saying, "No belly, no tone!" I am proud to say that I own/have owned some of these deformed instruments. 😊
I have also encountered as many or more guitars with little or no visually distinguishable belly that sounded just as great to my ears. I own some of these instruments, too.
If I think of bellying as a good thing, then I am unlikely to take further action.
If I think of bellying as a deformation of the structure of the guitar then, in lieu of rebuilding my guitar or purchasing a different one, I may seek to counter the effects of bridge rotation.
In the case of severe bellying, short of replacing the soundboard, I may choose to attempt to flatten the bulge. I can apply heat and cauls or, even better, heated cauls and use clamping pressure to force the belly out of the soundboard.
However, unless I correct the condition(s) permitting the bridge to rotate and the soundboard to bulge, I will likely end up having to deal with it, again. To that end, I may choose to explore additional bracing options and/or bridge and bridgeplate replacement. Rarely is this an inexpensive solution.
In November of 1993, Don Kendall patented his apparatus for "... reversing or preventing warpage in the top plates of guitars and similar musical instruments attributable to the tensile forces within the strings ..."
"The apparatus employs a compression block attached within the interior of an instrument's
sound box, upon the interior side of the top plate and opposite the bridge, a compression rod between the compression block and the tail block of the instrument, and means within the interior of the sound box for adjusting the movement of the compression rod."
Both the JLD Bridge Doctor, which requires that a hole be drilled through the bridge, and the JLD Bridge System, which replaces your bridge pins with its own brass versions, directly address the forward rotation of the bridge that is responsible for the "warpage in the top plate", or bellying, by applying a less than or equal rotating force directly to the underside of the bridge in the opposite direction.
With a wooden block secured to the underside of the bridge, leverage is used to pry the bridge back into position, accomplished by pushing the wooden dowel back against the tail block. Leverage is adjustable using the set screw housed (horizontally) within the wooden block.
With a JLD Bridge Doctor installed, string energy is still transferred to the soundboard. Mass has been added to the equation. Weighing as much as 34 grams we have, in effect, added the weight of a second ebony bridge to the soundboard. The JLD Bridge System, a "non-destructive" variation of the JLD Bridge Doctor, utilizes 6 brass pins that replace the standard bridge pins and adds 30 more grams to the overall weight, coming in at a total of 60 grams or, using my analogy, the equivalent of 2 additional bridges.
Users of the JLD Bridge Doctor/System offer a mix of reactions, with some expressing gratitude for the visual reduction in (if not complete reversal of) bellying, while there are those who claim little or no reduction occurred. Some users have cited a noticeable increase in bass response, with others claiming they are experiencing more pronounced midrange frequencies. Some say their guitar is louder and others think they may have killed the sound.
I decided to include the JLD Bridge Doctor in my tests, for comparison.
Unlike the JLD Bridge Doctor, which (mostly) hides away inside the guitar, the TurboTail mounts outside the instrument. There is a definite aesthetic to consider, though it is immediately apparent that much thought has gone into the design and appearance of this fixture, making it both functional and attractive. The components of the TurboTail weigh 44 grams, in total. The majority of the weight rests on the tail block, with less than 1 gram being added directly to the bridge.
What does the TurboTail do differently from the JLD Bridge Doctor/System?
The TurboTail is not specifically designed to counter the rotation of the bridge (though that is definitely a side-benefit). Instead, it it shares the pull of the strings with the tail block, effectually suspending the bridge on the soundboard.
Here is a loose analogy: Lay a big truck tire flat on a 6 ft. tall platform outdoors between two large trees, and secure the tire to the platform. I trust you can rest the platform on some hard, stable soil. Attach one end of a rope to the tire and wrap the other end of the rope to the large tree 20 ft. away, securing it at a point approximately 5 ft off the ground. Tighten the rope sufficiently to just start to lift the legs on the backside of the platform up off of the ground. Call this setup “My bridge under string tension.”
The JLD Bridge Doctor/System directly addresses the forward rotation of the bridge by applying a less than or equal rotating force in the opposite direction. Leverage is used to pry the bridge back into position, accomplished by pushing a dowel back against the tail block. Using my truck tire analogy, bolt a big block of wood to the underside of the platform on which the tire rests. Like the keel of a ship, engineer it to hang 4 ft. below the deck of the 6 ft. platform. Position a jack between the big block of wood and the tree behind the table (the other tree). Expand the jack and make use of leverage to drive the back legs of the platform down to the ground.
Ta da! The principle works. Rotation has been countered. However, do you notice how both the pull of the rope (strings) on the tire (bridge) and the push of the jack (wooden dowel) on the block are forces working in the same direction? With a JLD Bridge Doctor/System installed, the soundboard directly in front of the bridge is the direct recipient of these forces. A load is applied across the surface of the soundboard between the bridge and the soundhole.
I have also added weight to the equation. This will lower the resonant frequency of the guitar (shown in my test results). Whether this produces pleasing or displeasing results, a change in tone will definitely occur.
The TurboTail is working the problem differently. Unlike the JLD Bridge Doctor/System, which is anchoring a lever to the underside of the bridge and literally pushing that lever away from the tail block and toward the headstock, the TurboTail is pulling the bridge toward the tail block, directly countering the pull of the strings in the direction of the headstock.
Using my truck tire analogy to visualize this, after removing the jack and the big block of wood (the "keel") that was mounted beneath the platform, simply attach a second rope to the tire on the opposite side of the first rope and stretch it to the adjacent tree, the same one we were pushing our jack up against. Wrap it around the tree at a point 5 ft. off the ground and pull that second rope nice and tight. Watch as the back legs of the platform re-connect with the ground.
As the tests will show, the JLD Bridge Doctor/System definitely decreases bridge rotation, but it does so at the expense of also decreasing top deflection. It affixes the soundboard in place. This may or may not prove to be a good thing. It also increases the load across the surface of the soundboard directly in front of the bridge. Additionally, the JLD Bridge Doctor/System dramatically lowers the resonant frequency of the soundboard, on which the TurboTail has no measurable effect.
Depending on how it is installed, the TurboTail will also have a nullifying impact on bridge rotation, eliminating it altogether, if so desired. Most importantly (and quite surprisingly), the TurboTail actually increases top deflection and it accomplishes this without altering the resonant frequency of the soundboard. This isn't theory, by the way. I measured these significant factors.
If your guitar's soundboard has already been braced to withstand the pull of steel strings, the TurboTail will have less opportunity to bear the load. I don't know how much difference you might experience. I installed a TurboTail on the blue guitar in the photo, above, and noticed a marked increase in sustain, but not volume. You may want to try it and discover for yourself.
If you support the neck, then yes. For my testing, I used nylon string guitars fitted with an adjustable truss rod. Where the TurboTail counters the pull of the strings on the bridge and soundboard, a truss rod assists in countering the pull of the strings on the neck. A normal tension set of nylon string pulls at 86 lbs. A set of light gauge steel strings pulls at nearly 160 lbs.
At the very least, lowering the action and adjusting saddle compensation for improved intonation will definitely make for a more enjoyable steel string playing experience. If the wider neck is uncomfortable, it can be narrowed, though this also introduces an aesthetic factor.
The TurboTail excels at allowing for greater tension strings to be installed on more lightly-braced instruments (such as converting fan-braced Classical guitars to steel strings, or converting a steel string (or even a nylon string) acoustic into an acoustic bass). It puts a spotlight on how heavily structured our existing steel stringed instruments really are, braced in an effort to resist bridge rotation and prevent collapse.
I don't know. Great strides have been made in perfecting the center soundhole, X-braced soundboard - a nearly 2 centuries old design. Advocates argue, "If it ain't broke. don't fix it." My own interest lies in utilizing the TurboTail in pursuit of an alternate approach to soundboard (and guitar) design and guitar construction. Give it a try and find out for yourself.
I would think so, though I have not done this, yet. The TurboTail relies on the structural soundness of the frame of the guitar (the outside edge) to counter the rotation of the bridge. While not required, a carbon fiber rod properly fixed between the tail block and the neck block would go a long way toward ensuring structural integrity of that frame over time, especially in the presence of 307.5 lbs of tension (D'Addario EJ86 strings). The neck would likely benefit from increased stiffening, such as is provided by the Dragonplate D-Tube (for example).
The center soundhole X-braced soundboard, introduced in the mid-1800s, eventually became the accepted standard in so-called "flattop" steel string acoustic guitar construction. A few brave souls have dared to challenge the assumption that this approach is the only way to build a quality steel string guitar. While we have access to several examples of successful alternate designs, none have yet succeeded in unseating the center soundhole X-brace design from its dominant position.
Adding a TurboTail effectively suspends the bridge/soundboard above the back. This can be visualized as a stretching of the cable the rest of the way across the ravine, as one would with a Tyrolean traverse, a Zip line, or a rope bridge. Imagine the bridge of my acoustic guitar as a deck or platform mounted to the simple suspension bridge in the photo, below, positioned approximately 1/3 of the way across the ravine from the left of the image (beneath the couple shown in the photo). In order to allow the hikers to safely traverse the bridge, and without running a post straight down to the ground below, how much structural support would be required if we were to remove the suspension cables? Applying the analogy to the traditional acoustic guitar soundboard, can you envision the difference?
By sharing the tremendous pull of the strings on the bridge with the frame of my guitar I no longer need to rely on the undergirding of the soundboard alone to handle the load. I can re-focus my attention on its sound generating role.
By this point in the article, I trust that you can see the difference between a conventional tailpiece and the TurboTail.
Utilizing the TurboTail, soundboard bracing, formerly a catastrophe mitigation requirement, now becomes an exploration in re-directing acoustical properties. Put another way, if I am going to glue sticks to the backside of my sound generating board, I can do so solely for the purpose of manipulating the sound.
For guitar makers, I consider the TurboTail to be, firstly, an educational tool. Having control over the tensioning of the cables that secure the TurboTail to the bridge, I am free to experiment and explore the relationship between my guitar, as it currently exists, and various string materials and gauges. I can increase string tension with greater confidence.
Going farther, I can re-explore the acoustic flattop soundboard, as I do not require an arched and/or braced surface just to mitigate collapse. I can look into reducing the mass of the bridge, reducing (or removing) the bridgeplate, altering my bracing size, altering my bracing pattern, even eliminating bracing altogether, as well as modifying the thickness of the soundboard.
The test results that follow provide additional information which may assist you as you draw your own conclusions.
I have tested both the JLD Bridge Doctor and the TurboTail with two brand new, nearly identical Cordoba C5 nylon string guitars. I have reduced the height of the block of the JLD Bridge Doctor to fit it inside a shallow-bodied Classical guitar, reducing its weight from 34 g to 30.5 g (this step would not be necessary in a typical deeper-bodied steel string guitar). For reference, I have included measurements from two additional, unrelated guitars: an un-modified Classical guitar along with an un-modified steel string guitar.
My tests include the following measurements:
Top Deflection (With 1 Kg weight at the bridge, how much deflection occurs with the strings under tension?)
Top Deflection (With 1 Kg weight at the bridge, how much deflection occurs with the strings de-tensioned?)
Bridge Rotation (With an inclinometer attached to the bridge, how much rotation is measured as the the strings are tensioned and de-tensioned?)
String Height (Between top of the 12th fret and the bottom of the string)
String Height (Off the surface of the soundboard, directly in front of the bridge)
Body Frequency (Air Resonance - T(1,1)1, Open Soundhole, Soundboard coupled with the back)
Top Frequency (Soundboard Monopole - T(1,1)2, Closed Soundhole, Soundboard isolated, uncoupled from the back)
Test l. measures all four guitars, unmodified. The balance of the tests are restricted to the two Cordoba V5s, only.
Test ll. JLD Bridge Doctor installed, nylon strings.
Test lll. JLD Bridge Doctor installed, steel strings (Note: I chose not to conduct this test after measuring the significant drop in top frequency associated with the JLD Bridge Doctor).
Test lV. JLD Bridge Doctor removed, TurboTail installed, nylon strings.
Test V. TurboTail installed, steel strings.
| TEST | Top Deflection Tensioned | Top Deflection De-Tensioned | Bridge Rotation | 6th String Height at 12th fret | 6th String Height at Bridge | Frequency Body T(1,1)1 |
Frequency Top T(1,1)2 |
|---|---|---|---|---|---|---|---|
| Test l. (No Modifications) | 0.19 mm/kg | 0.20 mm/kg | 1.0° | 3.04 mm | 9.2 mm | 111.3 Hz | 210.0 Hz |
| Test | Top Deflection Tensioned | Top Deflection De-Tensioned | Bridge Rotation | 6th String Height at 12th fret | 6th String Height at Bridge |
Frequency Body T(1,1)1 |
Frequency Top T(1,1)2 |
|---|---|---|---|---|---|---|---|
| Test l. (No Modifications) | 0.12 mm/kg | 0.12 mm/kg | 0.9° | 1.4 mm | 12.4 mm | 95.1 Hz | 167.3 Hz |
| TEST | Top Deflection Tensioned | Top Deflection De-Tensioned | Bridge Rotation | 6th String Height at 12th fret | 6th String Height at Bridge | Frequency Body T(1,1)1 | Frequency Top T(1,1)2 |
|---|---|---|---|---|---|---|---|
| Test l. (No Modifications) | 0.19 mm/kg | 0.20 mm/kg | 0.8° | 3.07 mm | 11.5 mm | 97.5 Hz | 181.0 Hz |
| Test ll. Bridge Doctor Nylon | 0.18 mm/kg | 0.16 mm/kg | 0.5° | 2.79 mm | 11.5 mm | 96.2 Hz | 160.2 Hz |
| Test lll. Bridge Doctor Steel | - | - | - | - | - | - | - |
| Test lV. TurboTail Nylon | 0.20 mm/kg | 0.20 mm/kg | 0.3° | 3.07 mm | 11.5 mm | 97.2 Hz | 182.0 Hz |
| Test V. TurboTail Steel | 0.21 mm/kg | 0.20 mm/kg | 0.3° | 3.50 mm * | 11.5 mm | 97.0 Hz | 180.7 Hz |
| TEST | Top Deflection Tensioned | Top Deflection De-Tensioned | Bridge Rotation | 6th String Height at 12th fret | 6th String Height at Bridge | Frequency Body T(1,1)1 | Frequency Top T(1,1)2 |
|---|---|---|---|---|---|---|---|
| Test l. (No Modifications) | 0.18 mm/kg | 0.20 mm/kg | 0.8° | 2.99 mm | 13.0 mm | 97.2 Hz | 181.0 Hz |
| Test ll. Bridge Doctor Nylon | 0.17 mm/kg | 0.16 mm/kg | 0.5° | 2.74 mm | 13.0 mm | 95.9 Hz | 159.4 Hz |
| Test lll. Bridge Doctor Steel | - | - | - | - | - | - | - |
| Test lV. TurboTail Nylon | 0.19 mm/kg | 0.20 mm/kg | 0.2° | 2.95 mm | 13.0 mm | 97.1 Hz | 181.2 Hz |
| Test V. TurboTail Steel | 0.20 mm/kg | 0.20 mm/kg | 0.2° | 3.45 mm * | 13.0 mm | 97.0 Hz | 180.9 Hz |
Strings used for testing: D'Addario ProArté Nylon EJ45 (85.85 lbs tension) and D'Addario 80/20 Bronze Light EXP11/XS (157 lbs tension).
Top Deflection is measured with a custom-built gantry using 80/20 Alumin(i)um components, a (modified) Digital Depth Gauge and shop-made wooden parts and secured to the guitar with a Star Tech Wrap N Strap. Weight is provided by a 1 Kg calibration weight (class M1, steel cylinder). The weight is applied, gauge is zeroed, weight is removed and measurement is recorded. Each test is conducted 3 times and averaged.
Bridge Rotation is measured using a Wixey Inclinometer (Angle Gauge). Strings are loosened, gauge is mounted to the bridge and zeroed, strings are tensioned to pitch and measurement is recorded. Test is conducted 3 times and averaged.
String Height at the 12th fret of the 6th string is measured using a StewMac Nut Slotting Gauge. String Height of the 6th string off the surface of the soundboard, directly in front of the bridge, is measured once using setup blocks and feeler gauges.
* = The installation of steel strings on a Classical guitar bows the neck forward, raising the action. After adjusting the truss rod, the action height returned to the original, unmodified, nylon string measurements.
Resonant Frequencies are measured using a calibrated miniDSP UMIK-2 connected to a Dell laptop and recorded with REW (Room Equalization Wizard) software. With the soundhole Open, the body resonant frequency is measured as a "coupled" reading (Air Resonance - T(1,1)1) involving both the front and back plates. The soundhole is then Closed (blocked) in an attempt to "uncouple" the front and back plates, "isolating" the frequency of the soundboard, alone (Soundboard Monopole - T(1,1)2).
My tests confirm that, with no modification to the soundboard or its bracing and with the TurboTail installed, bridge rotation may be nullified and top deflection actually increases. Subjectively, I perceived no change in tone. The guitars did seem a bit louder to my ears (and to all those who have heard them).
Of greater interest to me is how much louder a former nylon string Classical guitar outfitted with a TurboTail and steel strings is (than it was prior to being modified). Just as sophisticated measurement tools are not required to identify someone shouting versus whispering (especially in a small, enclosed space), so detecting the increase in volume in these "conversion" guitars is unavoidable.
The cables securing the TurboTail to the bridge are adjustable in tension. The means of measuring that tension currently includes listening for the plink! when plucking one of the cables with a fingernail and, if desired, noting the frequency at which the plink! occurs.
Several days after installation I noticed an audible drop in the volume of the guitar. Upon inspection, I realized the cables had loosened (which I attributed to a tightening of the manually-tied knots at each end and subsequent lengthening of the cables). Upon re-tightening the cables the guitar volume was immediately restored. Very cool! This is not an insignificant issue.
I re-measured bridge rotation and the degree of movement had decreased from 0.2° to 0.1°. EDIT: I have confirmed it can be brought to zero with additional tensioning. I do not want to overshadow the significant contribution of the TurboTail regarding forward bridge rotation. The ability to reduce forward bridge rotation from 1.0° to 0.0° is HUGE!
Avoiding a treatise on yet another topic, "loudness" is defined here as perceptible audio volume. Strumming or plucking the strings "harder" typically produces a "louder" sound (within the capabilities of the instrument).
I had long followed the advice of others and built soundboards with a 25 to 28 foot radius - to mitigate collapse, of course. I suppose I was thinking that, "At least it isn't a 15 foot radius!", or something like that. It wasn't until I spent time with luthier John Greven that I realized I had been ignoring that "flatter is louder" maxim in favor of over-bracing the top. I switched to his suggested 52 foot radius and, what do you know, my guitars got noticeably louder!
Now imagine building even flatter tops using the TurboTail to mitigate collapse. Imagine constructing two identical guitars with only one distinction: one of the guitars requires significantly less energy to produce equivalent audio volume.
I had set out to prove whether or not I could use the TurboTail as a tool to explore the sonic potential of the soundboard by not having to first undergird it with bracing just to prevent failure when subjected to the pull of the strings. Witnessing bridge rotation effectually reduced to zero under string tension, increased top deflection and the undeniable increase in volume on guitars fitted with the TurboTail, I have not only proven that this is the right tool for me to move forward with, but I have also demonstrated that the violent back and forth rocking of the bridge cannot possibly be the primary driver of the sound, at least, not in the way in which it has been presented across the years.
Building with the TurboTail will permit me to explore completely distinct bracing patterns and entirely new bridge designs.
I would encourage any guitar maker, builder and luthier to play and/or listen to a fan-braced Classical guitar fitted with a TurboTail and steel strings, if only to personally experience the potential of the soundboard. Better yet, convert one for yourself. At the very least, for a minimal investment you might gain an impressively responsive guitar! Perform a little saddle compensation to correct the intonation and modify the nut for a more comfortable action. Take it even farther and modify the neck width and depth, if you wish. You may find yourself spending significant time enjoying such an instrument.
The instructions included with the kit are clear and helpful. I have had success with a slightly different sequence of steps, which I will outline here, along with some photos.
The TurboTail currently ships with your choice of 2" or 3" tensioning tubes that the company refers to as "wire holders". I opted for the longer, 3" version. Two miniature ferrules are provided for housing the cable as it exits the surface of the bridge. I chose to forego ferrule installation, opting to drill a smaller hole and permit the wire to directly rest against the wood of the bridge.
Apply a piece of tape between the TurboTail and the bridge (see photo, below). Draw a 3" to 4" line on the tape, perpendicular to the centerline of the guitar and 3-1/8" from the edge (for the longer, 3" tension tubes) or 2-1/8" from the edge (for the shorter 2" tension tubes).
Attach the TurboTail. With the guitar stationary and firmly held in place (clamped, vacuum clamped, weighted with pillows, etc), position the TurboTail firmly up against the binding at the tail end of the guitar, centering it on the soundboard.
Mark the bottom hole using a scratch awl, and set the TurboTail aside. To avoid splitting any wood, drill a hole into the tail block. The hole should be deep enough to house the screw and appropriately sized to let the threads cut into the wall of the wood. For the screws provided with this kit, that meant using a 5/64" drill and drilling 5/8" deep. Secure the Turbo Tail onto the guitar using one of the wood screws provided.
Using the secured TurboTail as a template for drilling, mark the remaining (top) hole using a scratch awl and drill a second 5/64" hole into the tail block 5/8" deep. Secure the Turbo Tail with the remaining wood screw.
Locate and drill two 1/16" holes through the bridge, behind the saddle. You are welcome to approximate and drill the holes. However, for best results and to maintain string clearance, a straight wire or wooden skewer (up to 1/8" diameter) may be slid through the respective hole in the TurboTail and used to target the location for drilling (see photo, below).
I opted to follow the suggested hole placement, staying between strings 1 and 2 on the treble side and strings 5 and 6 on the bass side.
Using the supplied length of cable, prepare two sections of cable 12" long. The instructions included with the kit detail the steps necessary to ensure success when working with stranded cable. Unless you are using sheathed cable, CA glue must be applied to the wire prior to making any and all cuts in order to prevent unravelling. Attempting to cut stranded cable with anything less than sharp, precise wire cutters or Bypass cutters will produce unacceptable results (much like trying to trim hair using dull scissors). I would add that it is advisable to pull the cable taut during a cutting operation to ensure clean cuts. Frayed ends must not be allowed.
Apply a piece of tape to an end of a 12" length of cable. Insert the clean, un-taped end into one of the freshly drilled holes in the bridge, fishing it out through the soundhole. Thread one of the small, flat washers onto the cable. The cable may be secured against the washer by tying a simple overhand knot near the end of the cable. Optionally, you may choose to crimp a small ferrule over the end of the wire. Pull the cable back through through the bridge using the the taped end and verify that your flat washer is making good contact with the bridgeplate.
Slide one of the tension tubes onto the cable, narrow end toward the saddle, threading the cable all the way through the tube. A knot must now be tied in the cable that will secure the cable in the tension tube, allow that tension tube to be attached to the TurboTail AND permit adjustment. We will use the horizontal line drawn onto the tape at the outset of the installation to determine the precise location of a second knot. Pull the cable with the tube taut in the direction of the mounted TurboTail to identify the point at which the cable intersects the line drawn on the tape. A marker (such as a Sharpie) may be helpful. Once the knot is tied, trim the excess cable, leaving a short "tail" that will hide inside the tube.
I have also successfully used a ferrule on this end, though a little extra effort is required to make everything fit neatly out of sight. Instead of working from the back of the tube, I found it necessary to work from the open slot in the tube's side.
Lastly, attach the tube to the TurboTail using one of the bolts provided and tighten it securely. Repeat the process for the second cable and tension tube. Adjustments to tension can be made at any point after installation.
Sufficient tensioning may be determined by tightening the cable until you hear a plink! sound when the cable is plucked. If that is too general of a guide for you, I have used a range of pitches from D (at the 22nd fret) to G, depending on the particular guitar, the gauge of strings in use, and how I want the instrument to sound.