Issue 2: Body Flexion
I realize that many guitar makers have never actually repaired (rebuilt, remade, etc) guitars. Not that I think they should have, or should start doing so. But that is how I learned to construct guitars - by learning how to fix broken ones, reverse-engineering existing ones, and experimenting with attempts to improve guitars I was dissatisfied with.
Such experiences with acoustic guitars have shaped my perspective. I learned so much about the forces at work, forces that could destroy an instrument as easily as make it produce gorgeous sound.
Through trial and error - an expensive, but effective education - I found out firsthand what happens when guitars are under-braced, or soundboards are sanded too thin, or bridges are attached with insufficient adhesive, et cetera. I learned about overall string height early on, after shortening more than one saddle and shaving down more than one bridge and KILLING the output on more than one guitar. And then resetting the neck, replacing the bridge with a taller one, adding back the appropriately-sized saddle and Voila! the sound is back! I learned that action should be adjusted using neck geometry, NOT by sanding down saddles. I got rid of the truss rods. I learned lots of things.
But I blew right past all that potential movement of the neck block! It wasn't until about a decade or so ago during one of my umpteenth neck resets that it suddenly hit me: Neck resets become necessary primarily as a result of permitting the body to flex, a condition I refer to as neck block shift (The neck block has moved away from its originally intended position in relation to the body, for however brief a moment). And I can do something about that. So I did!
I have written an article dedicated to this very issue, titled » Body Flexion - Neck Block Shift and Soundboard Shear. I encourage you to read it, as it lays a detailed foundation for what I touch on, below.
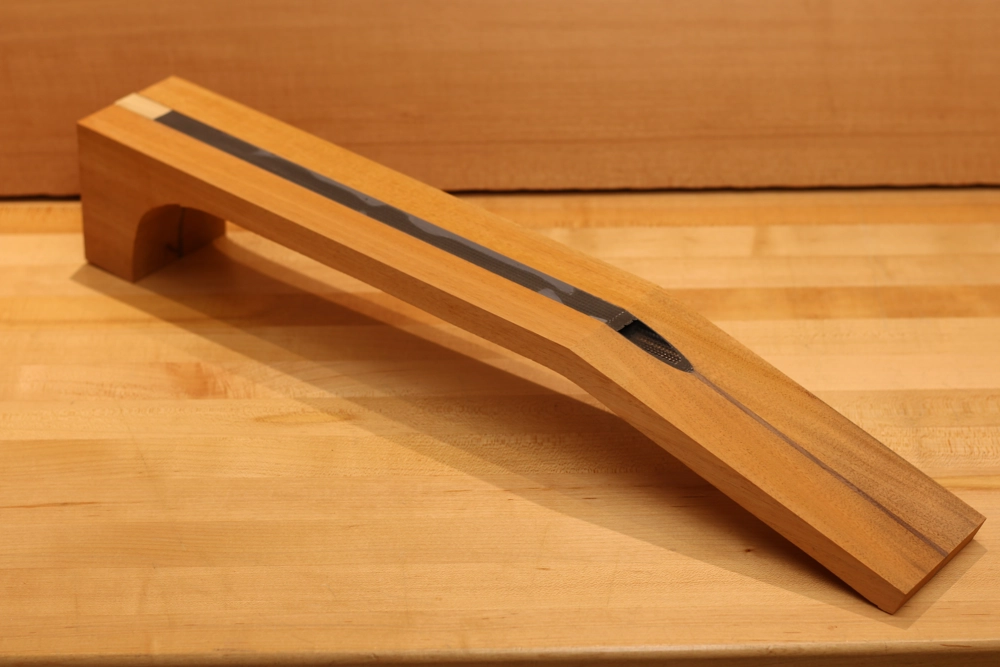
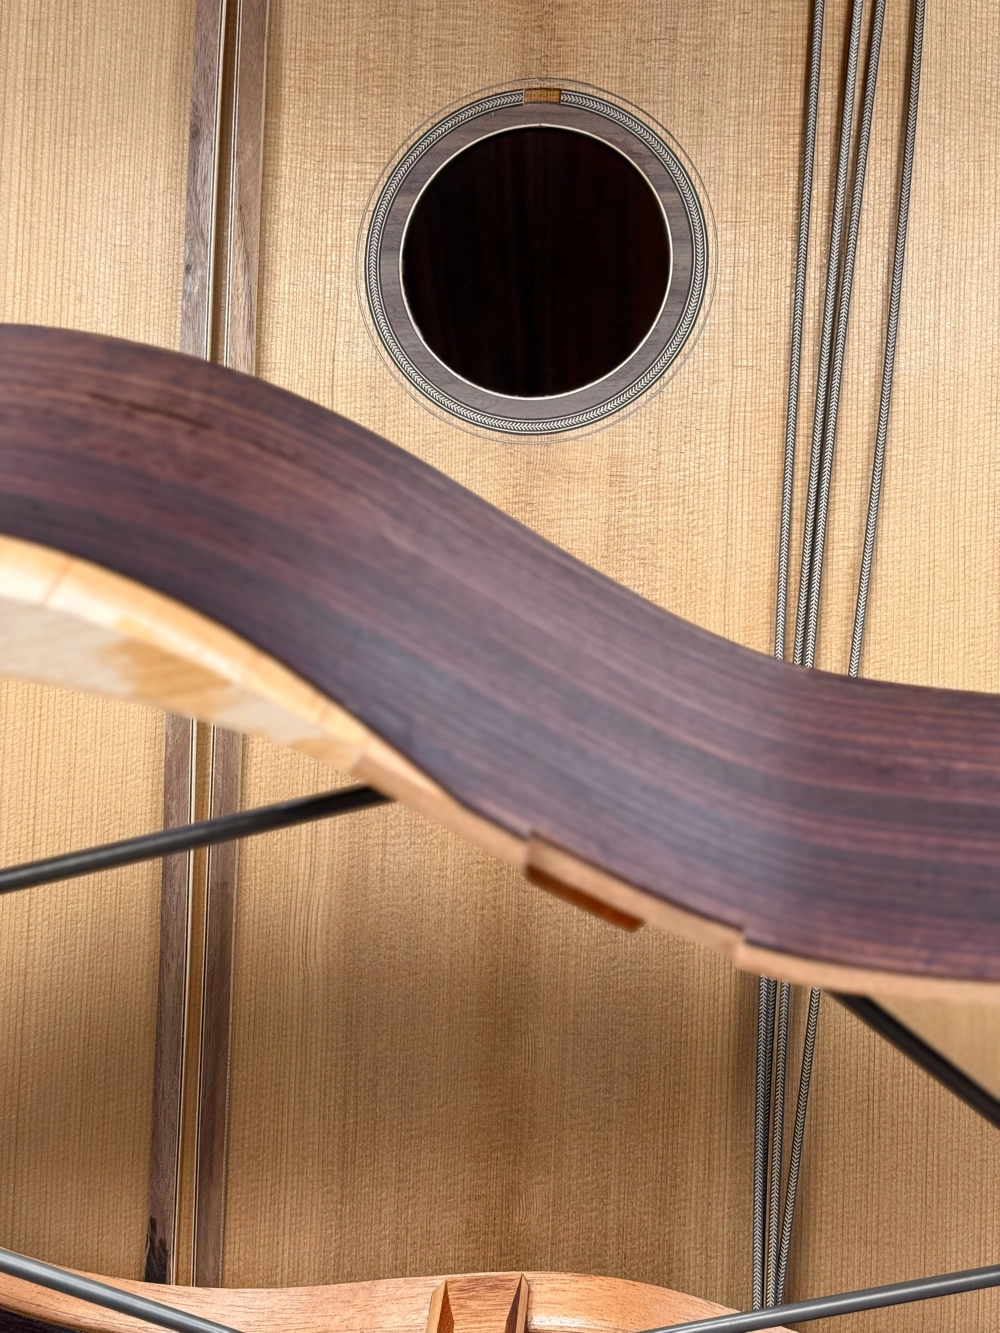
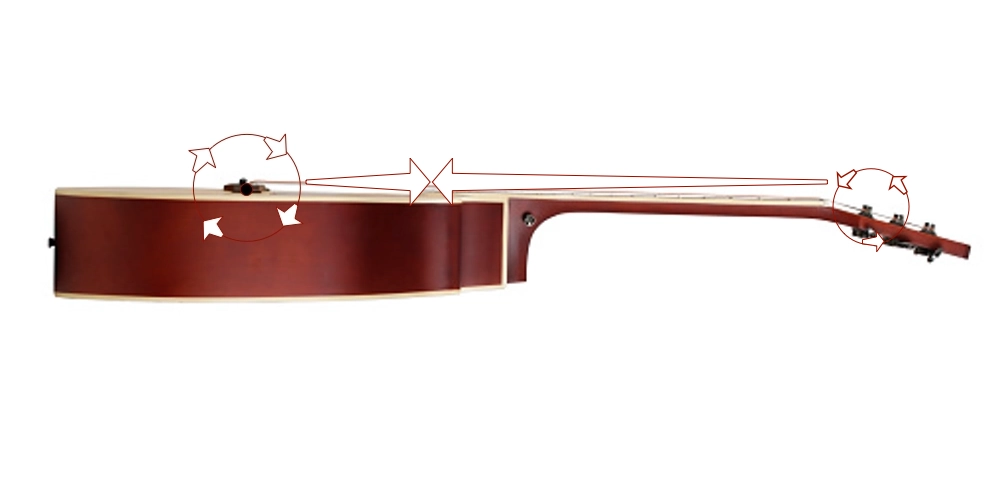
The pull of the strings on a guitar neck that is properly resisting forward bow, in addition to pulling the bridge in the direction of the headstock, is most assuredly also pulling that neck forward, directly toward the soundhole (see my illustration, below). Unless you loosen the strings when you are not actually playing your guitar(s), a constant force is being applied to the instrument, whether you are playing it, or it is hanging on the wall, or sitting in a stand, or resting in its case. If that neck block (the bulwark, the buttress, the great wall that stops the neck from intruding into the body) moves (rotates, shifts, slips) even the slightest amount, it will alter the neck geometry, typically resulting in a raised action. Whether, like me, you consider this to be damage or not, you now most definitely have an issue with your guitar.
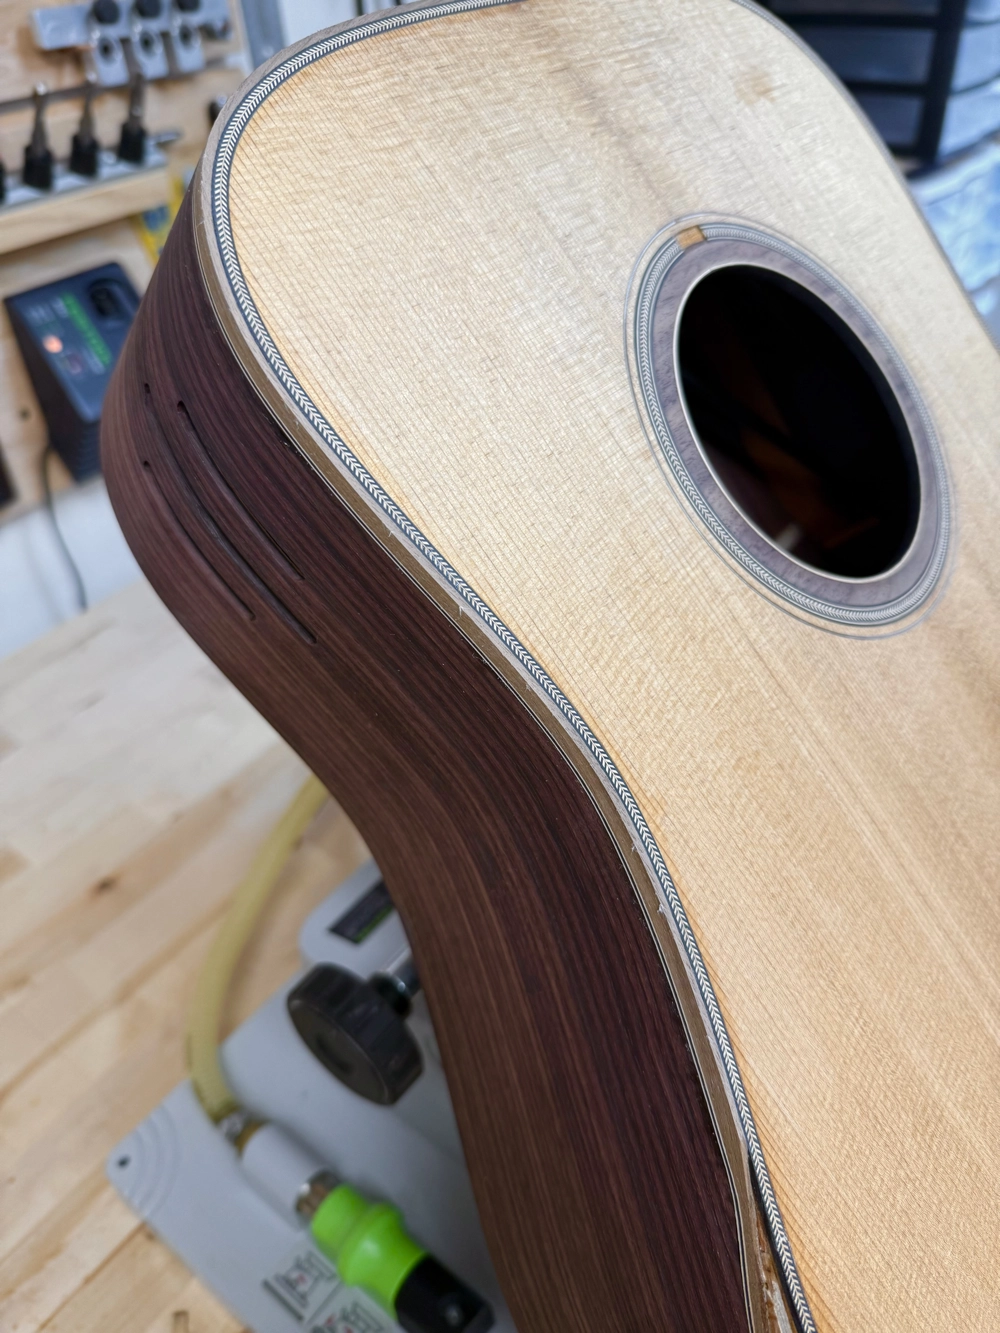
For a very long time, the body of the traditionally-constructed acoustic steel string guitar has been assembled using two (2) thin, bent, solid wood sides that are glued to hardwood blocks referred to as a neck block and a tail block. Kerfing (or kerfed lining) is added to the very edges of those sides in order to have something to attach the front and back plates to. See the photo, below.
Are you aware of just how flexible the shells built in this manner really are? Granted, the body firms up dramatically when the soundboard (front plate) and back are glued on. But history teaches us that movement, be it temporary or worse, will (and most assuredly does) still occur.
Once the body is complete, the neck of the guitar (typically built as a separate component on most steel string acoustics), is attached to the neck block using glue or bolts. The potential for movement of that neck block remains, as is evidenced by the continued need for neck resets/adjustments.
Imagine purchasing a pickup truck and learning that in n-number of years you are going need a truck bed reset, as the back of that truck is not going to remain where it was originally attached at the factory. Better yet, how about being resigned to the fact that your favorite touring sedan will require an engine block reset after so many miles?
Perhaps a better analogy would be to discover you can no longer enter your home through the front door without bending down to avoid bumping your head. You know it wasn't like this when you first moved in, so you ask a home building representative to come by for an inspection. You are informed that your house has simply shifted off its foundation. Upon learning of the age of the house, the rep nods knowingly, tells you the occurrence is quite common and hands you a color brochure titled, "Understanding Foundation Resets."
That all sounds absolutely absurd, doesn't it?
And yet, makers continue to build and players continue to purchase guitars whose necks are not going to stay where they were originally installed. This is the result of a design decision; a decision that is somehow okay because that is how it has been done for decades. I don't know about you, but THAT sounds absurd to me! The neck block should NOT be permitted to move.
Rather than continue to defend shortcomings as though those shortcomings were the original intent of the design instead of the unfortunate results, I choose to alter the design.
I don't want the body to flex.
I don't want the neck block to shift.
This necessitates stabilizing the body. Incorporating less-conventional modifications such as laminating the wooden sides, laminating the wooden linings, laminating the wooden neck and tail blocks and, perhaps more importantly, tying those blocks to one another will come as close as I am aware of to achieving immobility while still utilizing wood as my primary construction material. Any combination of the above items is a step in the right direction, as far as I am concerned.
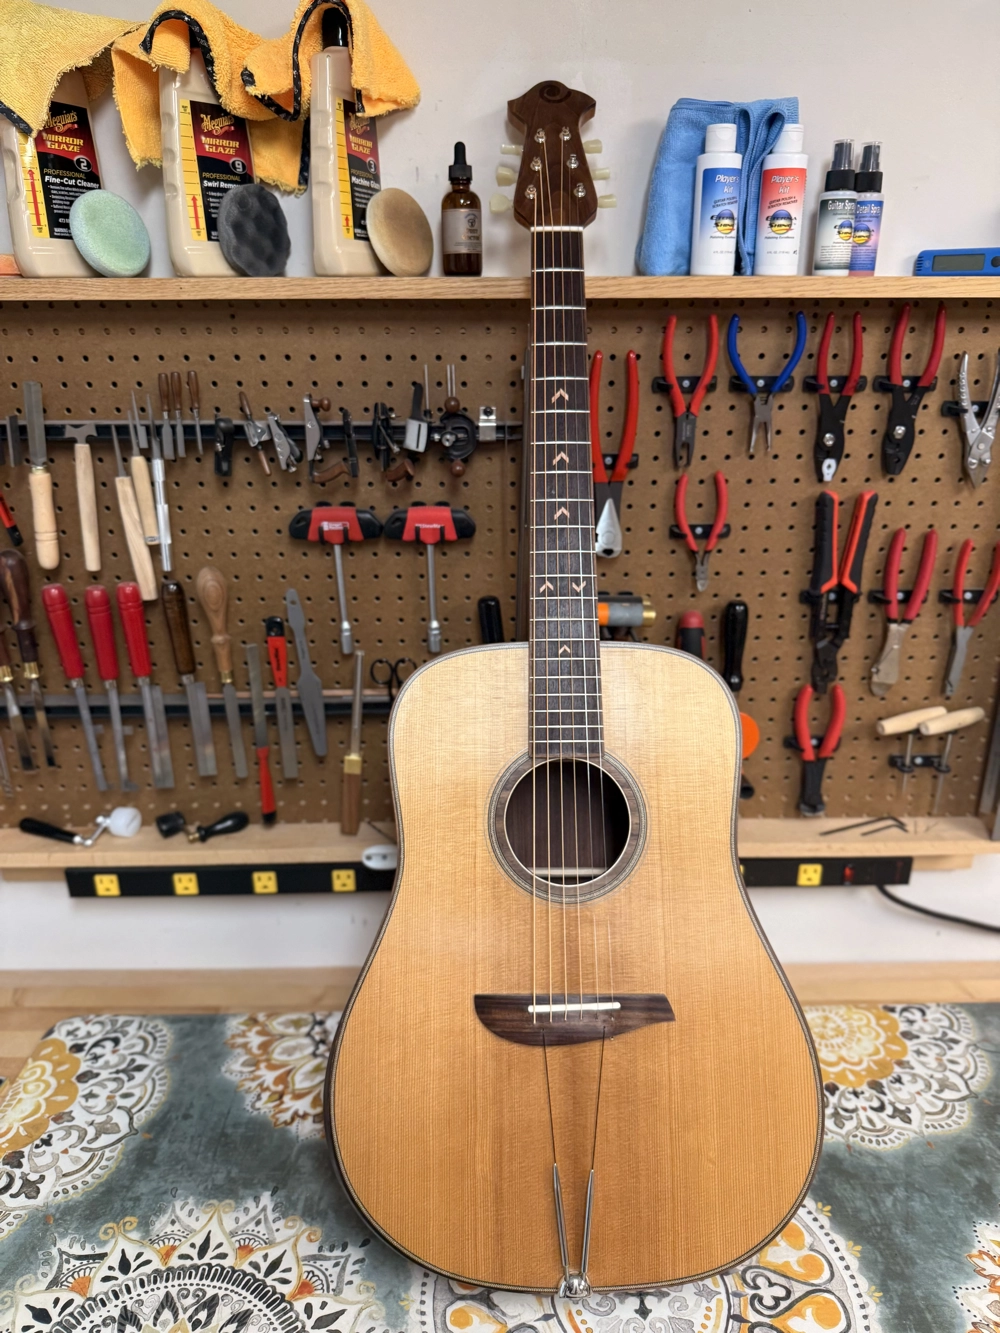
This experimental guitar, the Turbo-D, will feature traditional solid bent sides, but will include non-traditional laminated linings, laminated blocks and solid carbon fiber tie-rods.
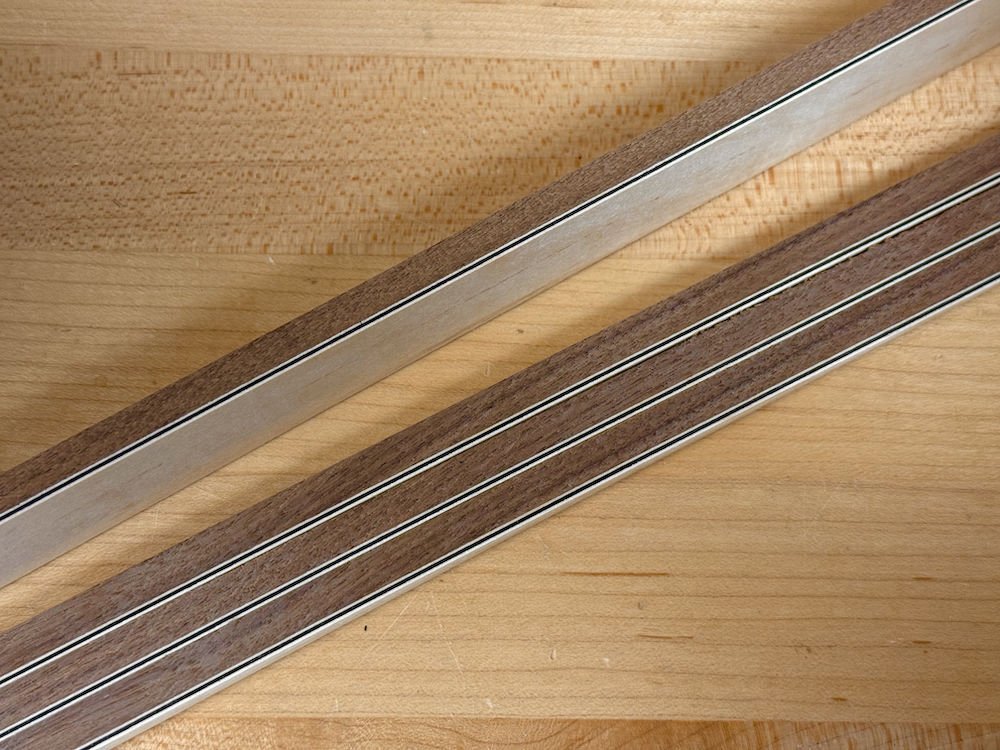
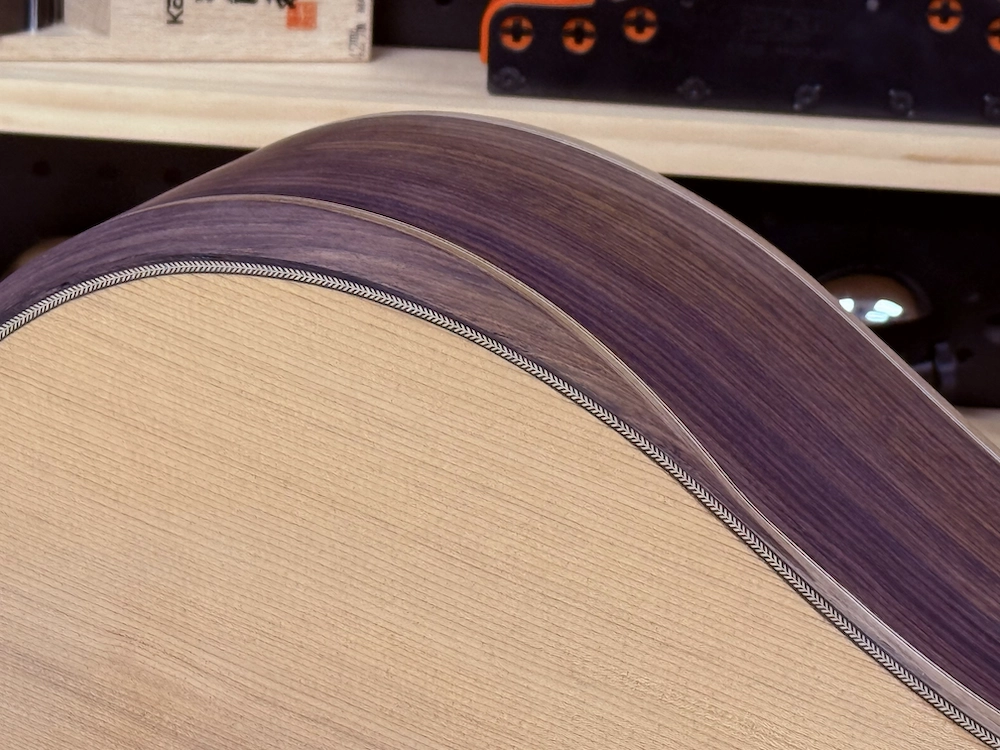
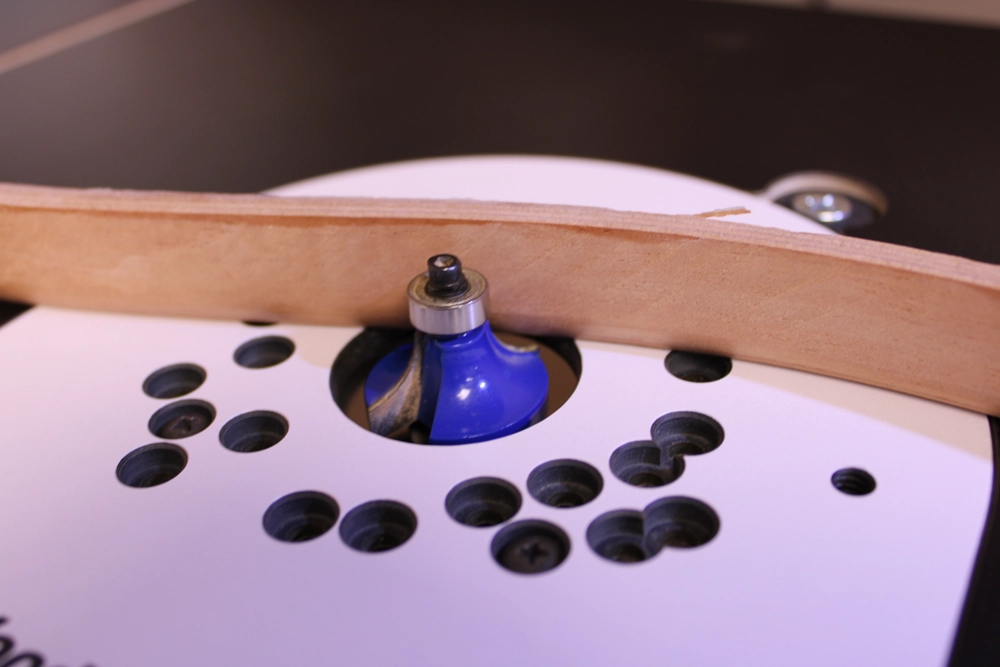
I have replaced the ubiquitous springy kerfing found in most all acoustic guitars with rigid laminated lining. I like to epoxy multiple strips of ≈ 1/16" x 1" (1.5 mm x 2.5 cm) Spanish Cedar together and press them into a mold. Having a bit wider lining allows for the safe installation of a bit wider binding which, in turn, can then be gently radiused for a more enjoyable playing experience.
HINT: Lining thickness must exceed the width of the binding/purfling rebate in order to avoid severing the soundboard off of the body. Make it as thick or thin as you desire, but please consider replacing flexible kerfing with laminated formed linings. After the epoxy dries, the lining emerges as a rigid, unified component that gets attached to the edges of the sides.
Traditionally, little attention has been paid to the forward movement of the neck block in relation to its position within the body. The neck was thought of as a lever, the fulcrum (hinge) being the point beneath the fretboard where the fretboard, neck heel and body all intersect. It was believed that, since the pull of the strings could cause a neck to bow forward, surely that same pull of those same strings must be trying to pivot the fretboard extension down into the body cavity. Builders responded by adding more support under the fretboard extension, resulting in both the Upper Transverse Brace and the Upper Transverse Graft (or "popsicle" brace), along with so-called "wing braces" in the Upper Bout. And yet, the need for neck resets continued, regardless.
I fell for this too, back in the early days, oh so many guitars ago. It wasn't until relatively recently that I realized that the trouble was with the linear force of the neck pushing forward into the body, not the rotational force (torque) that allegedly sought to plunge the fretboard extension straight down into the depths of the body. If I could prevent the neck block to which the neck is attached, from ever moving in relation to its original position, then torque would become irrelevant! In other words:
→ If the neck is disallowed from moving forward (towards the bridge), it cannot rotate downward!
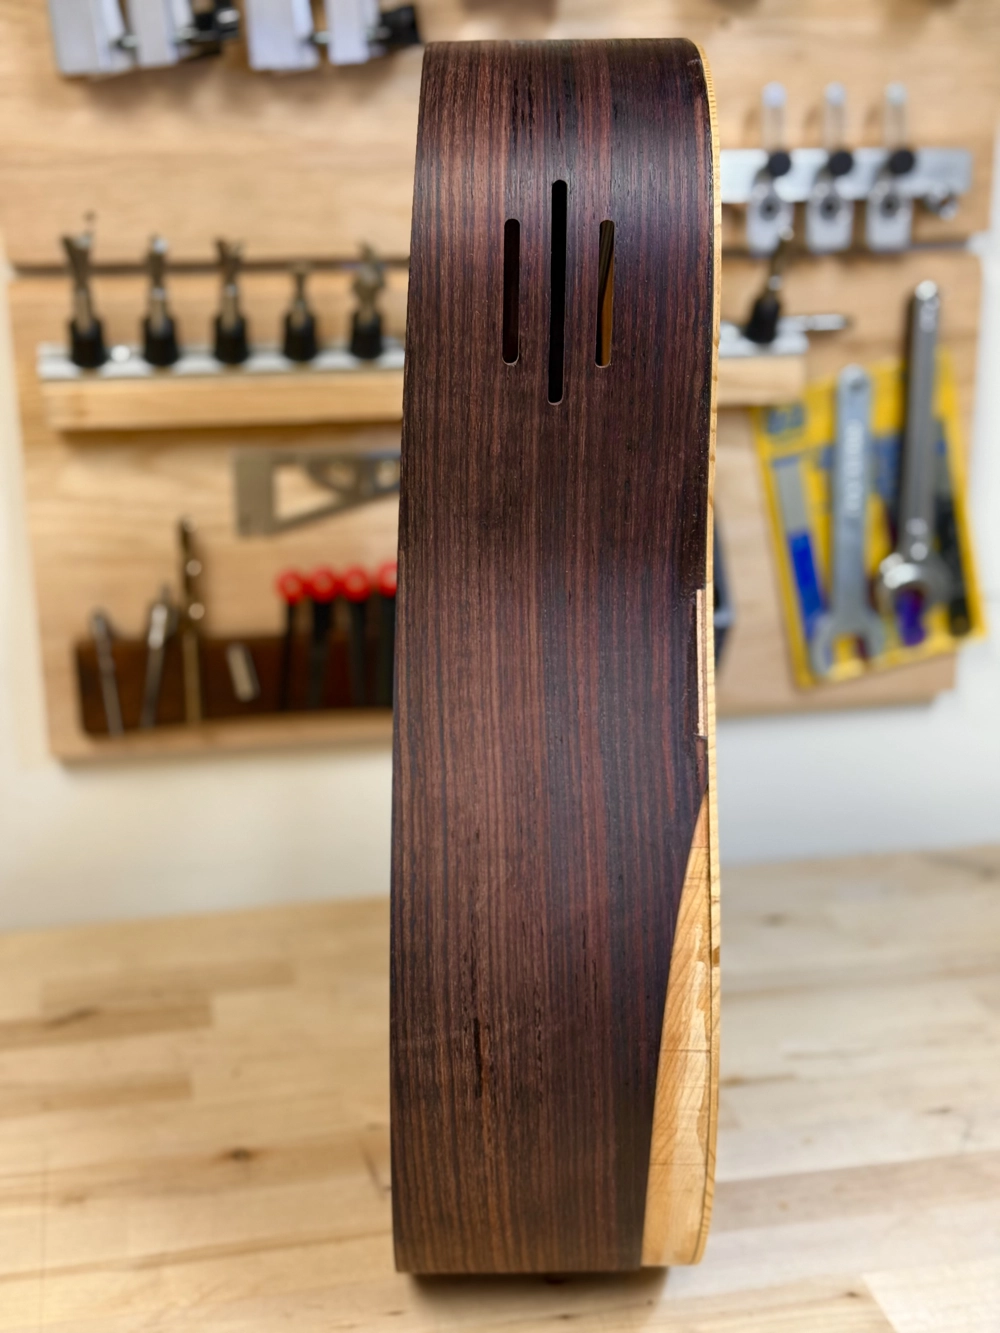
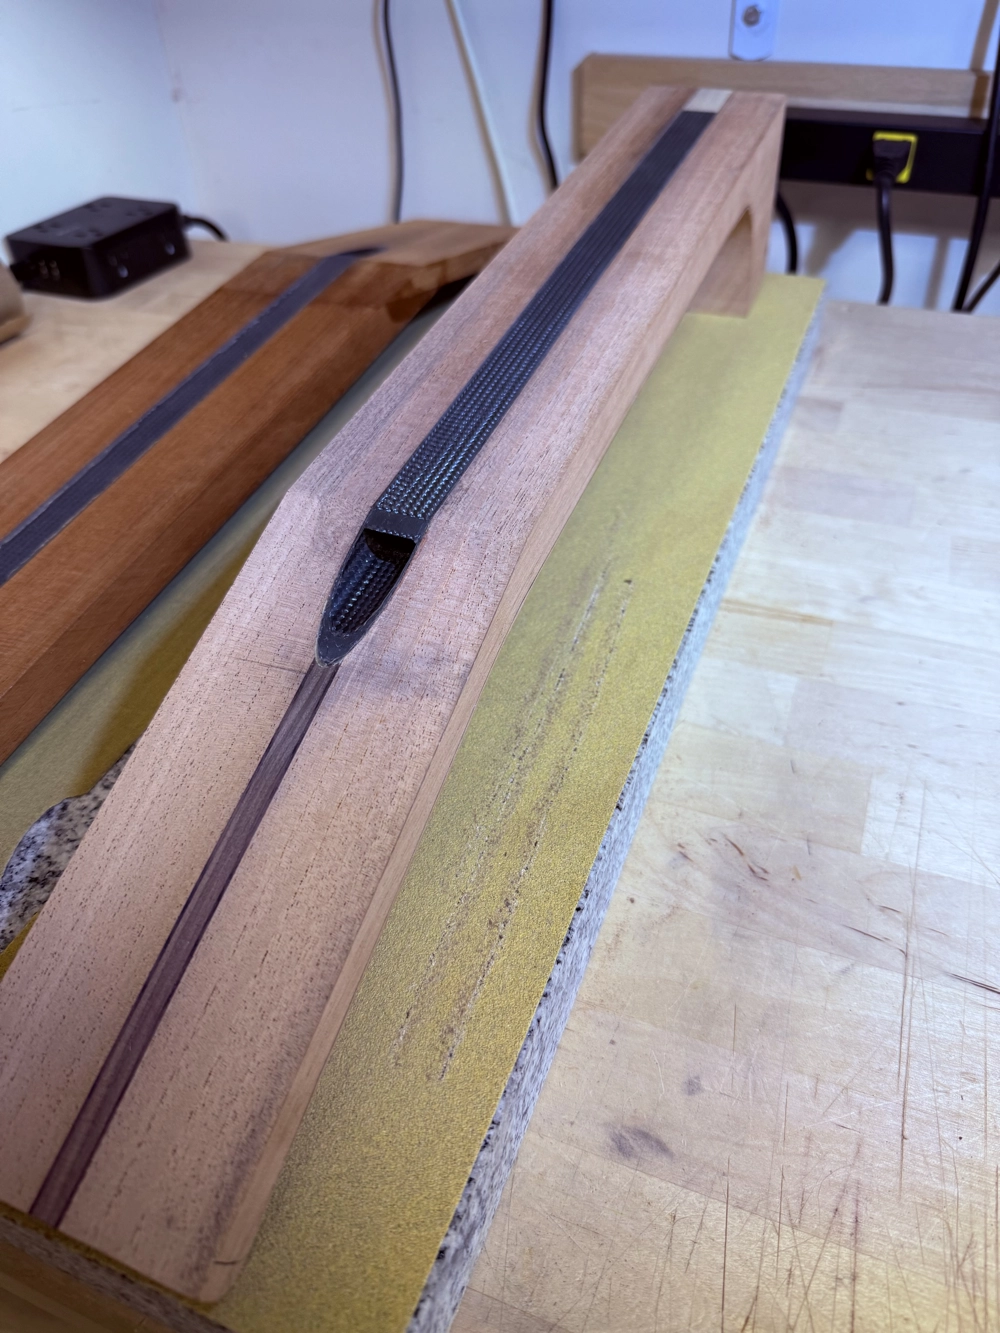
Rather than rely on the soundboard to resist all this compressive force, I employ carbon fiber rods to tie the neck block to the tail block. The most direct means I have found of accomplishing this, of eliminating rotation of the neck block and, subsequently, preventing flexing of the upper bout of the guitar body, is to install (at a minimum) one rod nearest the soundboard and the second rod near the back of the guitar, and run those rods, in parallel, directly from the neck block to the tail block. An alternative to this, one that also eliminates torsion, is the installation of a larger, hollow carbon fiber tube that is permanently attached between the neck block and the tail block.
For center soundhole soundboards (such as I am using on this guitar), both approaches (above) complicate access to the inside of the box. The rods prevent me from getting my arm inside the soundhole, required for access to bridgeplate transducers, for example. As an alternative, I can choose to create an access panel elsewhere, such as via the back or from the lower bout, but considerations accompany each approach.
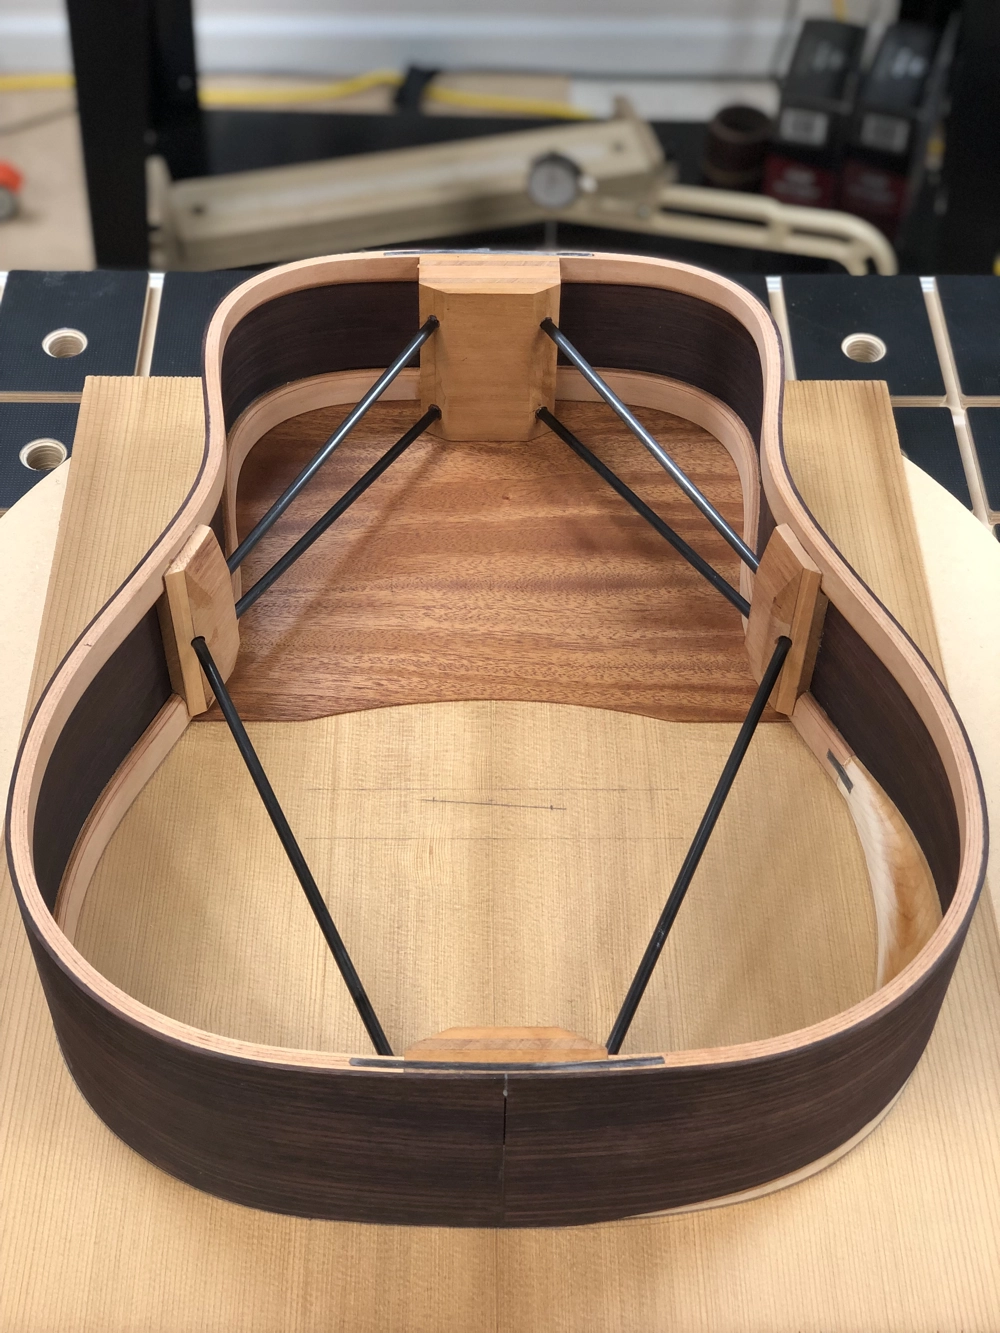
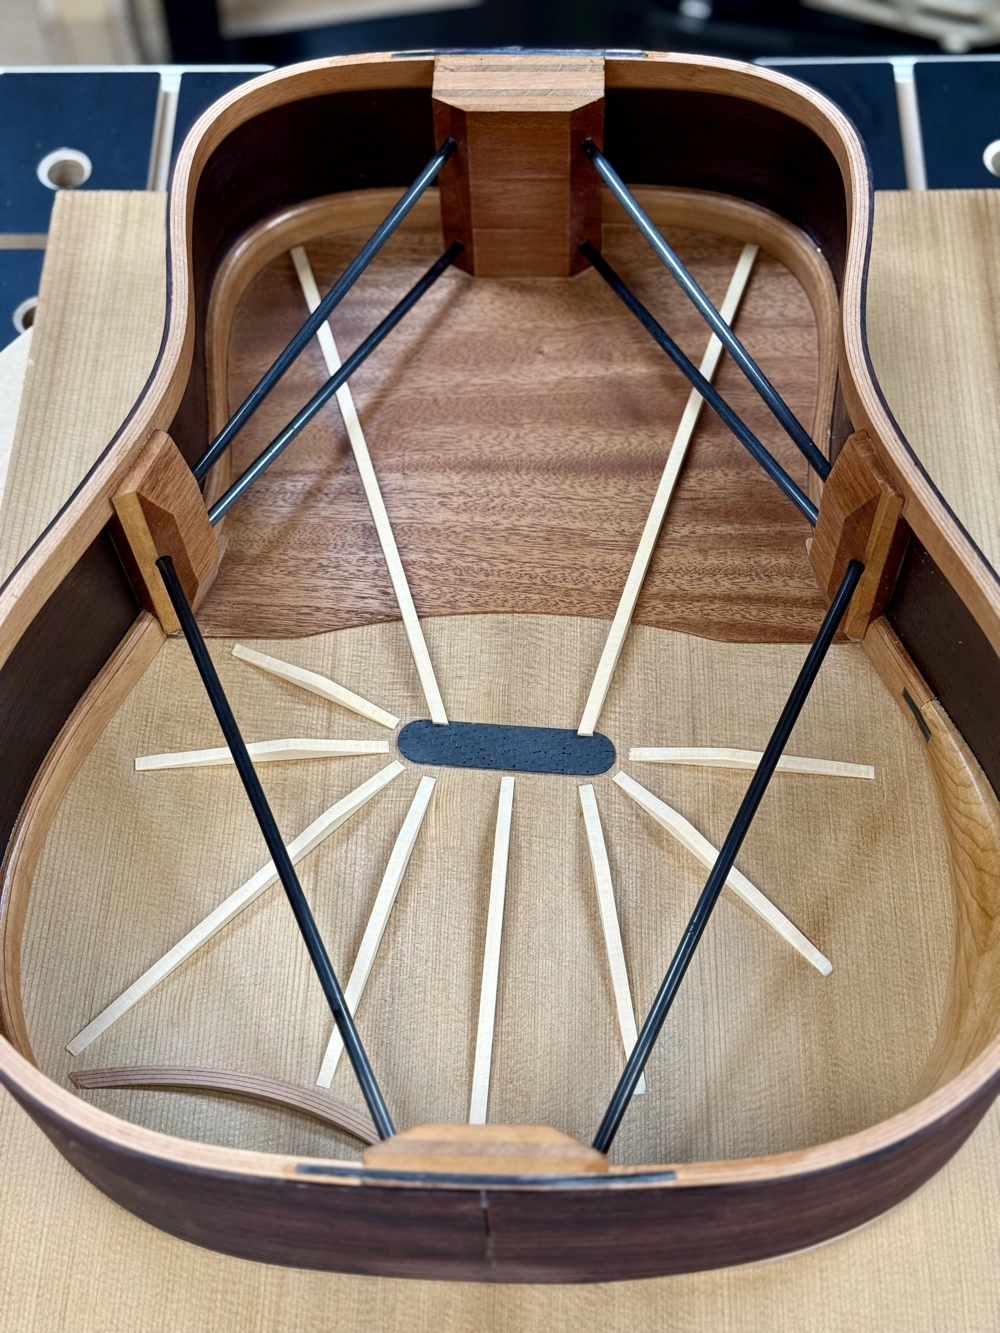
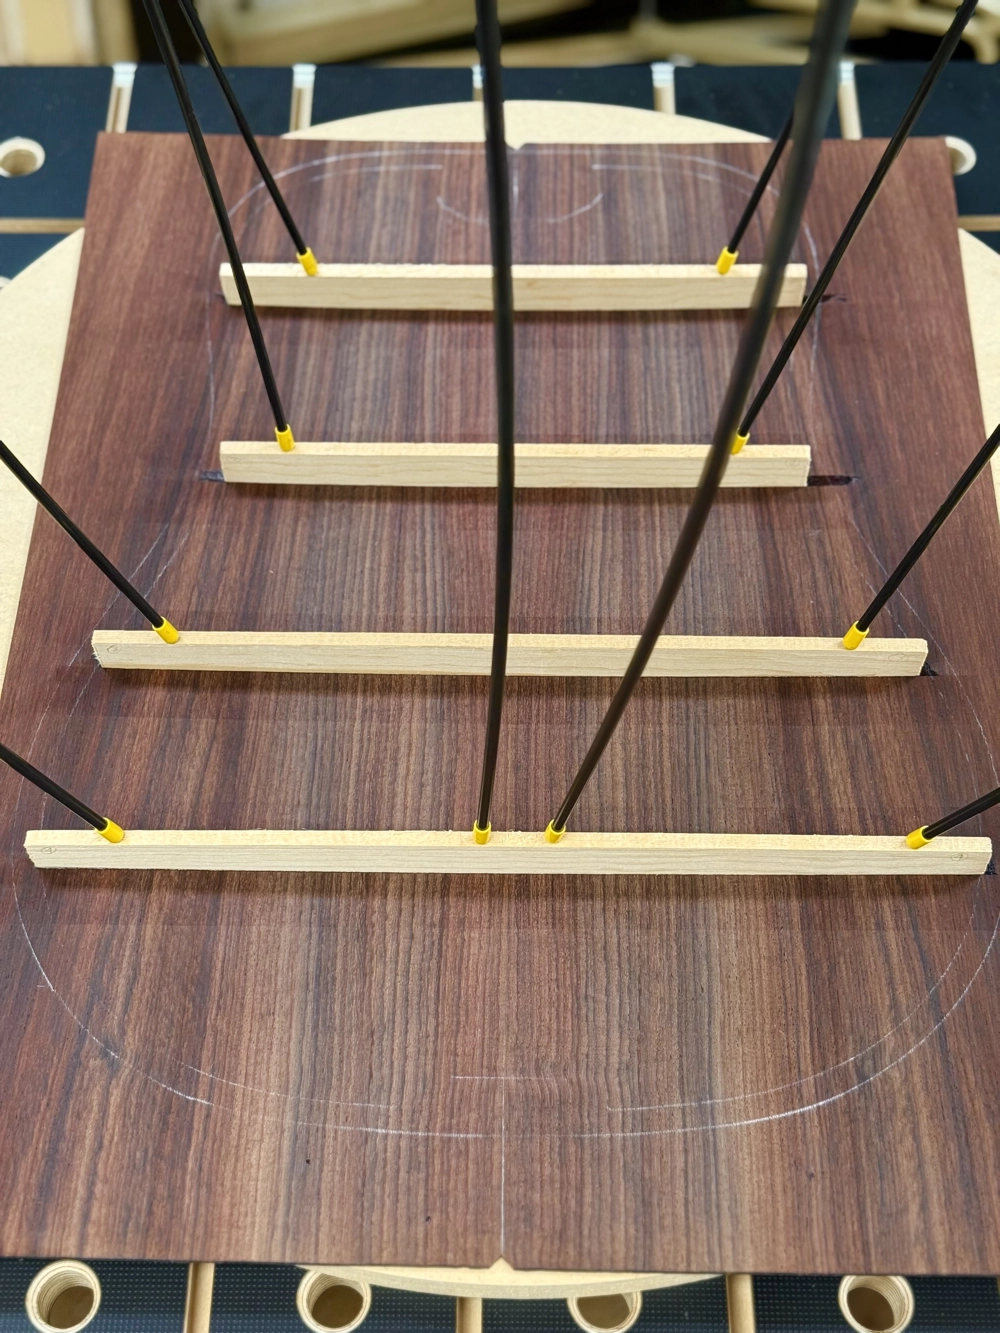
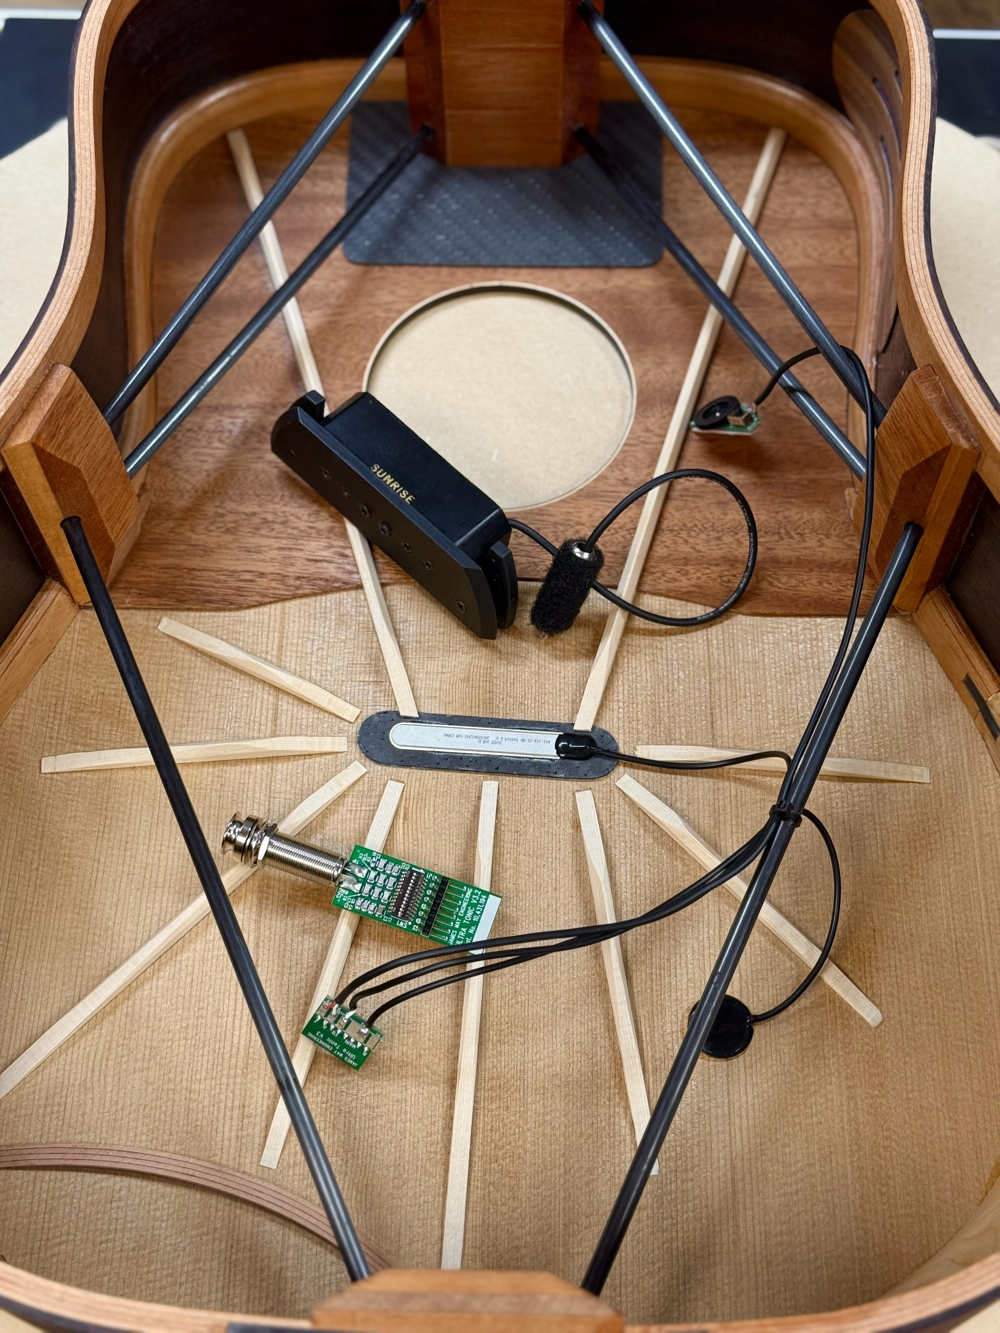
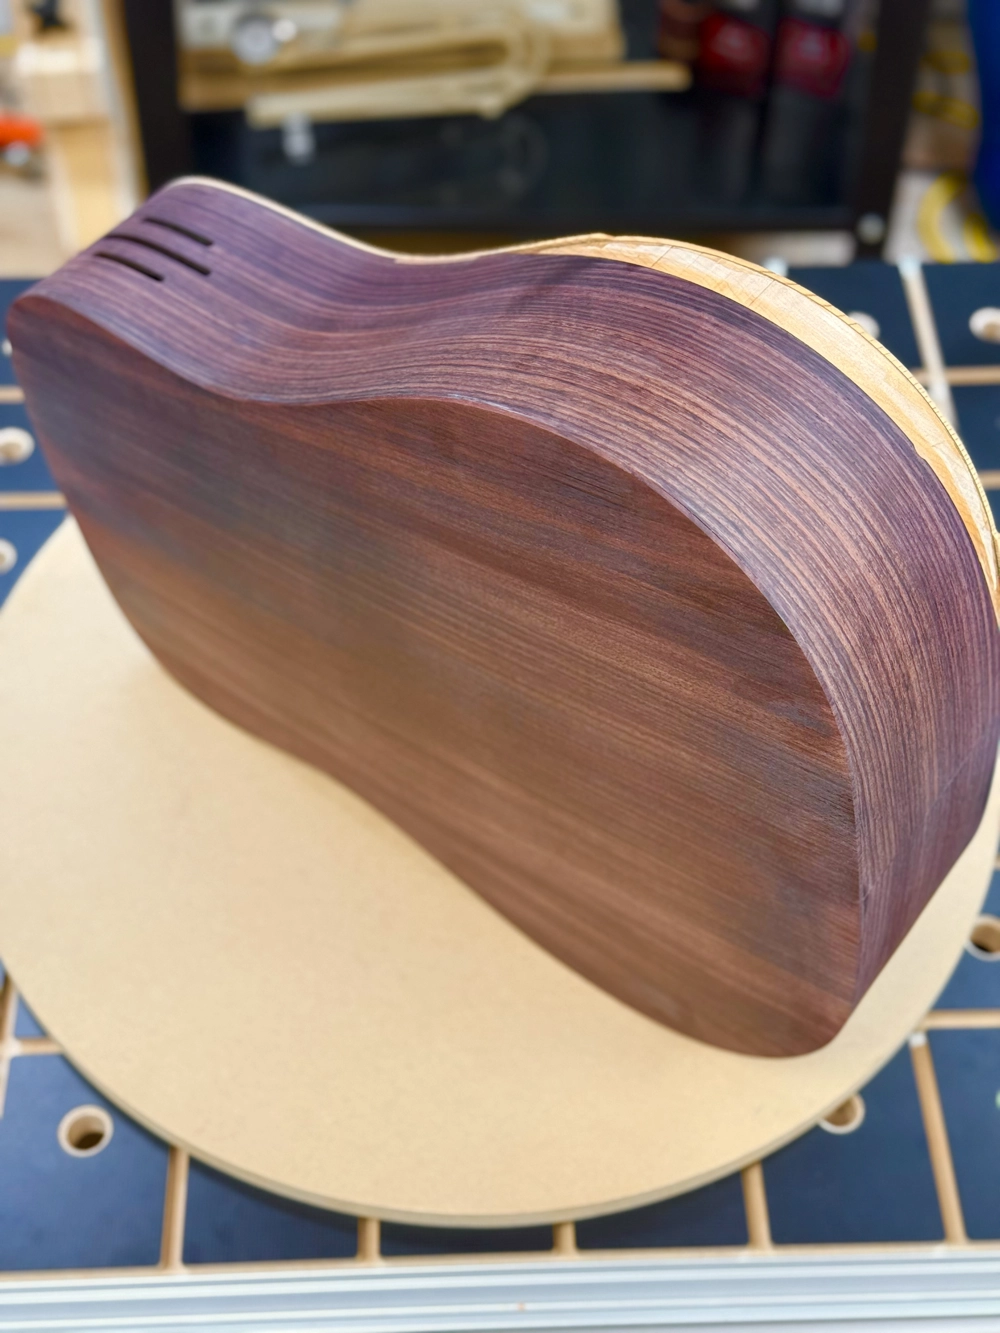
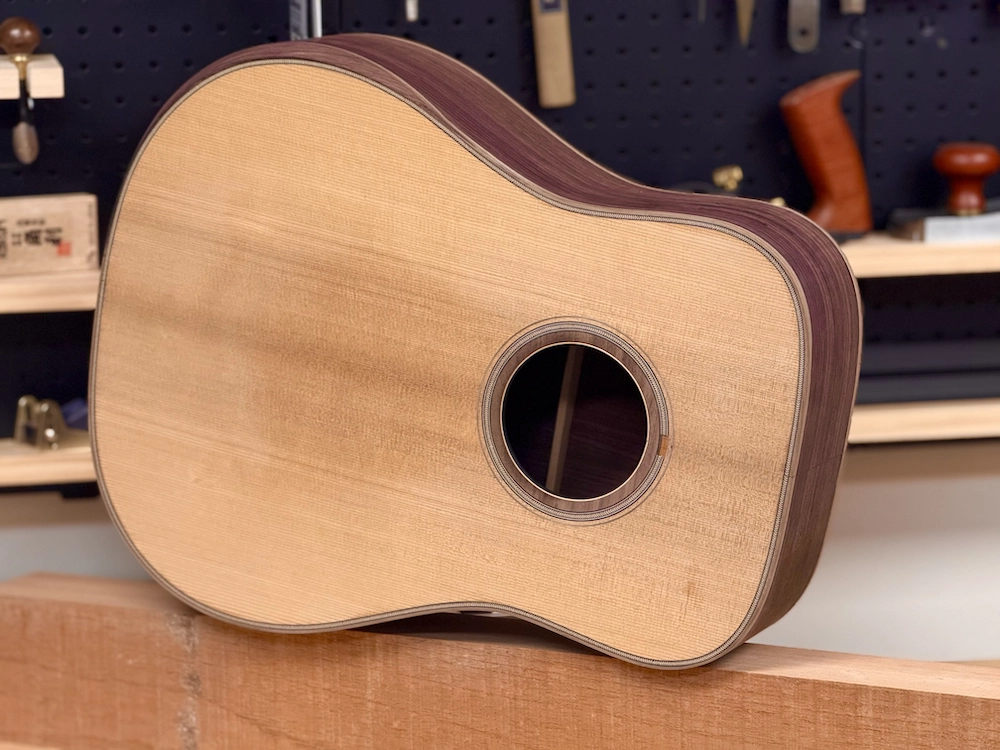
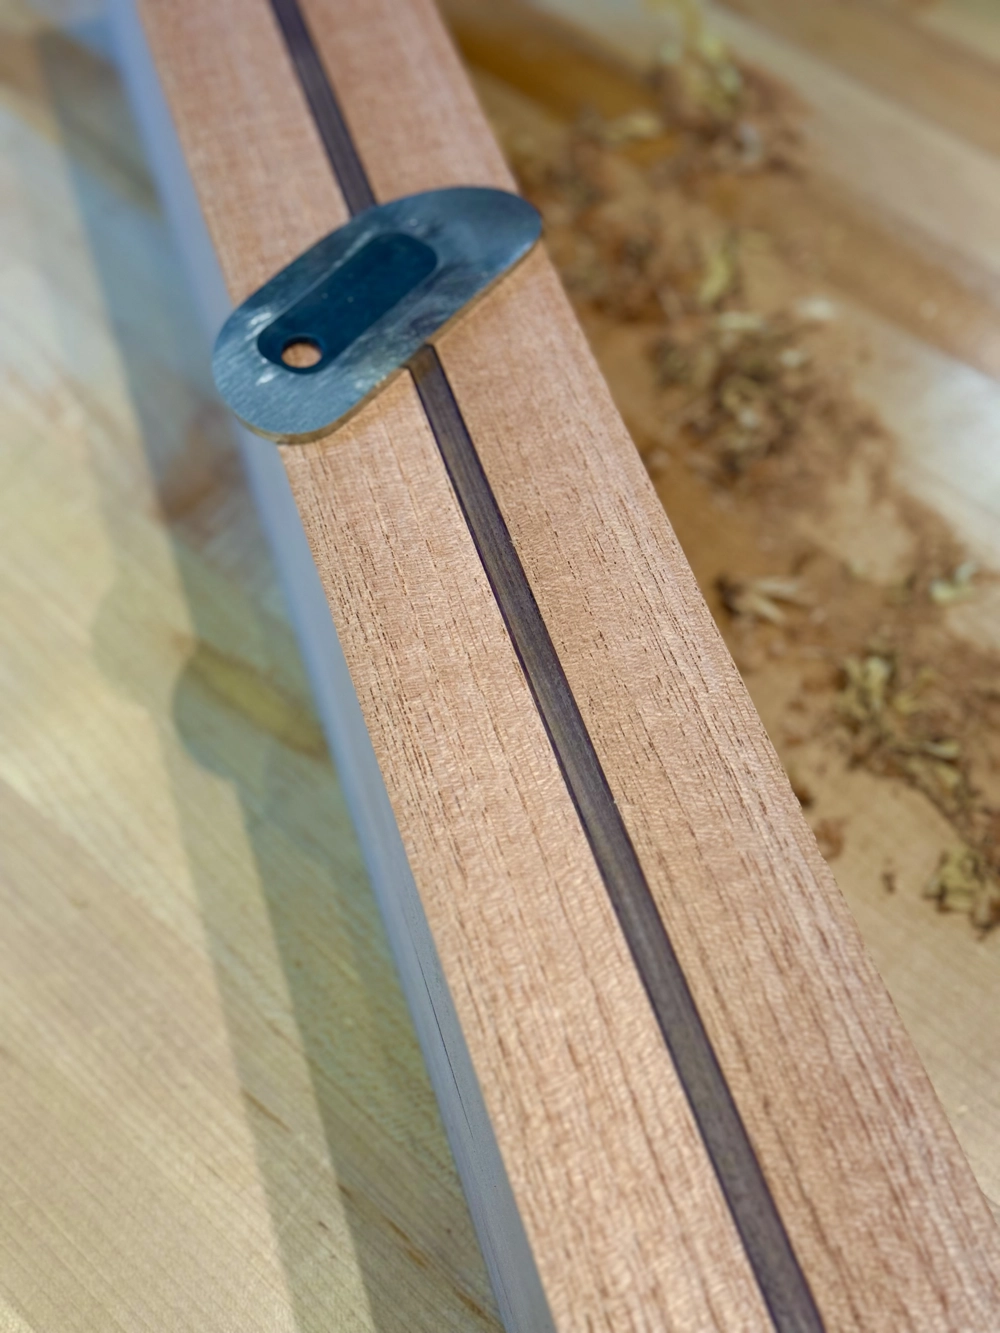
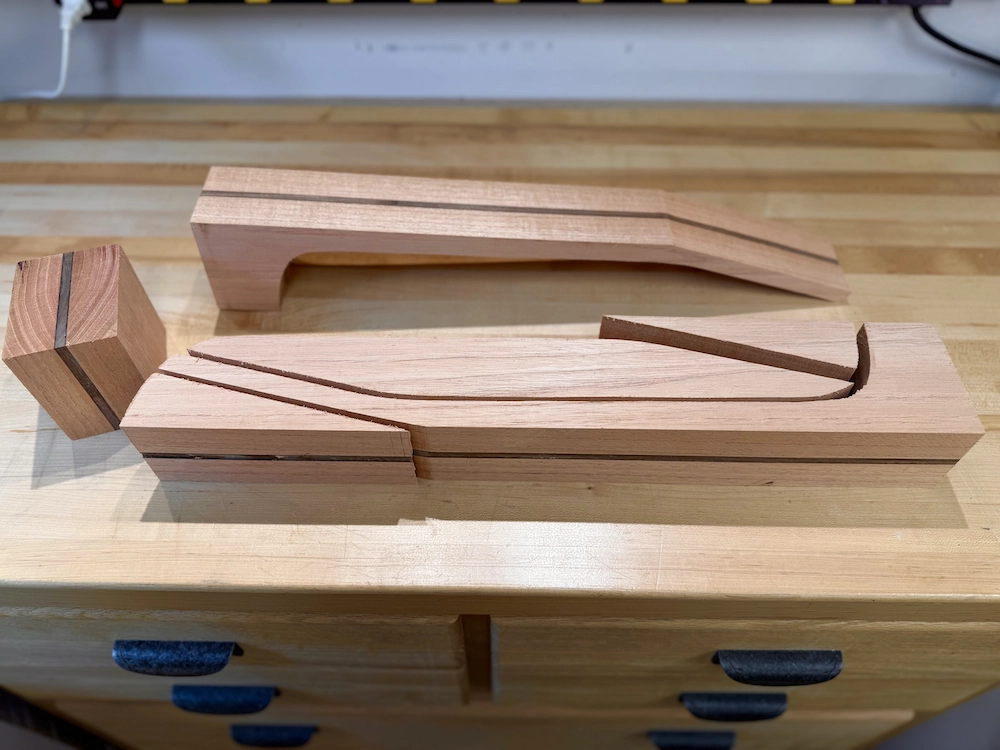
A compromise can be engineered that accomplishes my stabilization task AND maintains access to the interior. By diverting the path of the carbon fiber rods and securing them to the waist first, prior to continuing on to the tail block, the neck block is secured against rotation and the soundhole remains unobstructed. I first saw this approach taken by Rick Turner on one of his Compass Rose guitars. Below is a photo of the body shell of the Turbo-D, having been stabilized using laminated linings and carbon fiber rods:

Two rods run from each side of the neck block to corresponding blocks added to a point just behind each waist. For those who may be concerned that the linear force applied to the neck block and, subsequently, transferred on to the waist, will now blow out the sides, please pause long enough to take a glance at your favorite acoustic guitar. You probably own, play, or are building guitars that have been constructed with extremely flexible shells, and rely solely on the front and back plates to stabilize all that body flexion. Most likely, you have been perfectly fine with that arrangement up until now with no concern of "blowing out the sides". Those same two (2) plates, a soundboard and a back, are going to be added to the Turbo-D., and they will successfully prevent the sides from "blowing out." If you remain unconvinced and don't mind complicating access through the soundhole, you can tie one waist to the other with a cross piece. A removable solution might include a small cable with turnbuckle. I have not found that to be necessary (yet), but it is an easy option to incorporate.
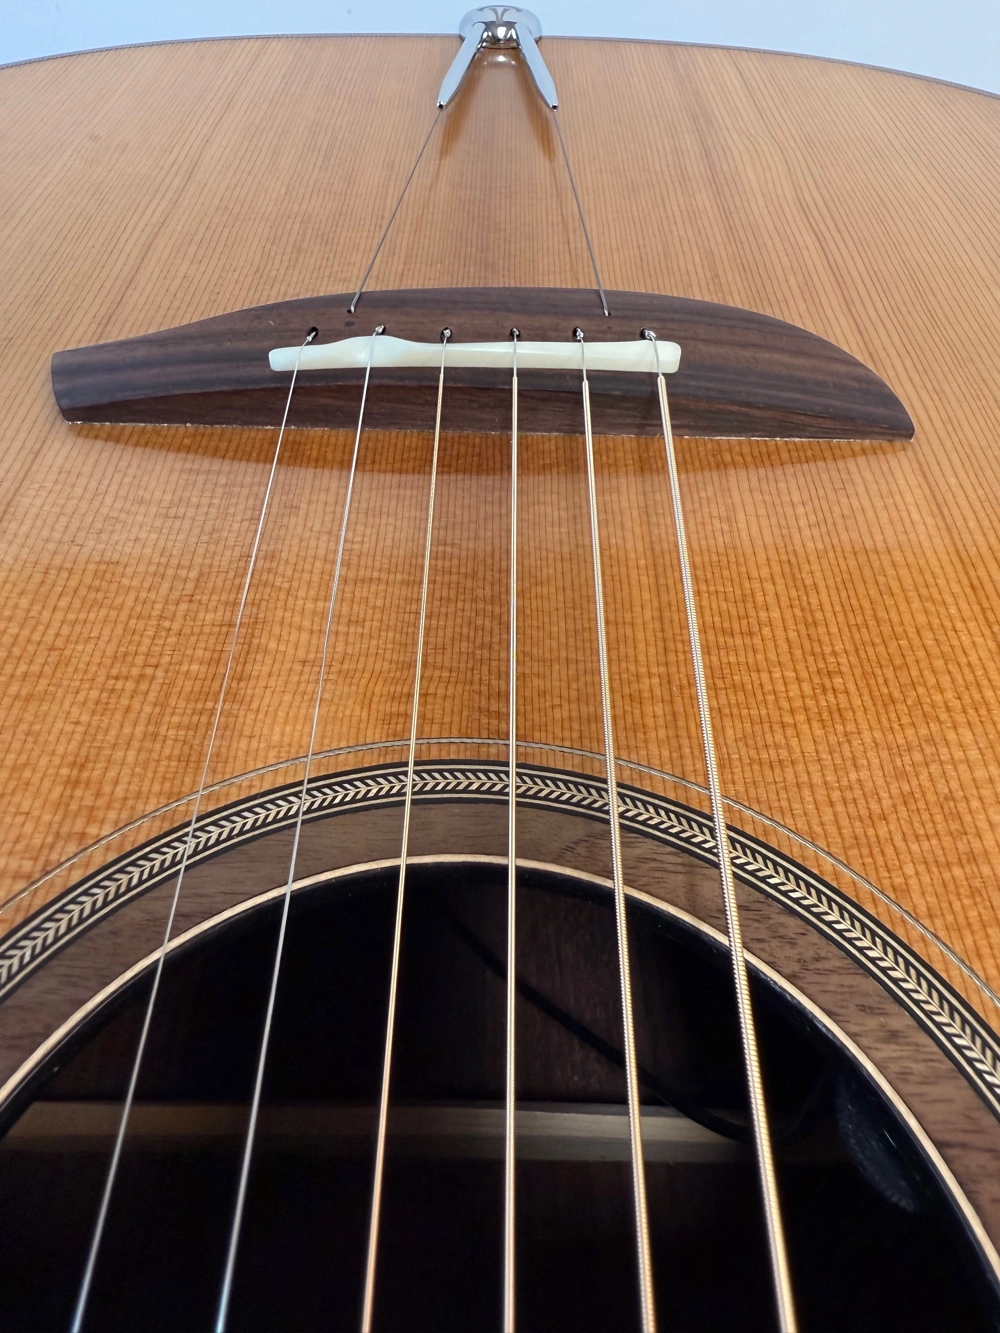
In an effort to unify the neck and tail blocks I run an additional rod from the center of each waist block to each side of the tail block, terminating those rods toward the soundboard side of the tail block (not at its center). I will be attaching the TurboTail to the tail block at the soundboard, not the back of the instrument. I want the extra support that a carbon fiber rod will provide concentrated where the TurboTail will be mounted. I am unaware of any rotational forces at work at the junction of the tail block and the back plate, so I don't add a second rod. These rods happen to be solid, not tubes, and are a whopping 1/4" (6.34 mm) in diameter. They more than get the job done! I hope to experiment at some point with an alternate, lighter design that supplies even greater rigidity to both blocks.
Is the effort worth it?
I ship guitars across the United States, year-round. They are tuned to pitch when they leave my shop. They arrive at their destinations still tuned to pitch. Observable. Repeatable.
However you choose to design your guitar, focus on mitigating, if not eliminating, body flexion. Prevent the body from flexing and, subsequently, the neck block from shifting.
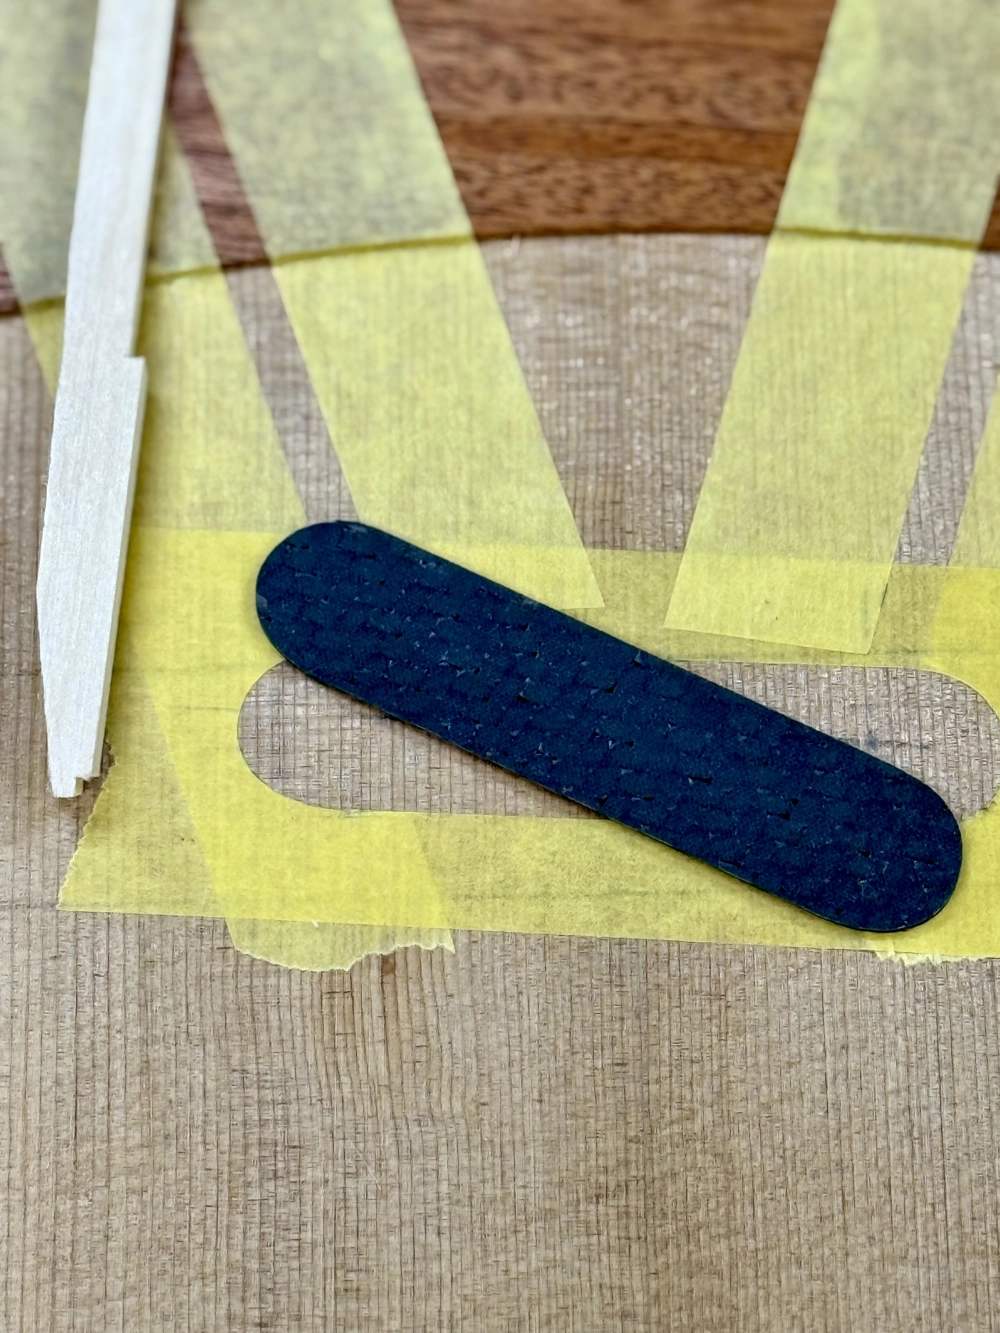
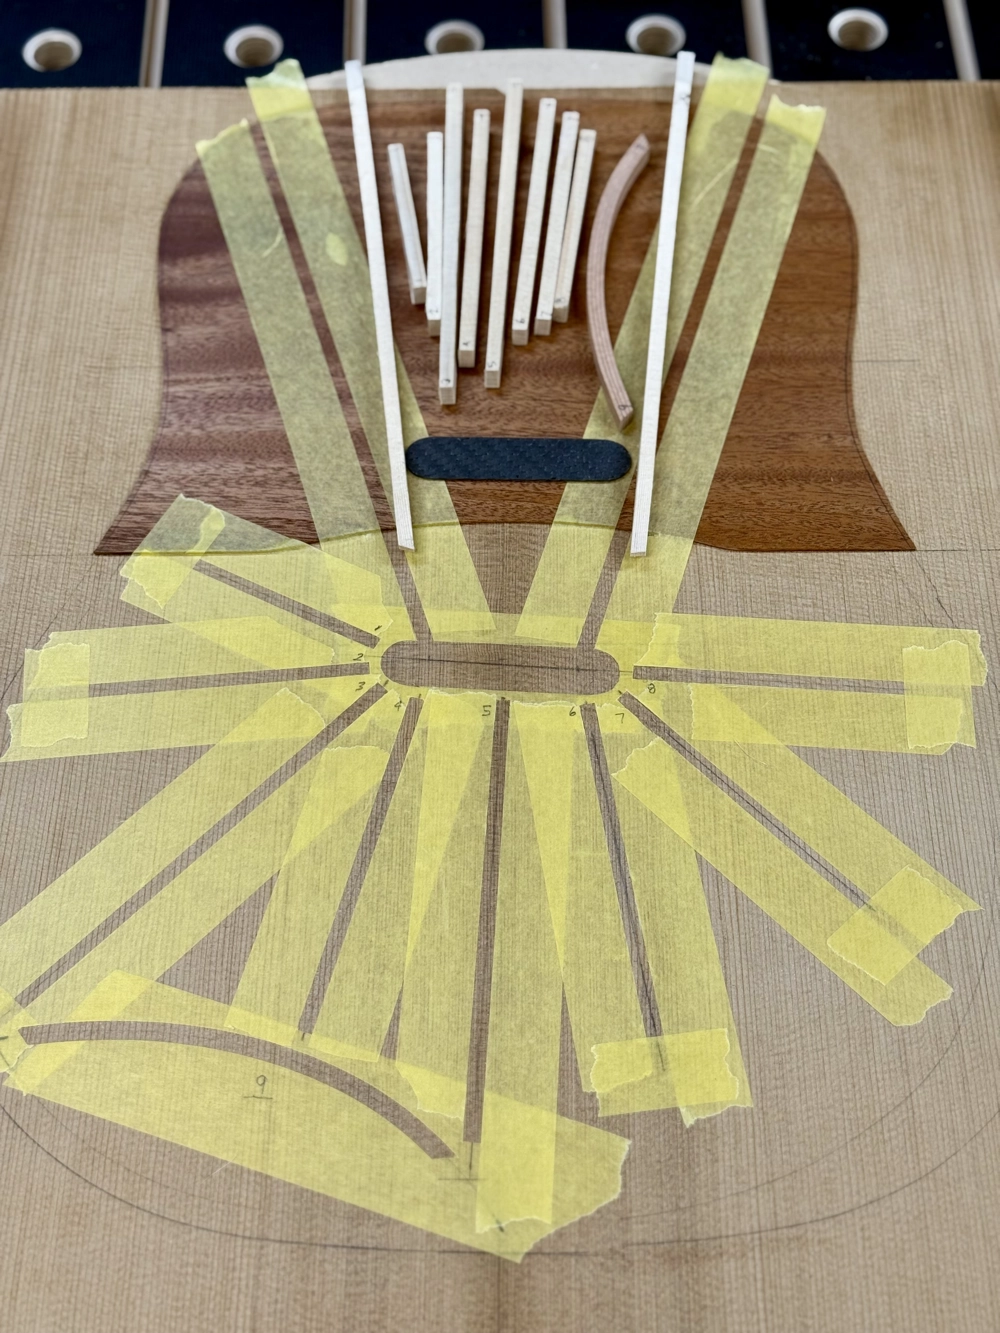
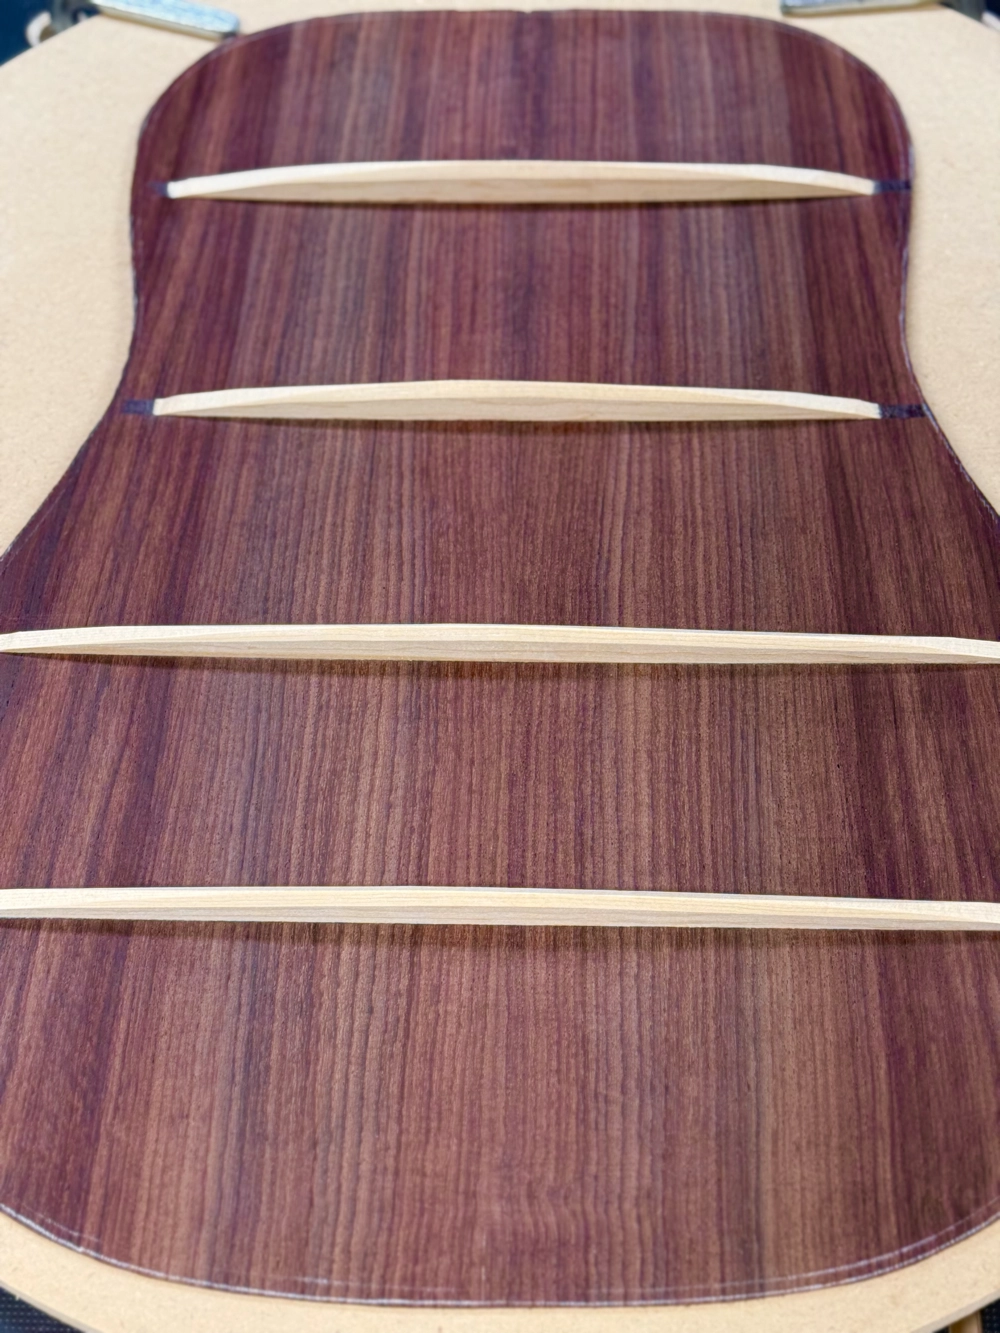
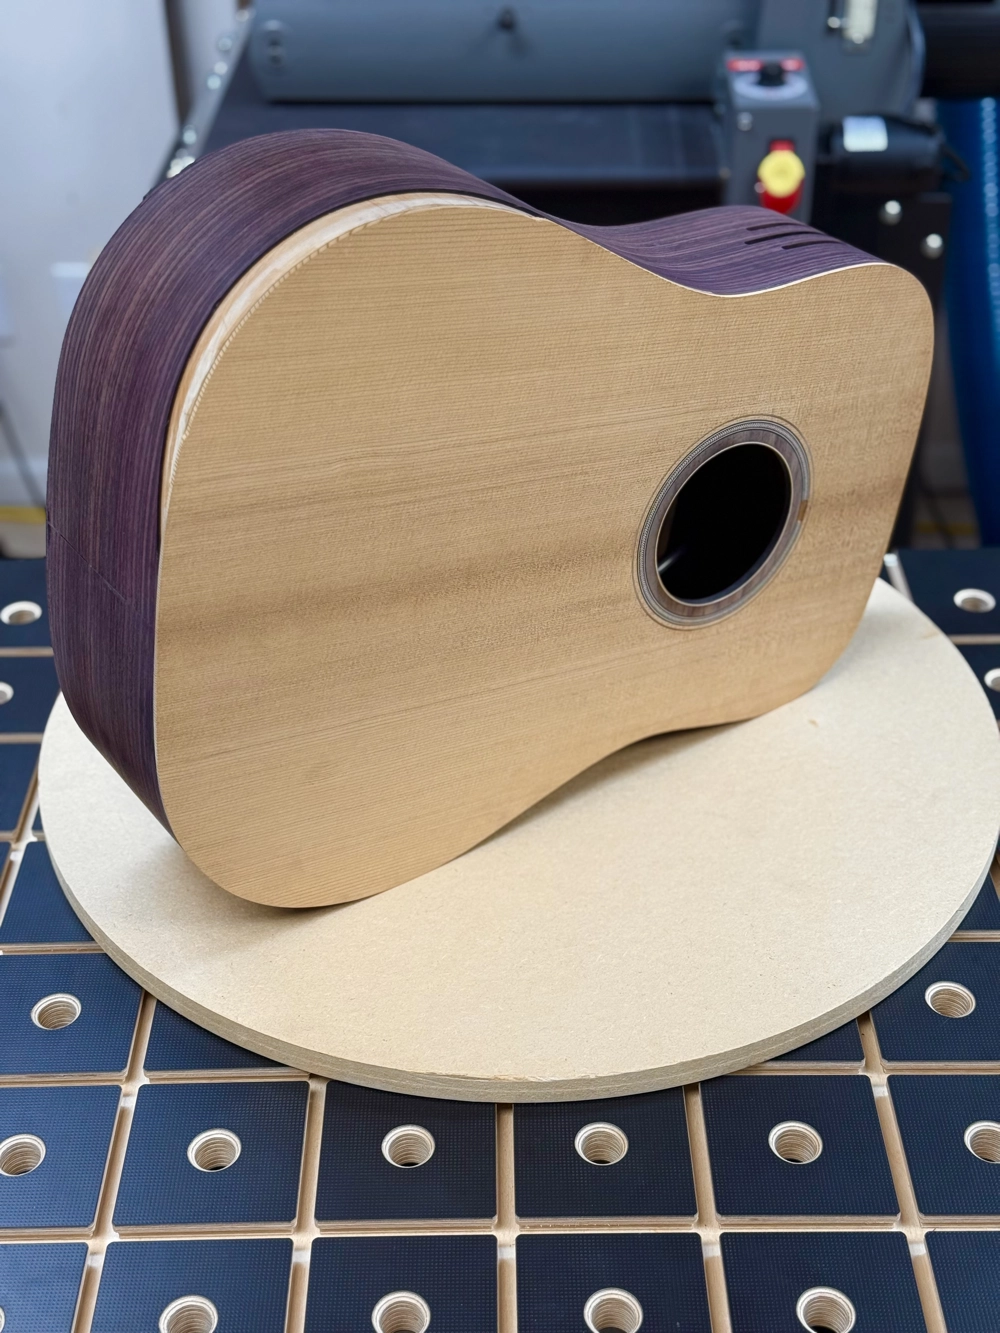
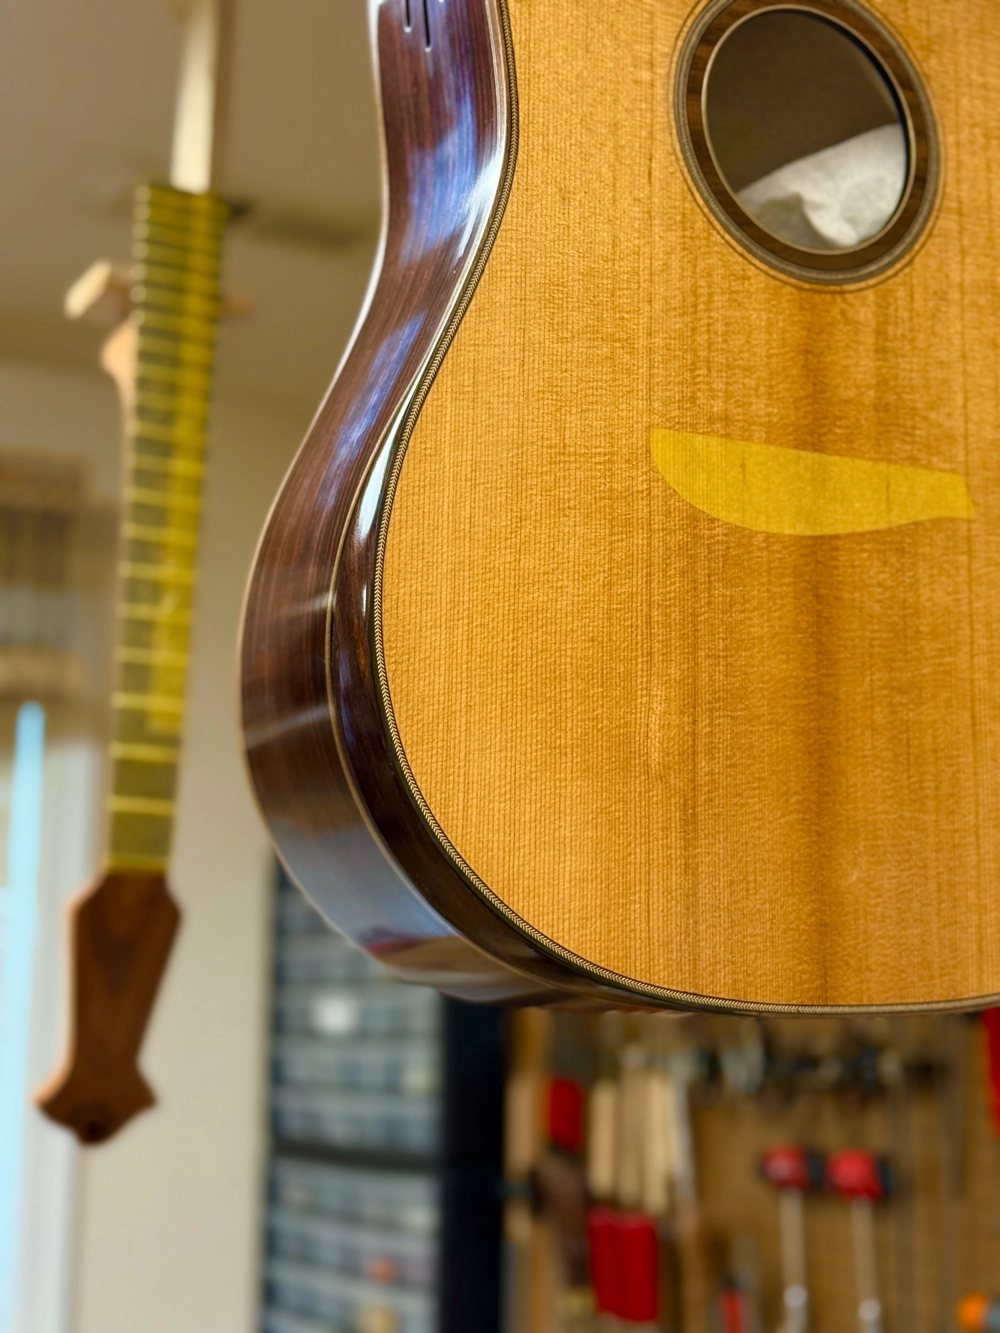
In addition to reinforcing the sides, I also reinforce the upper bout of the soundboard by applying hardwood veneer whose grain is oriented perpendicular to the soundboard's grain. Once the bracing has been added, that thicker section of the soundboard is "let in" to a recess in the shell, locking it in place. This approach has proven quite effective on many guitars I have built. With the advent of the TurboTail, this may prove to be totally unnecessary. It stays, for now.