Installing the D-Tube
The D-Tube is designed to be the sole resident in your guitar neck. If you have been supplementing truss rods with twin, parallel carbon fiber stiffeners, you will be pleased to learn that the D-Tube replaces all three items.
To install a D-Tube, instead of routing or sawing three slots (one for the truss rod and the remaining two for carbon fiber stiffeners), one simply routs a single, half-round groove (NOT a square-bottom saw cut) down the center of the surface of the neck. The D-Tube is glued into place (using epoxy - NOT wood glue) and the neck is ready for the fretboard.
The groove may be cut via CNC, milling machine, a router table, jigs and fixtures with a handheld router, or with hand tools.
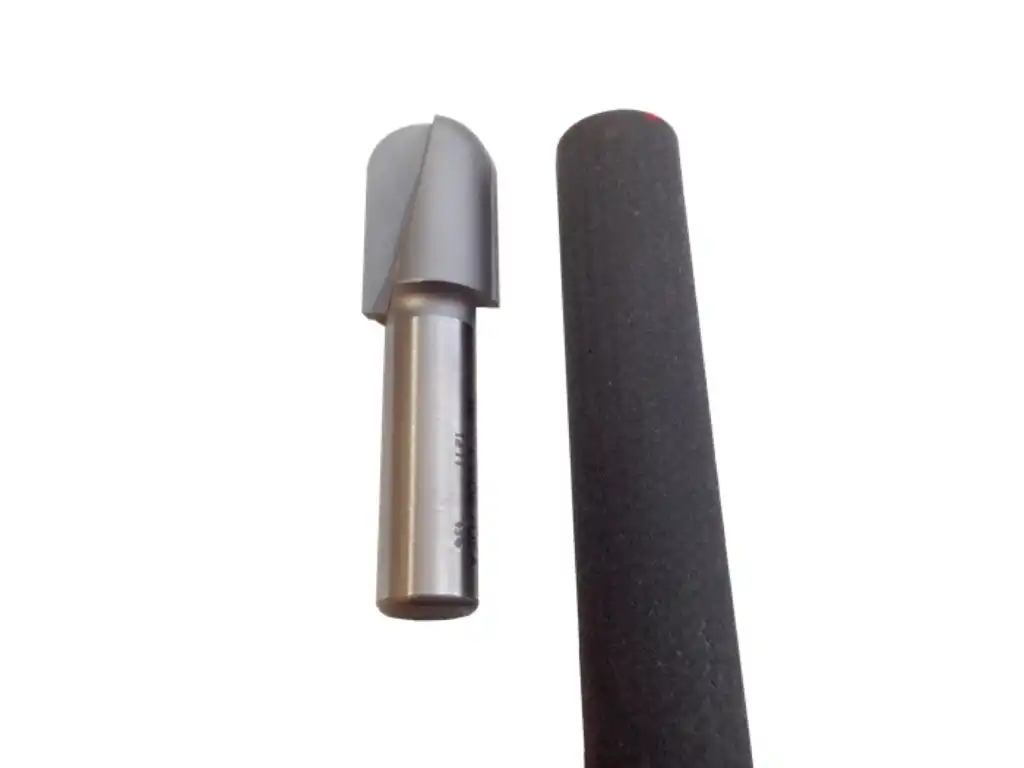
I use a router table, so I selected a 3/4″ Whiteside #1411 3/8″ radius round nose (Core Box) router bit that perfectly matches the half-round profile of the “D” shaped carbon fiber beam.
A trip to the router table provides me with a couple of advantages over using my handheld router with a centering base. Dust collection is a given at my router table and can be harder to control with a handheld tool. Additionally, the fence allows me to cut grooves quickly, safely and accurately. With a handheld router, I need to be much more vigilant regarding the proximity of the router base to the neck. More importantly, my neck blank does not extend far enough beyond my groove's start and stop points to safely register my router if using a centering base (dedicated router base having two (2) perpendicular pins spaced equidistant from the center). If I didn't have a router table I would employ a jig or fixture to both cradle the neck and to guide the router along. Otherwise, I would have to alter my construction techniques, attempting to rout the groove prior to dimensioning the neck.

For my application, it is necessary to rout a 1/2″ (33/64") deep groove or channel down the center of the face of the neck, the side to which the fretboard will be attached. That extra 1/64" of depth is an allowance for the epoxy. I choose to keep the D-Tube flush with the face of the neck blank, where it will be in direct contact with the back of the fretboard.
Optionally, I could rout the groove just a bit deeper, glue in the D-Tube, and fill the recess with a thin strip of wood. Once the face of the neck is planed or sanded perfectly flat again, this approach provides for a 100% wooden surface onto which to attach your fretboard using your preferred wood glue.
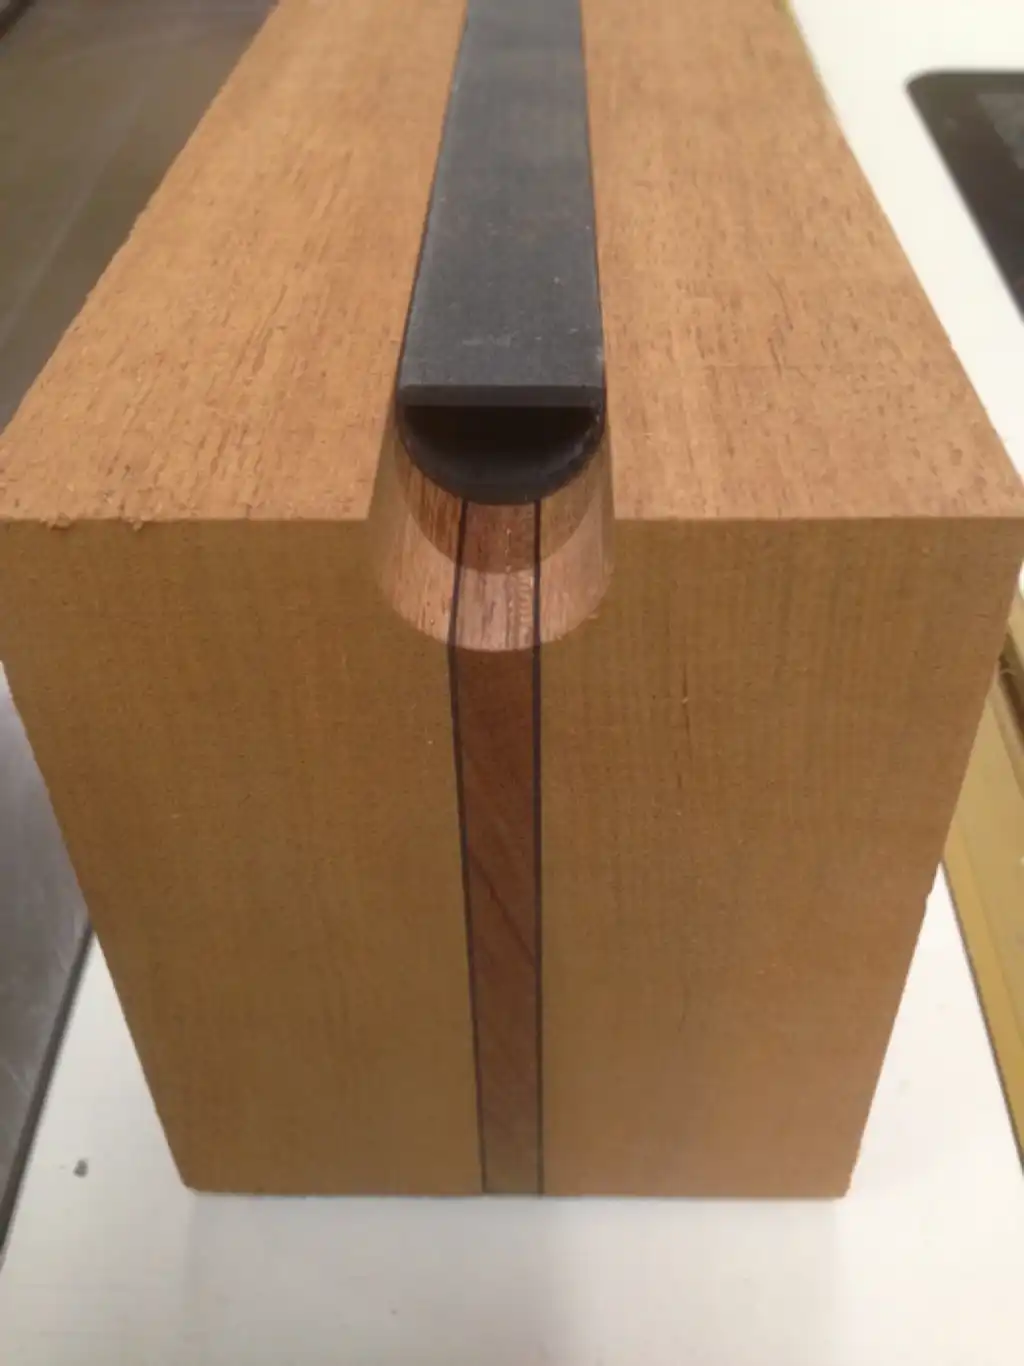
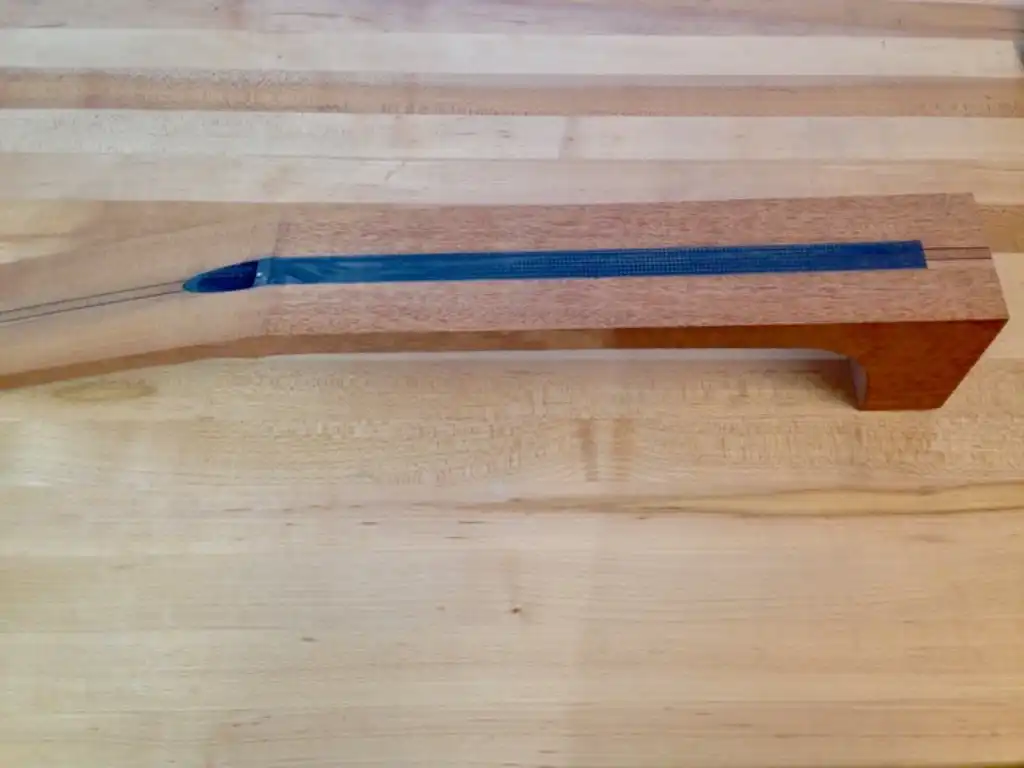
In the photo, below, I have routed a through groove from the headstock to the heel block using three (3) ever-deepening passes over the router bit. If desired, I could also choose to stop the groove short of the end. Notice the depth of the slot and the depth of the D-Tube; there is just enough room for the adhesive.
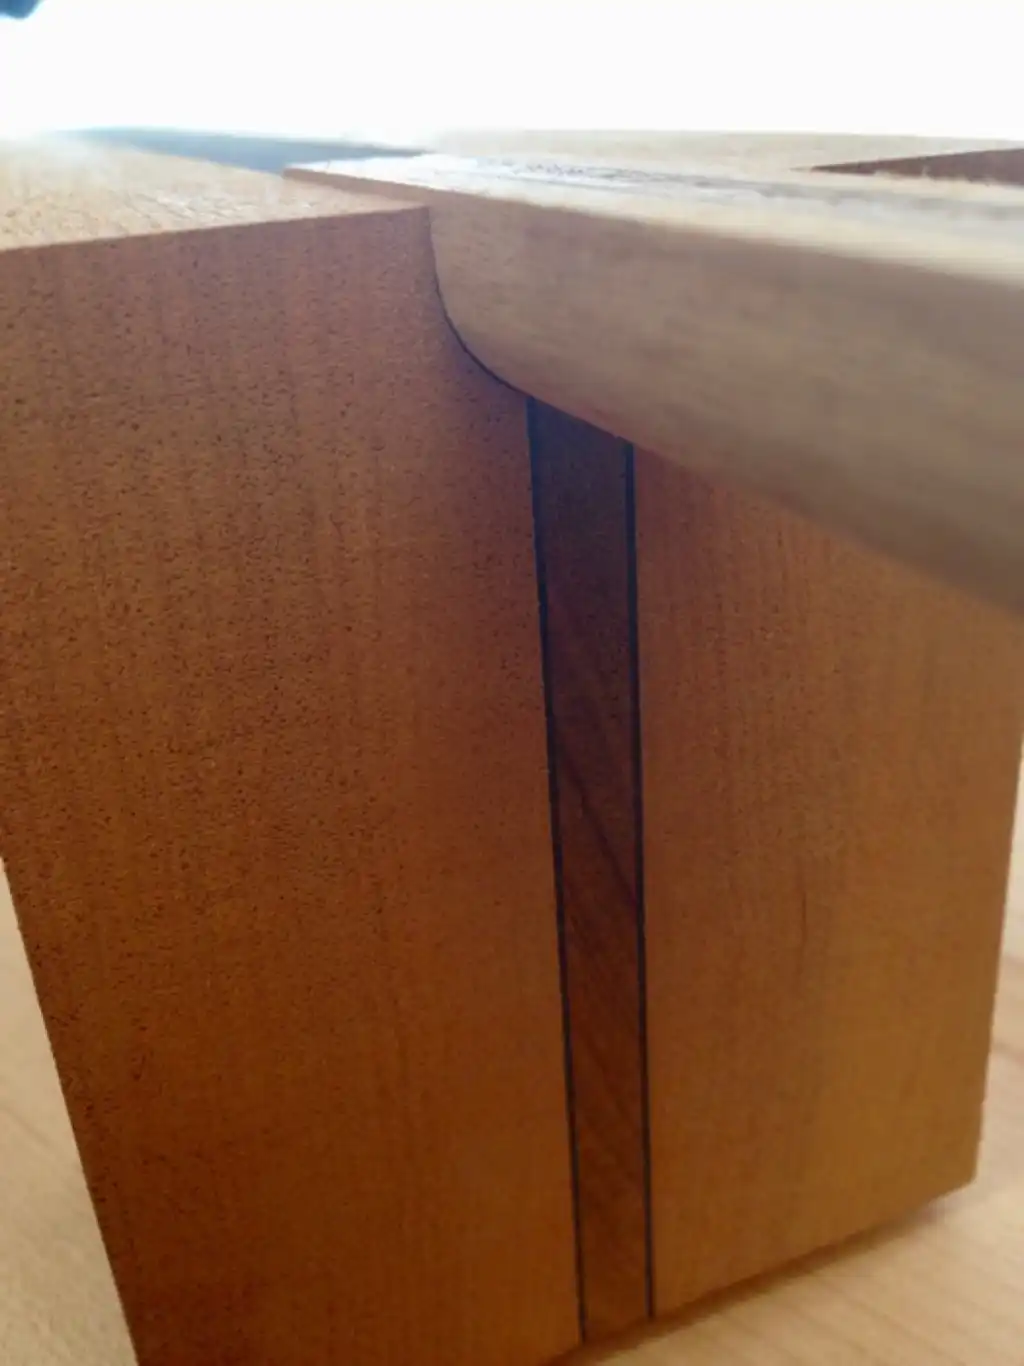
Once the epoxy has cured, the D-Tube will (should) be perfectly flush with the surface of the neck.
Because I routed a through-groove down the neck, I fashion a plug that will fill the void (the portion of the through-groove not filled by the carbon fiber), butting up squarely against the end of the D-Tube, a process which takes just a few extra minutes at the bandsaw and the disc sander. In lieu of making a custom plug, 3/4″ hardwood dowel stock works great for this purpose.
Alternatively, I can stop the groove short of the end of the neck, and shape the end of the D-Tube to conform to the compound radius left by the stop dado. If that seems like too much work, I can plug the end of the D-Tube and fill the small void with epoxy, if desired.
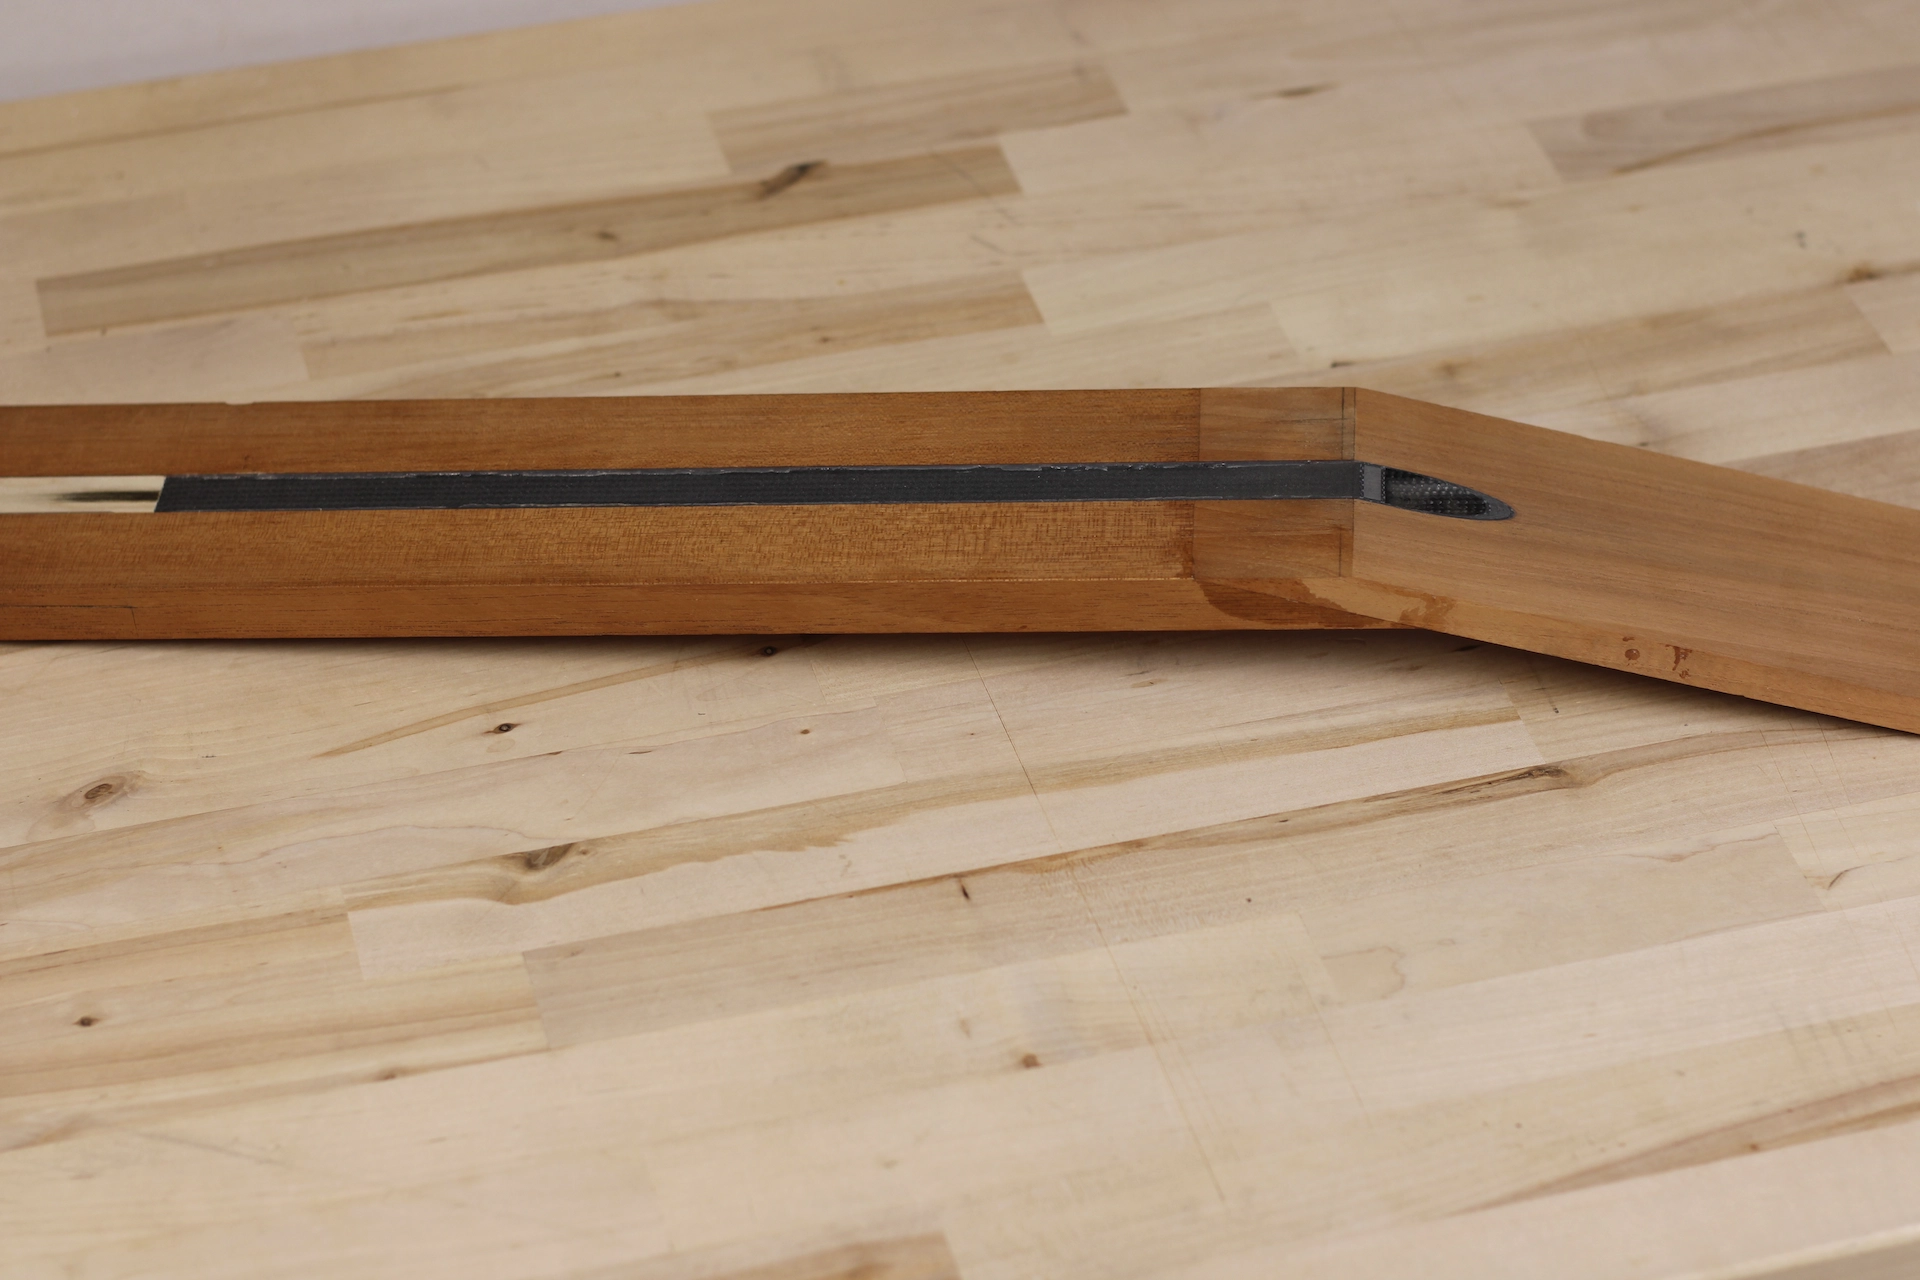
On the opposite end of the neck I choose to run the carbon fiber up into the headstock, rather than terminate the groove short of the point where the fretboard ends at the nut, as I would with a truss rod slot. It has been a long time since I fashioned a neck without using some form of carbon fiber stiffener, and I have always extended those stiffeners into the headstock area - especially critical for one-piece necks. Having witnessed a few cracked headstocks from other builders, I believe this crucial juncture of the neck benefits from the extra attention.
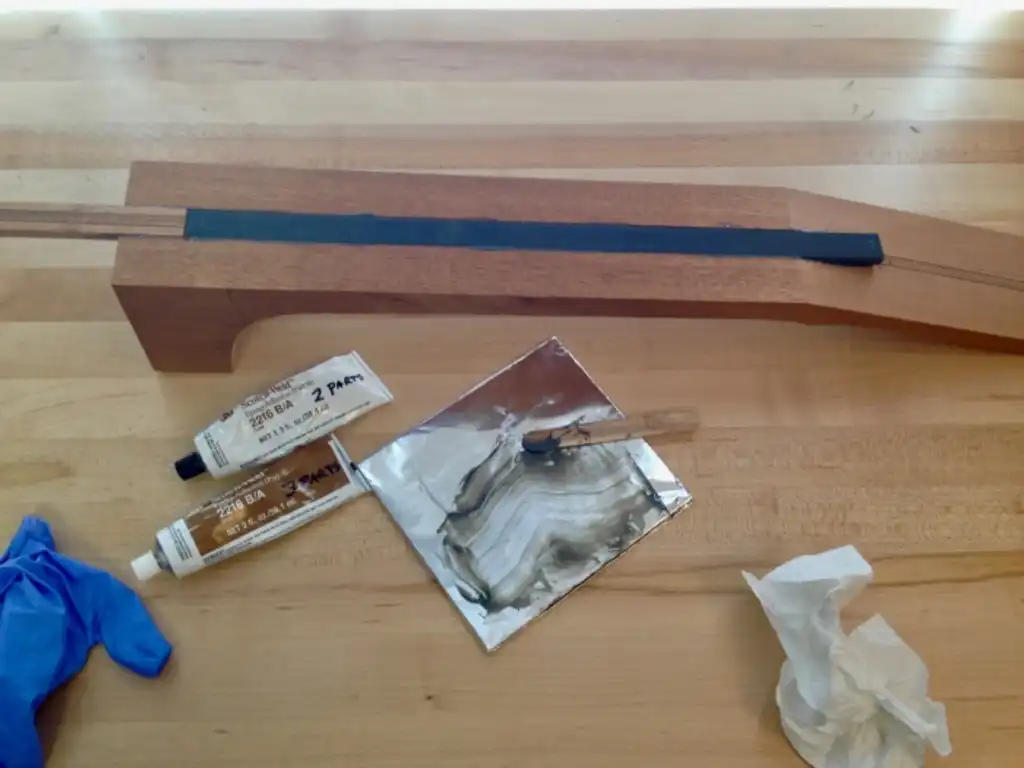
The groove gets coated with a thin layer of epoxy. The D-Tube is hollow and I don't want glue inside of it. Because I do not flood the groove with adhesive there is no need to plug the ends of the D-Tube. At the recommendation of the manufacturer, I am using 3M Scotch-Weld #2216 2-part epoxy. It has proven to be very effective.
I have also had success with Superbond Epoxy 1:1 from Fiberglass Coatings. Note that both of these epoxies, the Scotch-Weld and the Superbond, are a paste format, versus a runny liquid format.
To simplify cleanup, I suggest applying tape (painter's, low-tack, etc) to the surface of the neck blank prior to adding the epoxy and gluing in the D-Tube. Two narrow strips, one down each side of the groove, or a single, wide strip whose center is removed with a razor knife will mitigate the need to aggressively remove any squeeze-out or hardened epoxy. Simply remove the tape once the epoxy has cured and be left with a clean surface.
Why bother with tape, you may ask? I have no desire to re-establish my neck geometry, which can (would likely) be altered when attempting to sand off epoxy squeeze out. Your mileage may vary.
Both the carbon fiber D-Tube and my custom wooden plug are pressed into place. I lay a piece of parchment paper over the neck and lightly apply a few small clamps, merely to prevent any shifting during cure. For any who may be unfamiliar, unlike PolyVinyl Acetate (PVA) or Aliphatic Resin (AR) glues, epoxy does not benefit from high-pressure clamping; in fact, heavy clamping is advised against.
The neck is left overnight, giving the epoxy time to fully cure.
After releasing the clamps and lifting off the parchment paper, I removed any accumulated, cured epoxy using a scraper. When setting the depth of cut for the groove, I had taken the time to ensure the D-Tube would sit just shy of the surface of the neck blank. I was rewarded as the scraper just kissed the surface of the carbon fiber as all the squeeze out was removed.
What do you do if the tube is slightly proud of the surface of the neck? While I have not had this issue, you would either need to try to make the surface flush again without altering your neck geometry and without weakening the D-Tube, or rout a shallow recess into the back of your fretboard.
SUGGESTION: try really hard NOT to do this on the next neck!
Cut-off wheels, such as the type used with rotary tools, are effective for cutting carbon fiber. Using a handheld rotary tool (Dremel), I am able to quickly remove most of the section of D-Tube that extends out over the headstock.
EDIT: I have since switched switched to using diamond impregnated jig-saw blades for the task.
Remaining material is sanded back nearly flush with the headstock (carbon fiber sands very readily). A disc (or belt) sander works well for this step. For final dressing of the face surfaces of the neck and headstock, I rely on strips of adhesive-backed sandpaper affixed to a dead-flat marble slab. A few careful strokes across that slab are all that are needed to complete this stage of the neck construction. Alternatively, I could saw the waste off and true it up with a sanding block. At this stage, it is critical to maintain the dimensions of the neck, so sand with caution.
TIP: Protect your airways and eyes when machining carbon fiber! That includes any and all routing, sawing and sanding.
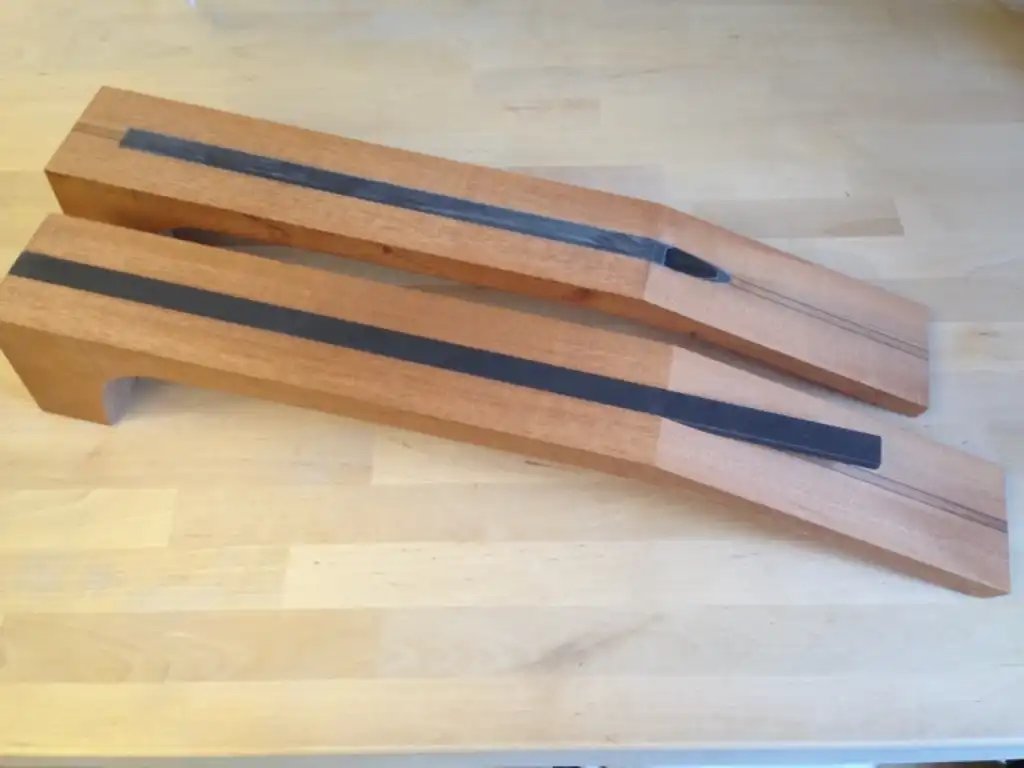
I completed the neck in the same way I would have had I installed any other form of truss rod. With this neck I have now completely replaced the truss rod (or combination truss rod / carbon fiber stiffeners) with the Dragonplate Carbon Fiber D-Tube Neck Beam.
The fretboard may be attached using your choice of adhesive, including Fish or Hide Glue, Titebond, or even epoxy. I have yet to experience adverse results with any of the above choices. I have had success using a very thin application of epoxy to attach fretboards and, while fretboard removal (should it ever be necessary) may be a bit more difficult (when compared with Hide Glue, for example), there is absolutely no concern regarding obtaining a sufficient bond with the carbon fiber.