An Excellent Case Study
Five of my seven assessments to determine whether a neck reset is warranted, or not, passed. The two assessments that failed are such exceptional examples of failure that I am going to include them here, for posterity.
Failure #1 - Overall String Height: The height of the strings from the soundboard, as measured directly in front of the bridge, is both relative to the class of guitar being measured, and an indicator of performance potential.
This 12-string belongs to a class of steel string acoustic guitars that benefit from an overall string height of +/- 1/2". That roughly translates to a 3/8" tall bridge and a saddle that projects another 1/8" above the bridge. We have established that the saddle on this guitar is, indeed, projecting 1/8" above the bridge. However, the bridge is less than 1/4" tall. The overall string height on this guitar comes in below 3/8".
When pursuing the need for a neck reset, it is common to lay a straightedge across the fretboard and note where the plane of the frets sits in relation to the top of the bridge.
This "straightedge test" seemingly passes! Coupled with the fact that, standing almost 1/8" above the bridge, it appears that there is "plenty of saddle" remaining, implying I can just whack material off the saddle to lower the action, it sounds like I'm good to go.
It is a good thing I know about my Overall String Height discrepancy, otherwise I could be seriously confused. We will set that issue on the shelf for the moment, because we have another failed assessment to discuss.
Failure #2 - Action Height: As you will see, this guitar's action is very high. As an isolated issue, big deal. We deal with high action all the time. What makes this guitar so interesting is that all the other assessments check out. Even the "straightedge test" with "plenty of saddle" remaining says everything is fine. I am going to show you why it isn't fine!
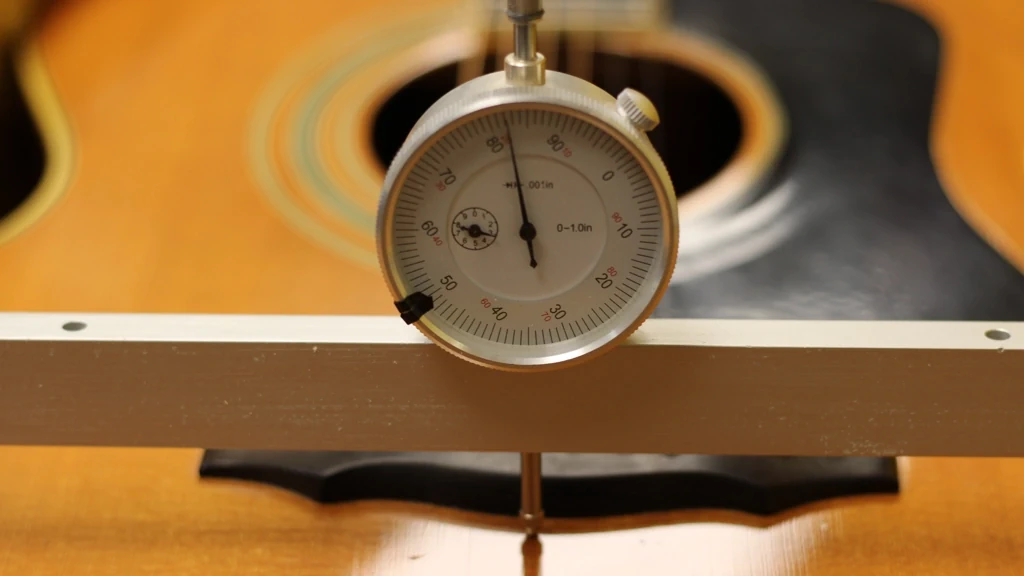
This guitar has become increasingly difficult to play, over time, as the action has raised. Fitted with light-gauge strings, and tuned to "Concert" (Standard, A=440 Hz) pitch, the 11th string is 5/32" (4.0 mm) away from the 12th fret.
My target height for that string is nearly 1/2 its current height, at just barely over 5/64", or 2.0 mm.
That goal is a combination of staying with light-gauge strings and getting the action as low as possible without constant string-to-fret contact ("buzz") for my style of playing. To go lower, I could increase the string gauge (to mitigate buzz), but that comes at a price. The increased tension makes the guitar feel "harder" to play, as well as exacerbating the condition that caused the need for the neck reset in the first place. But I am getting ahead of my story.
A common approach to achieving a target action height is to adjust the saddle height. In this case, I would need to lower the saddle by sanding material off of its bottom, in order to preserve any radius and compensation filed into its top. How much material would I need to remove?
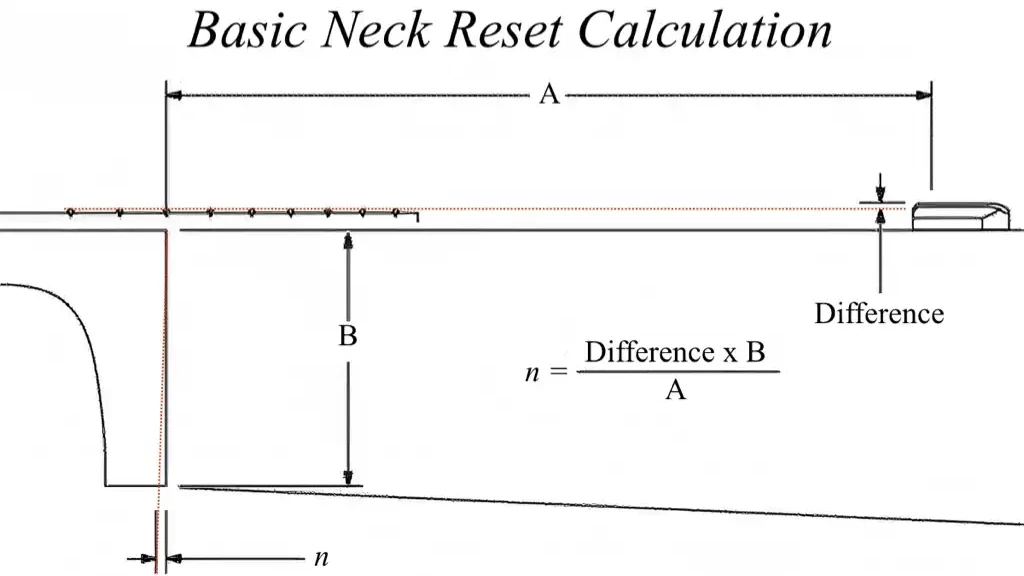
The 12th fret sits at a point approximately 1/2 way between the nut and the saddle. I can therefore understand the relationship between the string height at the 12th fret and the saddle height by using a multiplier of 2. For each unit of measure ("n") I consider modifying at the 12th fret, I double that unit of measure ("n x 2") to make modifications to the saddle.
I want to lower my action on the bass string at the 12th fret from 5/32" to 5/64" (or from 4.0 mm to 2.0 mm). My saddle currently projects a little less than 1/8" (3.0 mm) above the bridge.
Existing height at 12th fret: 5/32" (= 10/64")
Target height at 12th fret: 5/64"
Formula: (Existing height minus Target height) multiplied by 2
Saddle material to remove: (10/64" - 5/64") x 2 = 10/64" (reduced to) 5/32"
Existing height at 12th fret: 4.0 mm
Target height at 12th fret: 2.0 mm
Formula: (Existing height minus Target height) multiplied by 2
Saddle material to remove: (4.0 mm - 2.0 mm) x 2 = 4.0 mm
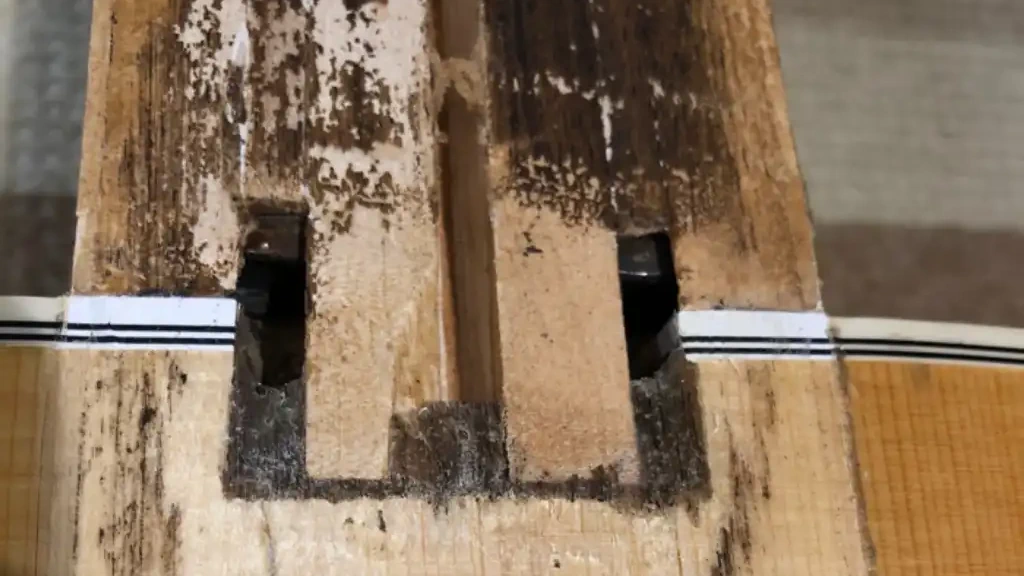
I have a big problem! I only have 3.1 mm (a little less than 1/8", or 8/64") of saddle projecting above the bridge, and that is measuring at its highest point. Attempting to reduce the saddle height by 4.0 mm (10/64") off of the bottom of that saddle will literally "bury" the saddle down into the slot!