Improving a Dark Years Martin
This article is being written and edited in real time, as I embark on a journey to not just fix and return to playability this 1972 Martin D-18, but to improve it. My goal is to coax as much sound from this guitar as I can. I wish to make use of the original components as much as possible, only replacing what I deem absolutely necessary.
The Acquisition
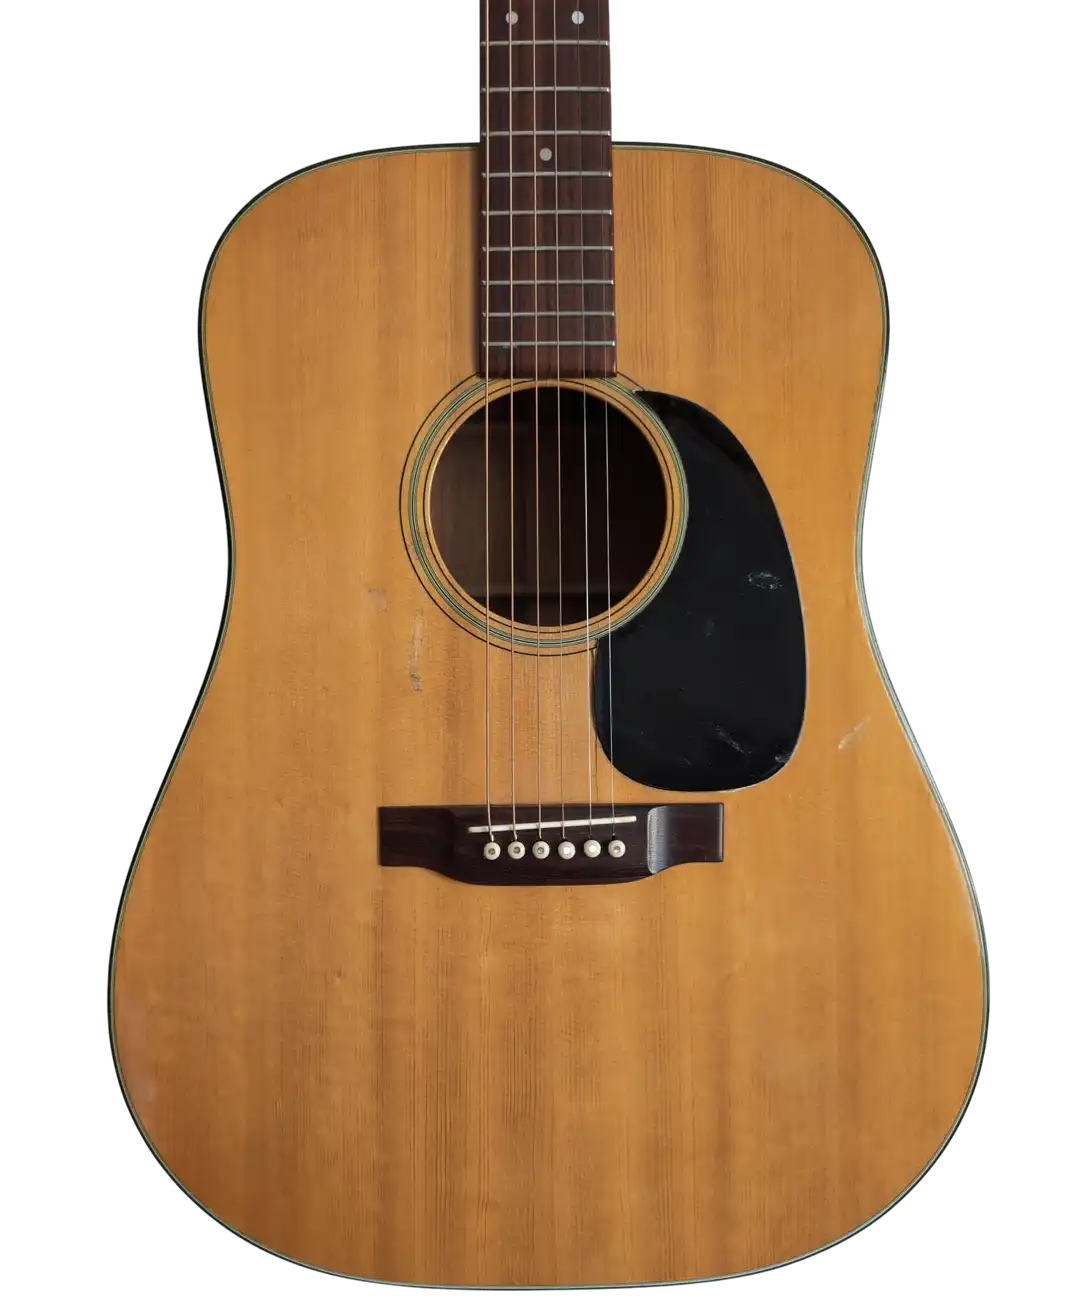
A friend called to tell me of his recent acquisition, a 1972 Martin D-18. He thought the guitar really had some potential, but it was just disappointing in its current condition. The finish had some damage and the pickguard was curling. The soundboard was split, but the guitar sounded "okay".
Most obvious to him was its immediate need of a neck reset to even make the thing playable. And, speaking of necks, this one was definitely bowing forward.
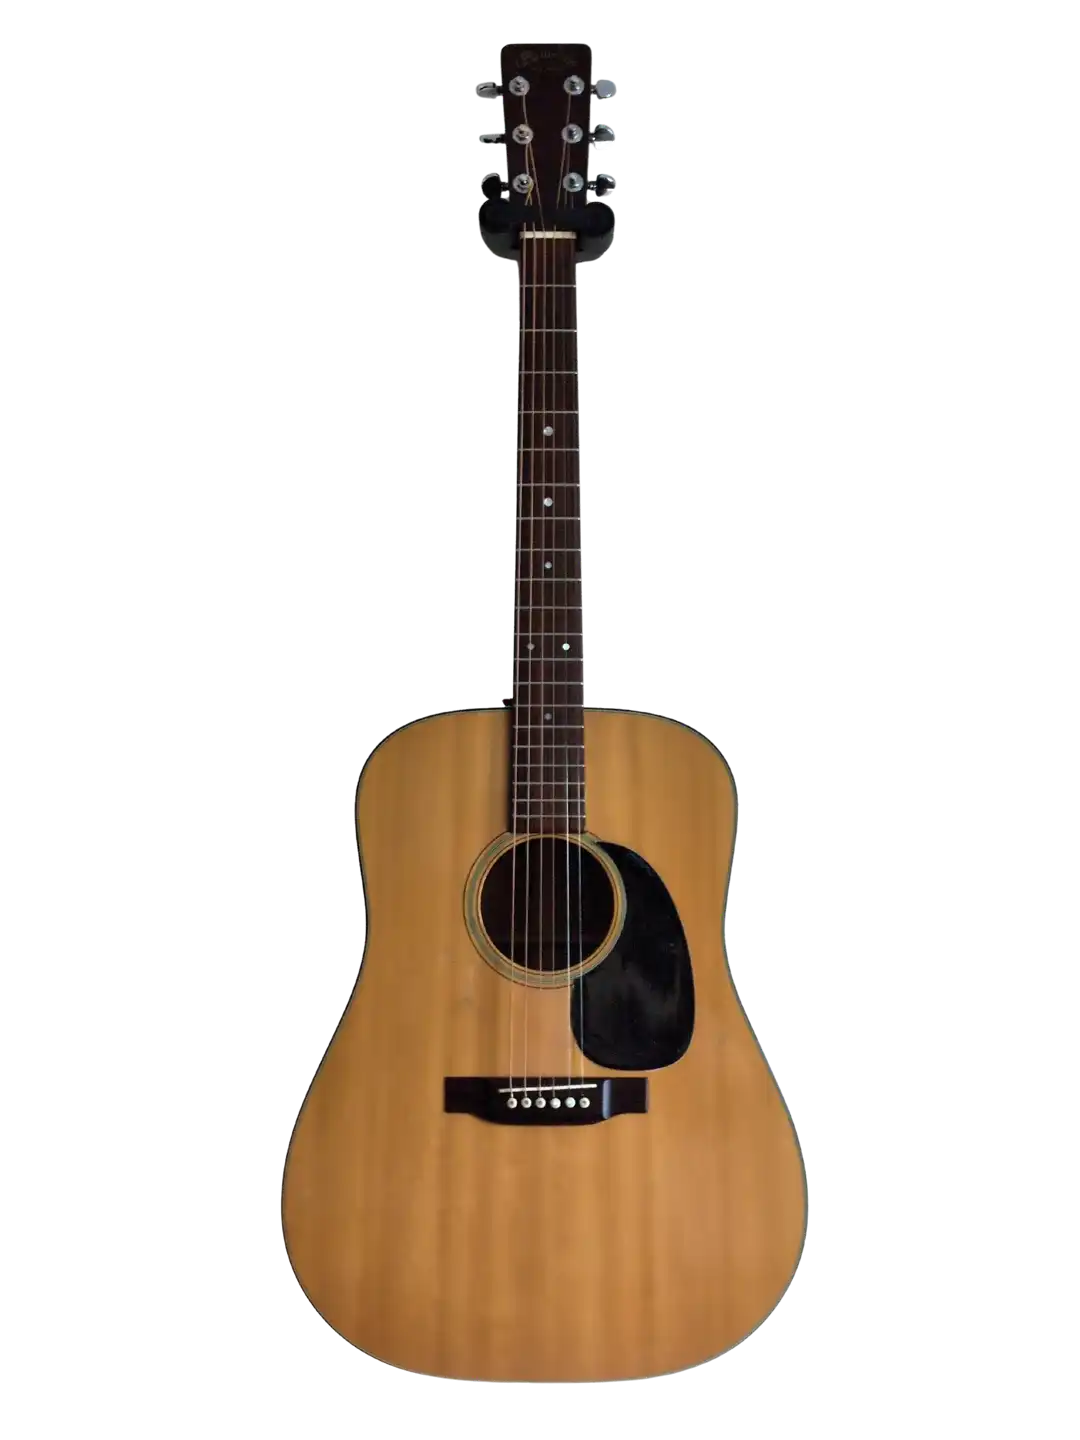
I told my friend that, were it my own guitar, I would consider it wasted effort to simply putting in just enough work to make it playable. Rather, I would want to correct its mediocre status to let it live up to its potential. With a few changes this guitar could be really great!
If I remember correctly, his response was, "I was really hoping you'd say that." So he shipped the guitar to me the next day.
Perspective
So, what's so "wrong" with this guitar that I would dare to consider altering it?
The strongest response anyone has been able to elicit from this particular guitar is a softly uttered, "Meh". That should NOT be the case with this instrument! There are straightforward reasons behind its lackluster performance, and I know what to do to put that right.
As I understand it, Martin more than tripled their production between 1965 and 1971. Such rapid growth makes any manufacturer an easy target among critics, and with just enough "less-than-stellar" examples sneaking past Quality Control (let alone a few "lemons"), a company's reputation is easily tarnished.
We are told that many guitars of this era suffered intonation issues as a result of an improperly located saddle slot. But there were deliberate changes made to these guitars that impacted their tone, especially when directly compared with guitars that had been completed just one or two years earlier.
Brazilian Rosewood backs and sides were replaced with Indian Rosewood. That same Indian Rosewood also replaced the much smaller, thinner and lighter Maple bridgeplates that had been in use from the 1930s. The heavy metal square tube that was added to stiffen the neck certainly didn't help as much as had been hoped.
The latest celluloid pickguards were attached by melting them into the raw wood of the top using solvent, a practice that would prove to be a bad idea. The problem was not so much the method of attachment but, rather, attaching a material that would have such a propensity for shrinkage.
Perhaps most significantly, the bracing was more stout, leading to the conjecture that the company didn't want to be overrun with warranty returns. It makes perfect sense: build the most sensitive, fragile, returns-prone, but best sounding guitars ever, or increase production more than 300% to meet growing demand, while trying to find a happy medium between instruments that still sound good but are bit more durable.
Martin wasn't alone in these changes; indeed, this was the consensus shared by most all of the guitar factories of the day. Many factory-built guitars in the 1970s would later be considered to have been "overbuilt". Public perception deemed that Martins built during this time were of lesser quality, thus of lesser value than what the Martin customer had grown used to. This period of time came to be known as the "Dark Years".
Vintage and Value
I want to address the topics of "vintage" and "value" head-on, as I intend to make alterations to this used instrument.
This guitar is most certainly not a pre-war Martin. It is not some five- to six-figure investment that will be instantly devalued by collectors should it even be looked at in the wrong way, let alone modified.
Nor is it a post-war Martin that was un-earthed in original condition, unstrung, still in its case, in somebody's closet, in a climate controlled room for decades. Sorry folks, there is no $9,000 payday here.
It isn't even a 1970s Martin "case Queen" in really good condition, perhaps commanding as much as $4,000 from the unsuspecting buyer.
This guitar is NOT a collector's item. It is NOT one of the dozens and dozens of "Special Edition" or "Artist Edition" or "Anniversary" models. It is just a simple, unadorned 1972 production model D-18 that no one can make good use of in its existing condition.
Truly, it is precisely what its owner hoped it would be: a "project guitar" having no particular sentimental value, but having potential to be something so much more, something other than a wall decoration with a sign above it that reads, "Don't let this happen to you!"; another one of those guitars that any experienced player would glance at and say, "What a shame!"
This guitar deserves more! It demands a thorough investigation.
The Inspection
It is always good to know where we are in order to chart a more accurate course to where we need, or want, to go.
The headstock, headplate, and decal are intact. But for a few small dings, there is no sign of damage to the neck structure. The finish on back of the neck, however, is soft in spots. It is suffering from a chemical interaction and, left unaddressed, is a permanent condition.
The nut is in excellent shape, and the slots are cut properly. If it is original, it is Ivory.
The fretboard is in good shape, though a bit thin (I assume it has been leveled at least once in its 54 years). There are shallow fingernail divots at the first fret, diminishing to none by the fourth fret.
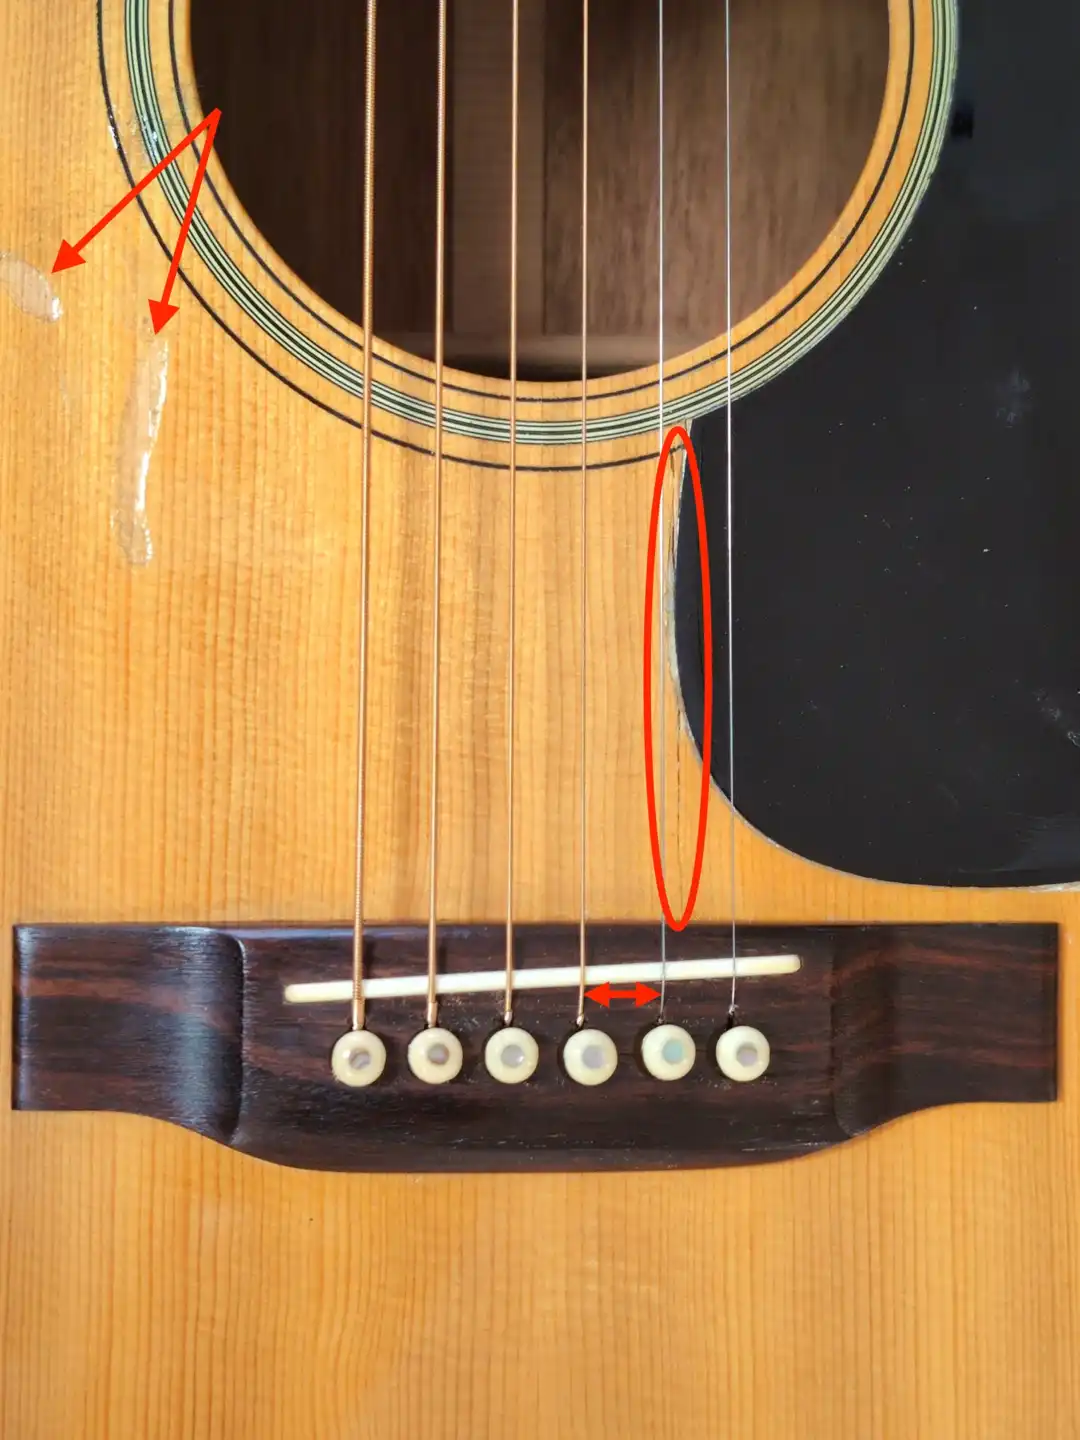
The soundboard (as well as the side around the neck heel, and even the pickguard) have several deep troughs of melted lacquer concentrated around the soundhole and pickguard. In the three seconds, or so, that I pondered the source of the scarring, the following ran through my head:
Intense heat, directly applied, such as when someone will lay a cigarette on a guitar, can certainly ruin a finish. But there were no telltale burn marks. Perhaps a soldering iron, or even a hair curling iron ...
... or maybe the guitar, in a stand, was repeatedly bumped up against a hot metal grate, such as the metal guard on a small work light, resting on the floor? Okay, overthinking has now been curbed. Look harder ...
There are several green fibers stuck to two of the twelve scars, and that green perfectly matches the color of the plush-lined case the guitar was transferred to prior to shipping it to me (not the original case). I recalled the owner specifically mentioning he did not want to send the guitar in the worn case he received it in.
I touched one of the scars with my fingernail and ... Yep, I was afraid of that! Soft and gooey. This soundboard has had an unfortunate encounter with a solvent at some point.
I am no chemist, but I am thinking "solvent with additives". I have seen the same residual damage from accidental spills of fingernail polish / polish remover. This is really unfortunate, as this kind of finish damage doesn't improve or just "go away" over time.

The pickguard is curling away from the top, and has already successfully split the soundboard in front of the bridge. This all-too-common event is the result of directly attaching a celluloid pickguard to the softwood top. As the celluloid "dries out", it shrinks, exceeding the range of motion of the wood it is glued onto/into.
The saddle fits the slot perfectly, but is much too low, and the bridge appears to have been shaved, slightly. The string spacing at the bridge, specifically at the 3rd string, is off, being dictated by the (very small, but very consequential) slots cut into the front of the bridge pin holes.
Measurements
Strings #3 and #5 intonate "passably". The other four strings are all sharp, with #2 and #6 being really sharp.
A look inside the body reveals a surprisingly clean interior, and no apparent cracks or splits in the bracing. Checking the braces with a palette knife reveals some missing glue bonds.
The large Rosewood bridgeplate is home to six chewed-up bridgepin holes. The soundboard split (from the shrinking pickguard) goes clean through the top, and is split on either side of the X brace glued to it.
The action is high, and is miserable to attempt to play. At ≈ 161 lbs of light gauge string tension, the action is right at 9/64 inches (3.3 mm, 0.130 in) at the 12th fret. This guitar shipped from the factory with medium gauge strings, not light gauge (like is on it, currently). Add that additional 25 lbs of string tension and this guitar, while sounding remarkably better for the way it is currently braced, would be rendered completely unplayable due to the increased action.

With light gauge strings installed, this neck has a pronounced forward bow under string tension. Contrasted with a straightedge, the gap measures 0.045 in. (about 3/64").
When string tension is removed (by loosening the strings), that gap only drops to 0.031 in. (about 1/32"), demonstrating a permanent bow.
Question: Is that so terrible?
Answer: For me? Absolutely.
Question: Why not simply tighten the truss rod to reduce all that "relief"?
Answer: 1.) This guitar does not feature an adjustable truss rod. 2.) 0.008" is one thing (even half that is plenty, for me), but 0.045" is absurdly tall for relief!

Top deflection is a way of describing how far the soundboard will depress under a specific load. Though is is not necessarily an indicator all on its own, by using the same weight across multiple tests and/or multiple guitars, useful comparisons may be drawn.
I will measure deflection with the strings both tightened to pitch, as well as with the strings loosened. I first apply the weight, then "Zero out" the indicator.
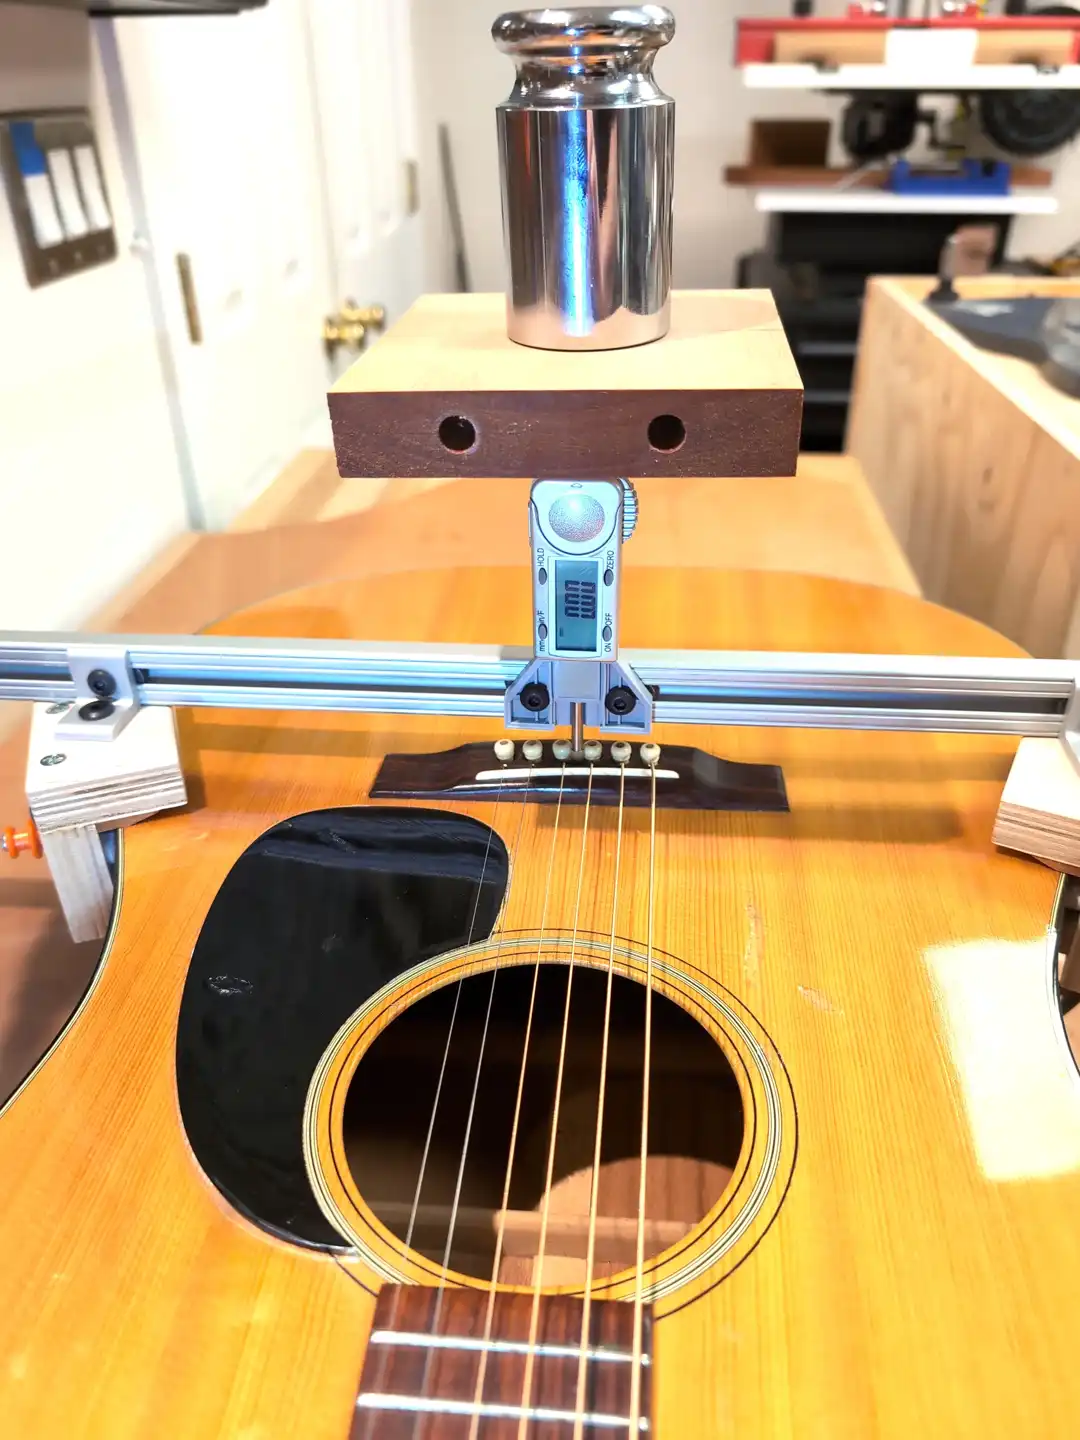
By simply removing the weight, I can take note of the movement as the top springs back to its "before" position (as in, before I added 1 kg of weight to the soundboard, directly atop the bridge). Three (3) tests are sufficient for me to rely on the results. This soundboard is very "tight", in that it does not move much under a 1 kg load.
Top deflection (1 kg - strings under tension): 0.06 mm (0.002 in.)
Top deflection (1 kg - strings loosened): 0.06 mm (0.002 in.)
For reference, with the same weight applied, a high-end D-28 will typically measure ≈ 0.09 mm, while a more modern, boutique soundboard will measure in the 0.12 mm to 0.14 mm range.
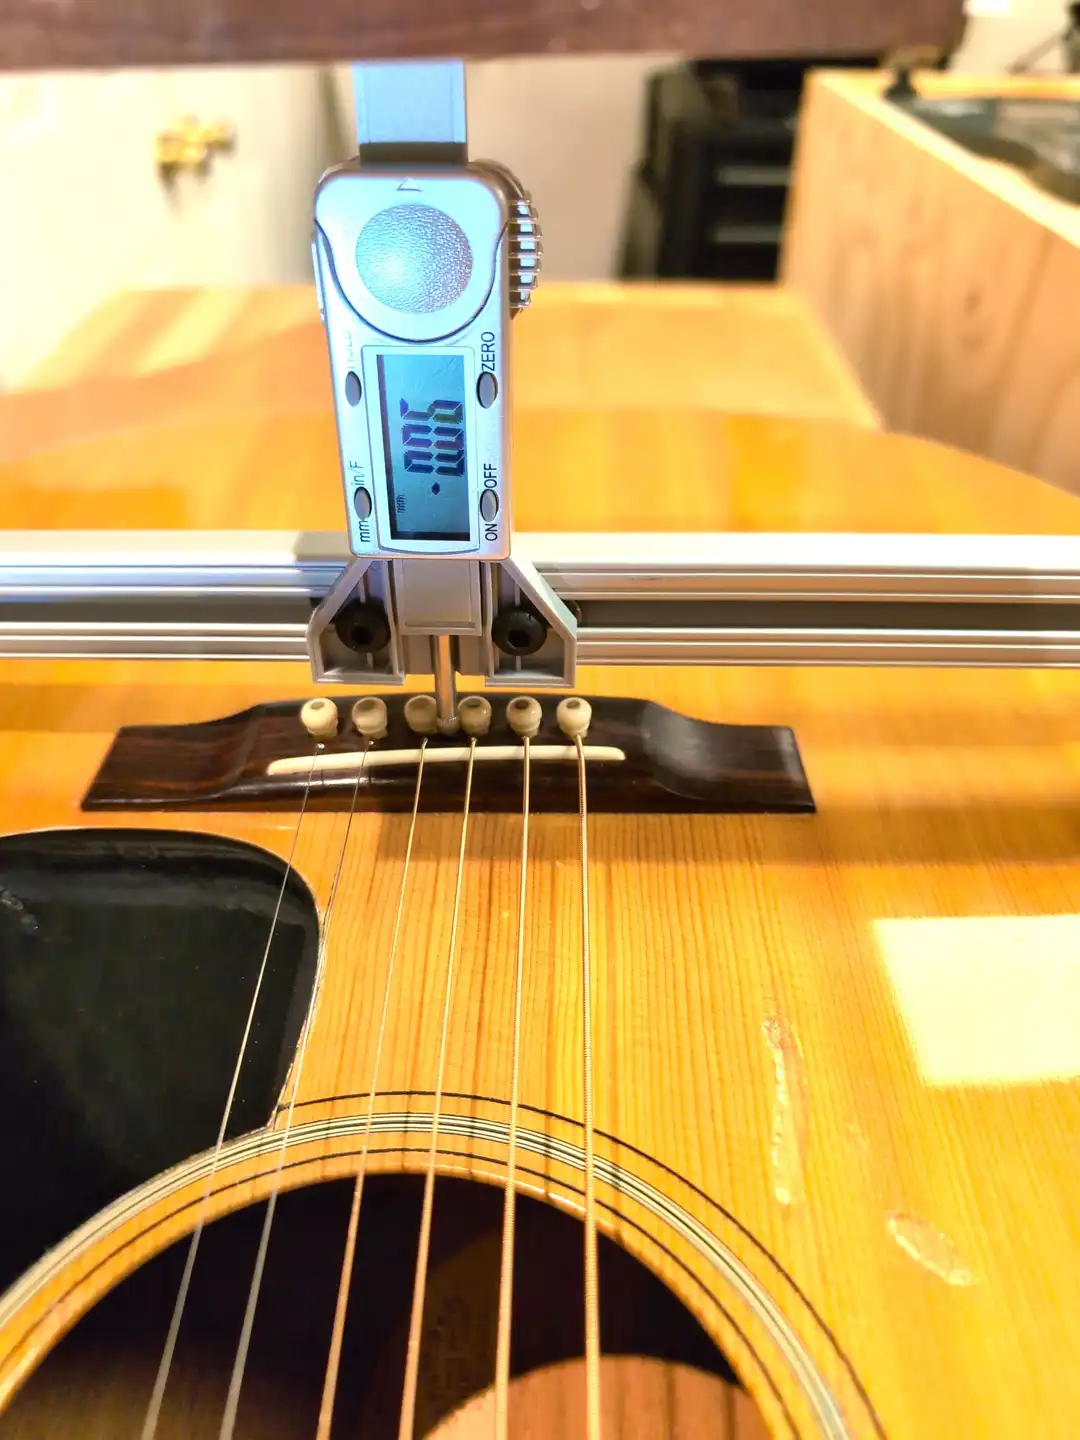
I doubled the weight to 2 kg and repeated the tests. The results are more interesting, and a better example of how this typically works.

Top deflection (2 kg - strings under tension): 0.12 mm (0.005 in.)
Top deflection (2 kg - strings loosened): 0.17 mm (0.007 in.)

Having such a "tight" soundboard on a '70s Martin is not at all unusual, in my experience. And it is good news, frankly, as it can be interpreted as an indicator of the potential of a given guitar. For more reference, I measured a Guild from the same period, with the strings tightened to pitch. Top deflection using a 1 kg weight: 0.08 mm. Top deflection using a 2 kg weight: 0.15 mm.
Soundboard rise is measured behind the bridge and is the difference between the height of the soundboard under tension and not under tension. This Martin is moving 0.27 mm (0.010 in.). This number is important to factor in when calculating how much material to remove from the neck heel during a neck reset.
The bridge rotates forward under string tension 0.8°, indicative of a fairly "overbuilt" (too rigid) X-braced soundboard.
The bridge is 8.3 mm (about 21/64") tall.
The saddle protrudes 1.6 mm (about 1/16") above the bridge.
Overall string height in front of the bridge measures 9.9 mm (3/8").
If the bridge was closer to 9.5mm (3/8"), and the saddle projected another 3mm (1/8") above it, the extra torque would generate better performance with this (heavier) bracing. This is why lowering saddles, let alone shaving braces, on these guitars eventually mutes their output.
A straightedge, when laid along the fretboard, collides into the front of the (already shaved) bridge. At this stage, it is a good indicator of the need for a neck reset.

A few more comparative measurements are needed before I begin work on this guitar.
Body frequency (air resonance, or T(1,1)1: 93 Hz
Soundboard frequency (monopole, or T(1,1)2: 201 Hz
It is painful to play in its current state, but I need to capture a "Before" recording of this guitar.
Before and After
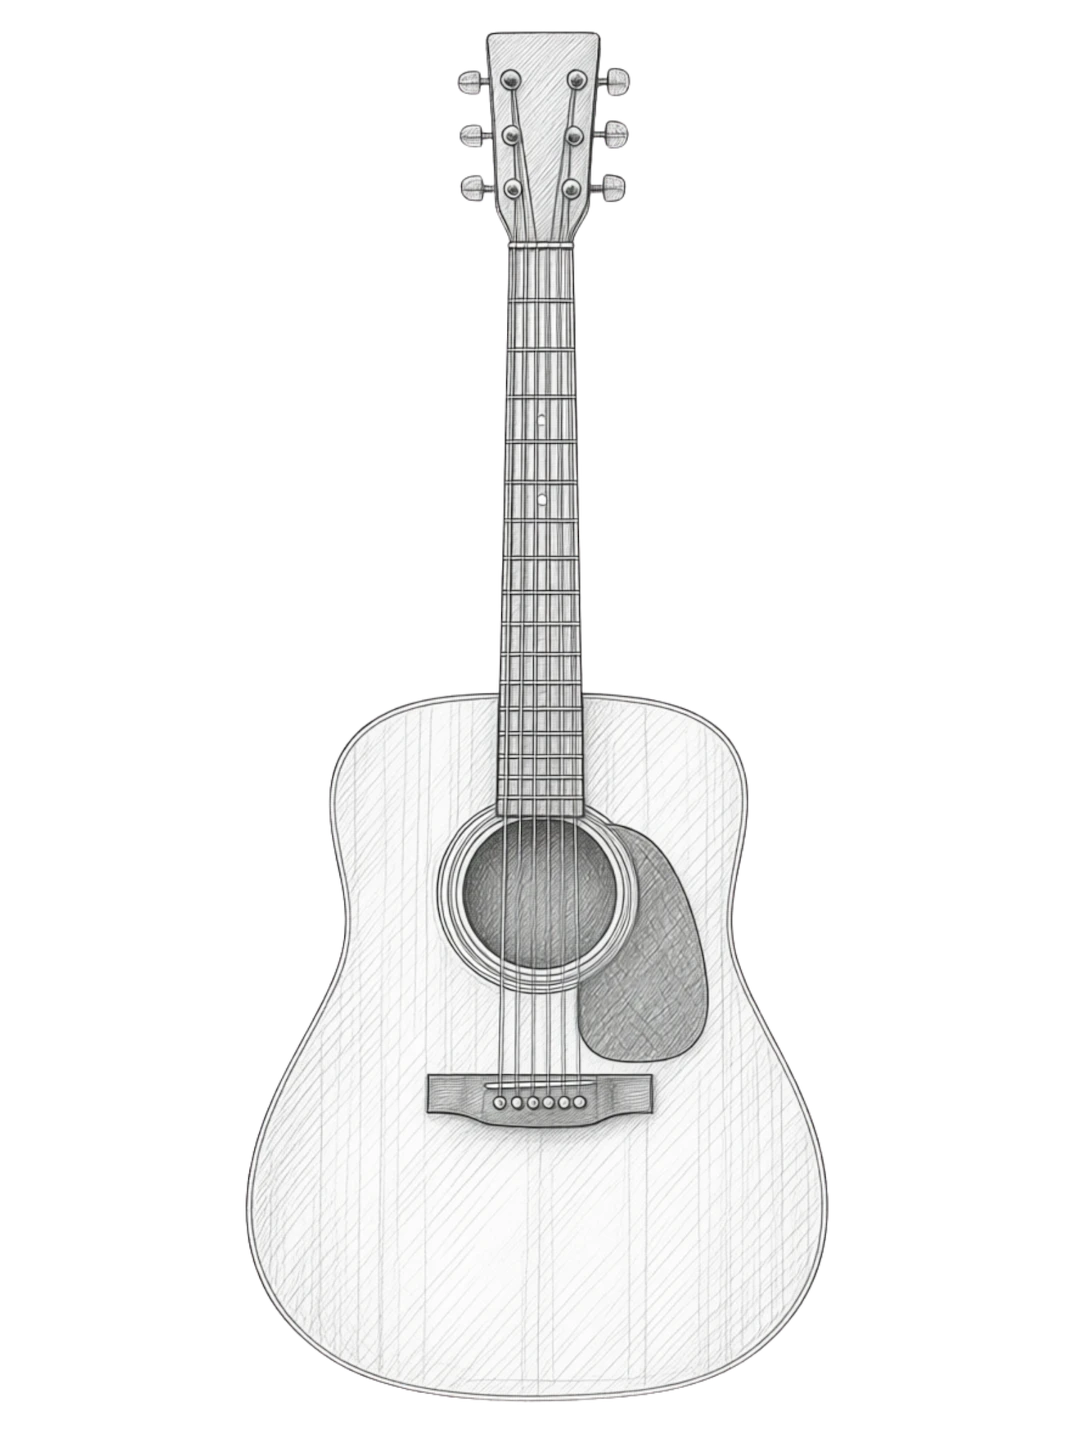
The Assessment
This Martin is plainly appointed, and the owner wishes it to remain that way.
The guitar sounds "ho-hum" and there are definite reasons for its lack of performance. It could and should sound fantastic! I don't want to "restore" the sound of this guitar, as I don't believe it was ever that great to begin with.
I am interested in taking the guitar where Martin could have taken it, had it been built just a few years earlier, or had they been able to spend more time with just the one instrument. I know that I would readily achieve that by replacing the soundboard, but I believe I can also accomplish my goal using the existing soundboard, with a few modifications made to the bracing. We'll see.
I have three paths in front of me, each representing an increasing amount of effort:
Path I
I learned that just weeks prior to the guitar being sent to me, it had visited a local shop. A partial setup was performed, which included polishing the frets, lowering the (Ivory) saddle and bridge, buffing the guitar, and putting new strings on it.
I can only assume that the guitar's owner had requested that minimal effort be made, just enough to assist with the sale of the instrument. I can confirm a quick buffing occurred from the compound I discovered that was driven up under the curling pickguard.
I say, "quick", as only the larger, flat surface areas were shined up. The softened lacquer sections on the soundboard and back of the neck, along with the gunk I encountered all over the balance of the finish is a genuine cry for help. The finish is damaged. For this guitar to be put back into circulation, I am forced to address it.
The setup work was adequately performed, though I would not have invested in it - not for this instrument in this condition. Put more simply: this guitar has long passed the point where a fret polish, bridge and saddle modification, and a hurried buffing could be anything but a waste of money. It has so much potential, but that is going to require going much farther ...
Path II
The neck must be reset and (most likely) a new compensated saddle (either with a wider slot and/or a new, properly cut slot) will have to be made in order to address the action height and intonation issues. The common accepted practice for countering forward bow in these non-adjustable necks, the "hide-my-tracks-so-it-doesn't-look-like-I-was-here" technique, is called "compression fretting". It involves hammering in frets having a wider tang in order to induce a back bow.
The pickguard split has to be addressed, and the pickguard will need to be replaced. Braces have to be re-glued. Regarding the finish scarring, I am still surprised at the number of people who will just chalk this level of damage up to "vintage mojo".
There may be a number of players who would be happy to inherit any guitar after this much effort was put into it. For a heavily discounted price, of course, seeing as how the guitar is "no longer original".
But this guitar has potential for much more. Besides, in my shop, "vintage mojo" is typically just another phrase for damage that no one wants, or is able, or can afford to correct, so I'll be taking this even farther ...
Path III
I intend to overcome the issues that branded this guitar a "Dark Years" Martin. To get there, I am going to make a few modifications.
This instrument has already been valued solely on the basis of its "vintage" worth, and here is the damning conclusion: It is an early 1970s Martin in far less-than-optimal condition - a guitar that nobody actually wants, as is. Leaving it "as is" will not improve its economic value; whereas, not just making it eminently playable, but actually improving the guitar ,certainly won't hurt it.
Here is what I plan to do to set things right with this instrument ...
The pickguard will be removed (and eventually replaced with a new one, after the finish issues are resolved).
I will repair the split in the top that was caused by the shrinking pickguard.
I will remove the bridge and replace it with one having the correct height.
I want to correct the permanent bow in the neck. The pull of the strings eventually overcame the stiffness of the 3/8" square tube truss embedded in the neck, and bent it into a permanent forward bow. There are only a couple of ways for me to address this neck, and both of them require the fretboard to be taken off and the metal truss to be removed.
Why not just hammer in wide tang frets? Hasn't that worked for perhaps thousands of repairs?
For this guitar, if it would even work, this technique is a temporary fix, at best. It is not a thorough and complete correction of a really serious condition. This "fix" was developed back when hardwood trusses were the norm, and there was no alternative to mitigating forward bow. By the time the steel tubes had replaced the T-bar stays, the technique was well-known, and was considered a fast and cost-effective solution.
Here is my problem with compression fretting (or, the "wide tang fix"): You are now deliberately deforming the fretboard in a contest against a bent steel tube (as opposed to a straight stiffener that is bowing under string tension). In the best case scenario, where the wide tang-forced back bow actually stays where it was installed, this "fix" only lasts until the next fret job (that some poor soul gets to inherit, all thanks to you). It has no place in my shop. I will pull the fretboard and remove the metal stiffener.
I could retrofit the neck with a dual-action adjustable truss rod. If you haven't already read my article on the topic, I would encourage you to have a look, prior to continuing. You can get to it, here » The Truss Rod.
Instead of replacing metal with more metal, I'm going to replace the square tube with a carbon fiber D-Tube from DragonPlate. In addition to being much more in keeping with the guitar's original design (a fixed, stiff neck), this will lighten the neck and offer a superior resistance to the string tension. I have extensive experience with this solution, and have dedicated an entire article to the topic, which you can access here » D-Tube by DragonPlate - Truss Rod Alternative.
Once I see how the fretboard removal and re-attachment goes, I will address the frets. They may stay, or they may be replaced. I will reset the neck and make a new bone compensated saddle.
That leaves two significant items that require attention. One is the soundboard bracing, which governs the tonal quality (or lack, thereof) of this guitar, and the other is the finish. At this stage, I intend to open up the box to gain proper access for the most important modifications, the ones that improve the sound.
That involves removing the binding and probably pulling the back (though I may remove the soundboard - I haven't decided, yet).
I am looking forward to swapping out the large Rosewood bridgeplate and replacing it with a much smaller Maple one, the same design found on all those killer-sounding pre-war Martins, some now worth more than houses. The bracing will be adjusted as I "re-voice" the soundboard. Reassembly will then warrant new binding.
Regarding the finish, well, we'll visit that again when we get that far.
Beginning Disassembly
All of the parts and accessories get removed, first. That includes the strings, plastic pins, saddle, nut, tuners, and the strap button (I had already removed the pickguard prior to taking the "group" photo. It came off without incident.).
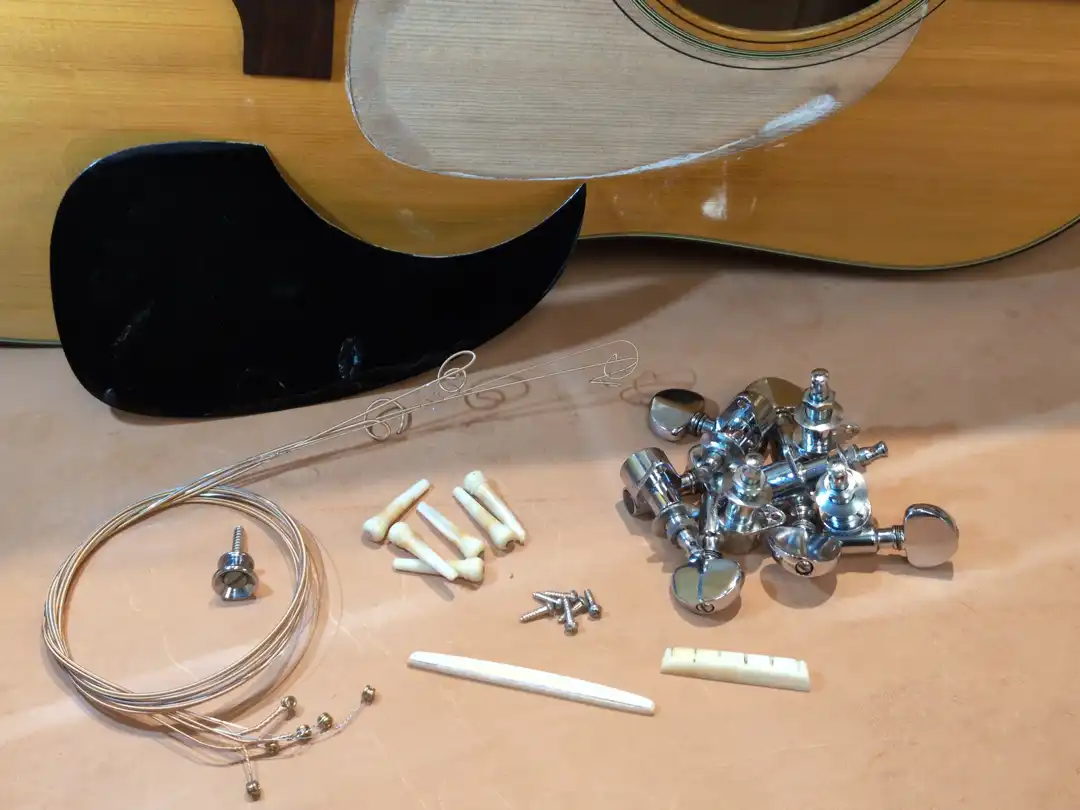
Here is the photo I took immediately following the removal of the pickguard. This process always goes one of two ways, either with a clean removal or a wood fiber tearout. This one required just a little bit of heat and rewarded me with a super clean removal.
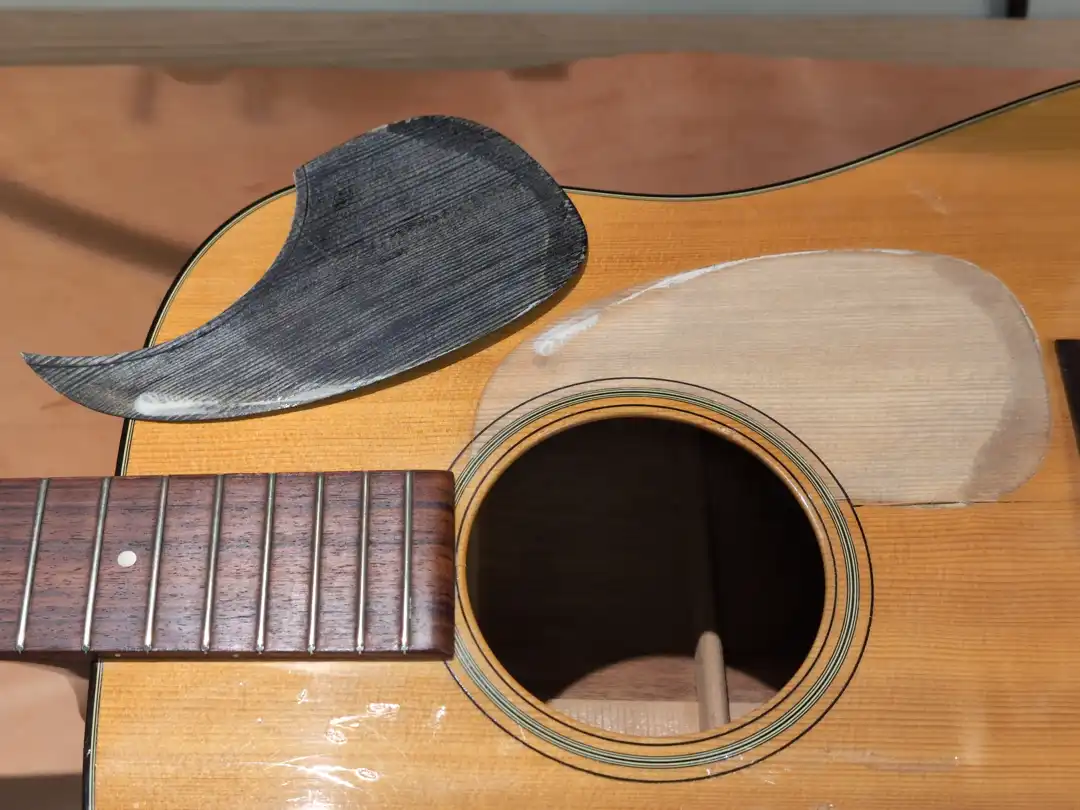
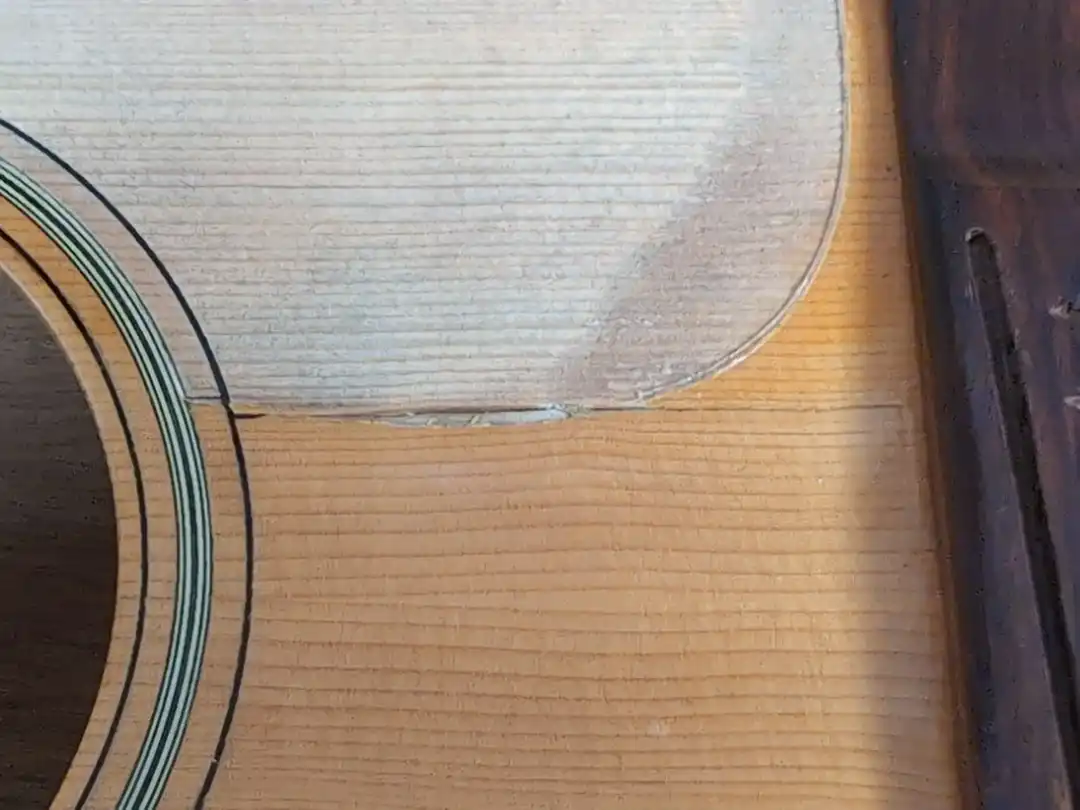
The split in the soundboard is more clearly visible, now:
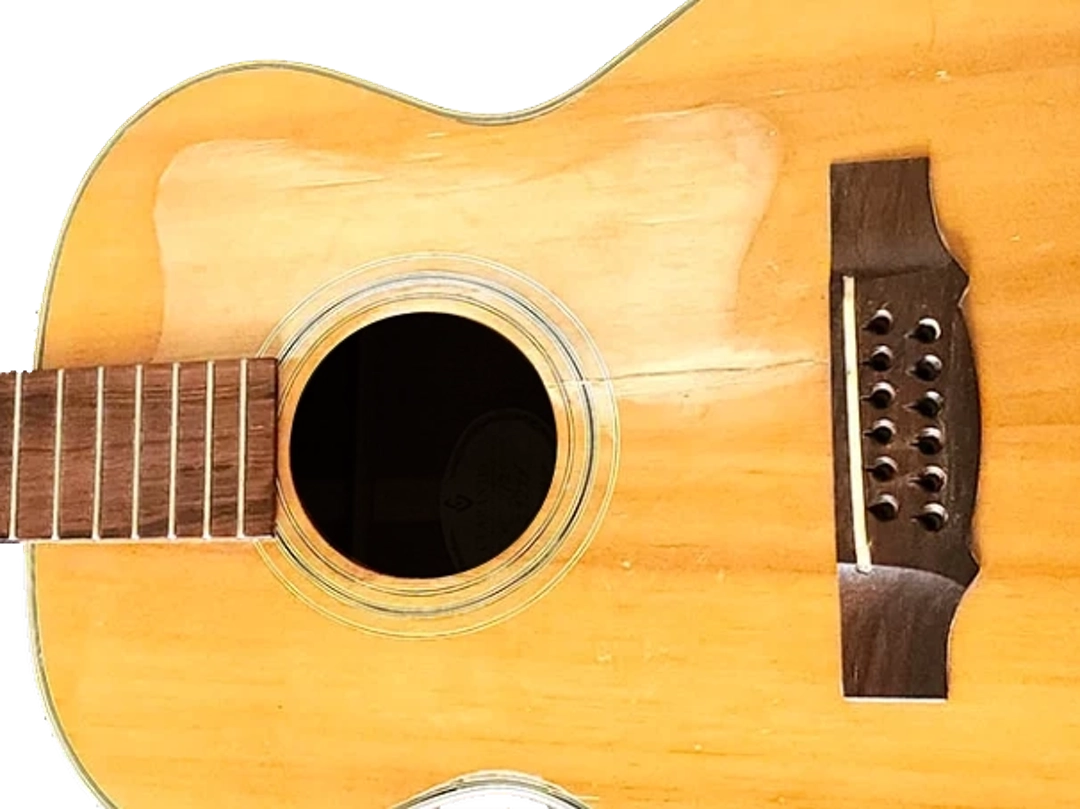
This type of soundboard split is not unique to Martins. Below is a Guild that is six or seven years older exhibiting the same type of split.
Here are photos of the headstock, front and back, with the Grover Rotomatics removed:


Of course, the pinnacle of achievement has been the advent of the dual-action truss rod, a variation of the single-action version. Using this machine, the player can manually curl the guitar neck both back and forward several times a minute, if so desired. I have dedicated an article to the topic, titled » The Truss Rod.
Bridge Removal
Focus now moves to removing the bridge. I use a small heat blanket connected to a power source to warm the glue holding the bridge on. A thermocouple lets me control the temperature to keep things safe and secure.
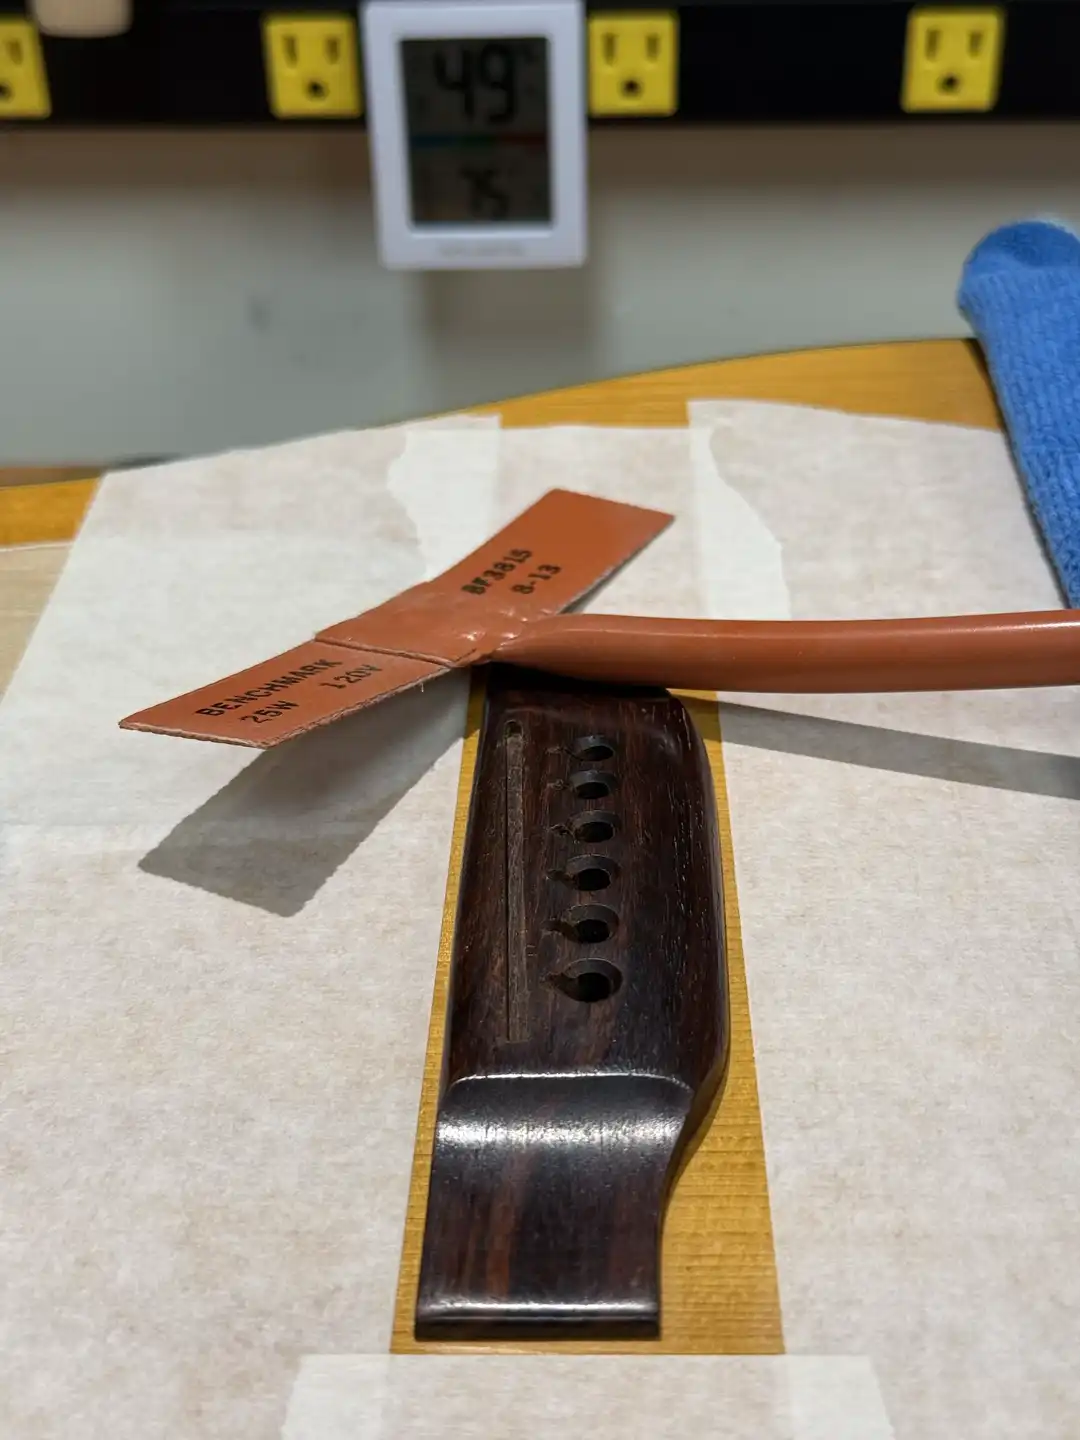
There are a few ways to accomplish this, and they all usually result in a delicate balancing act with some serious heat involved. I built a simple jig that mounts to the neck and holds a swappable caul. This leaves two hands free to manage the heat.

I set these types of blankets to ≈ 190° F (88° C) for bridge, fretboard extension, fretboard, and headplate removal. I never leave a heated blanket unattended (a developed habit). Upon occasion, a drama may occur, involving some combination of heavy runout, or a surprise adhesive, and/or not allowing that extra minute or two of adequate heating to soften the glue prior to sliding in a palette knife. But "patience" is the operative word.
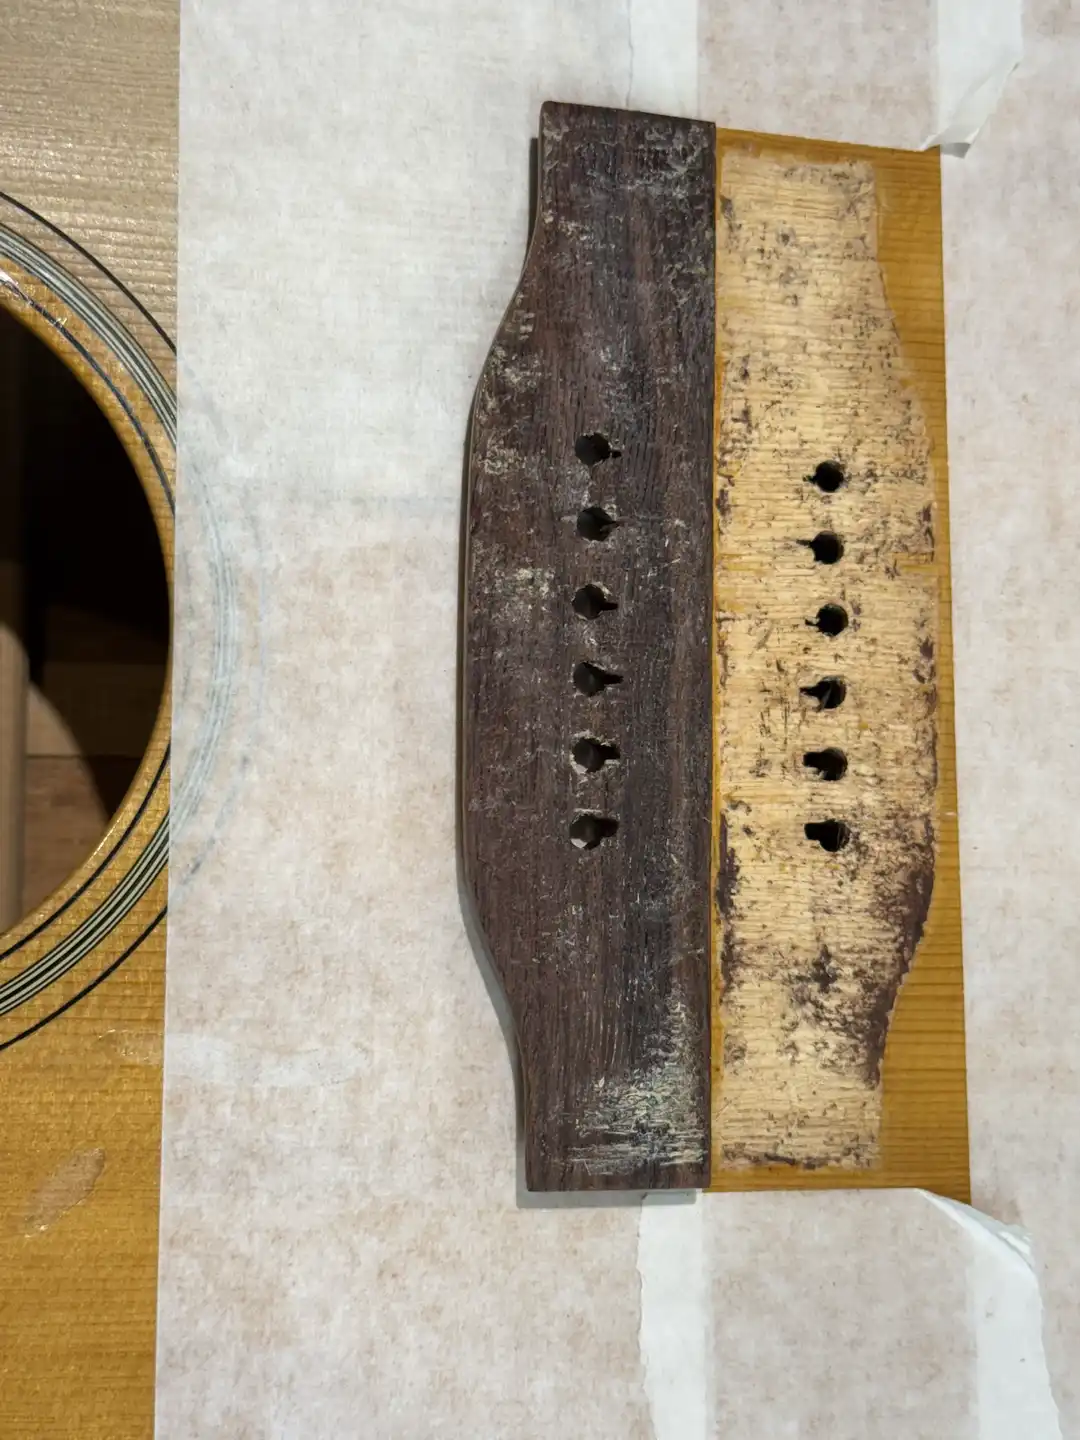
This bridge came off so cleanly after only about 10 minutes of heating, it made me curious. I took a little harder look at the two mating surfaces. It is not completely unusual to find bridge wood fibers on the soundboard, along with soundboard wood fibers stuck to the bridge. But it is unusual if they don't match.
There are just enough sections of missing Spruce on the soundboard that are not on this bridge (and should be if they were just torn off during this removal) to make me think this bridge may have been removed, before.
Regardless, the bridge is off without drama.
Fretboard Removal
Whenever possible, I prefer to take the fretboard off of the guitar leaving all the frets in place (regardless of their condition) and leaving the neck still attached to the body.
If you remove the frets, first, you exponentially increase the risk of splitting the fretboard during its removal. If you remove the neck, first (as you would for a neck reset), you have to come up with a means of holding it, either by the heel or the headstock, while you both apply heat and work with palette knives.
I carefully scrape the lacquer at the edge of the fretboard, along the line formed where the fretboard contacts the neck, in an effort to mitigate lacquer chipping. I used to heat a blade and scribe the line, but that line is not always where you think it is.
I lay a long, trapezoidal heat blanket atop the fretboard, lay a strip of cork insulation on top of that, then rest a metal radiused sanding beam on top of the pile. A couple of clamps hold the assembly tight against the fretboard. After bringing the blanket up to temp, I let it warm up the board for about 15 minutes.

I set the large blanket aside and switch to a short rectangular blanket, of the same type that I use exclusively for removing the fretboard extension (after all, that is what I am about to start with). Stay with me, as this should make sense, soon.
I lay a short, wooden radiused sanding block atop that blanket, and set a weight on it to maintain good contact. I quickly bring the small blanket up to temp and begin testing the extension for glue release.

I use a long palette knife to carefully separate the fretboard free and away from the soundboard.
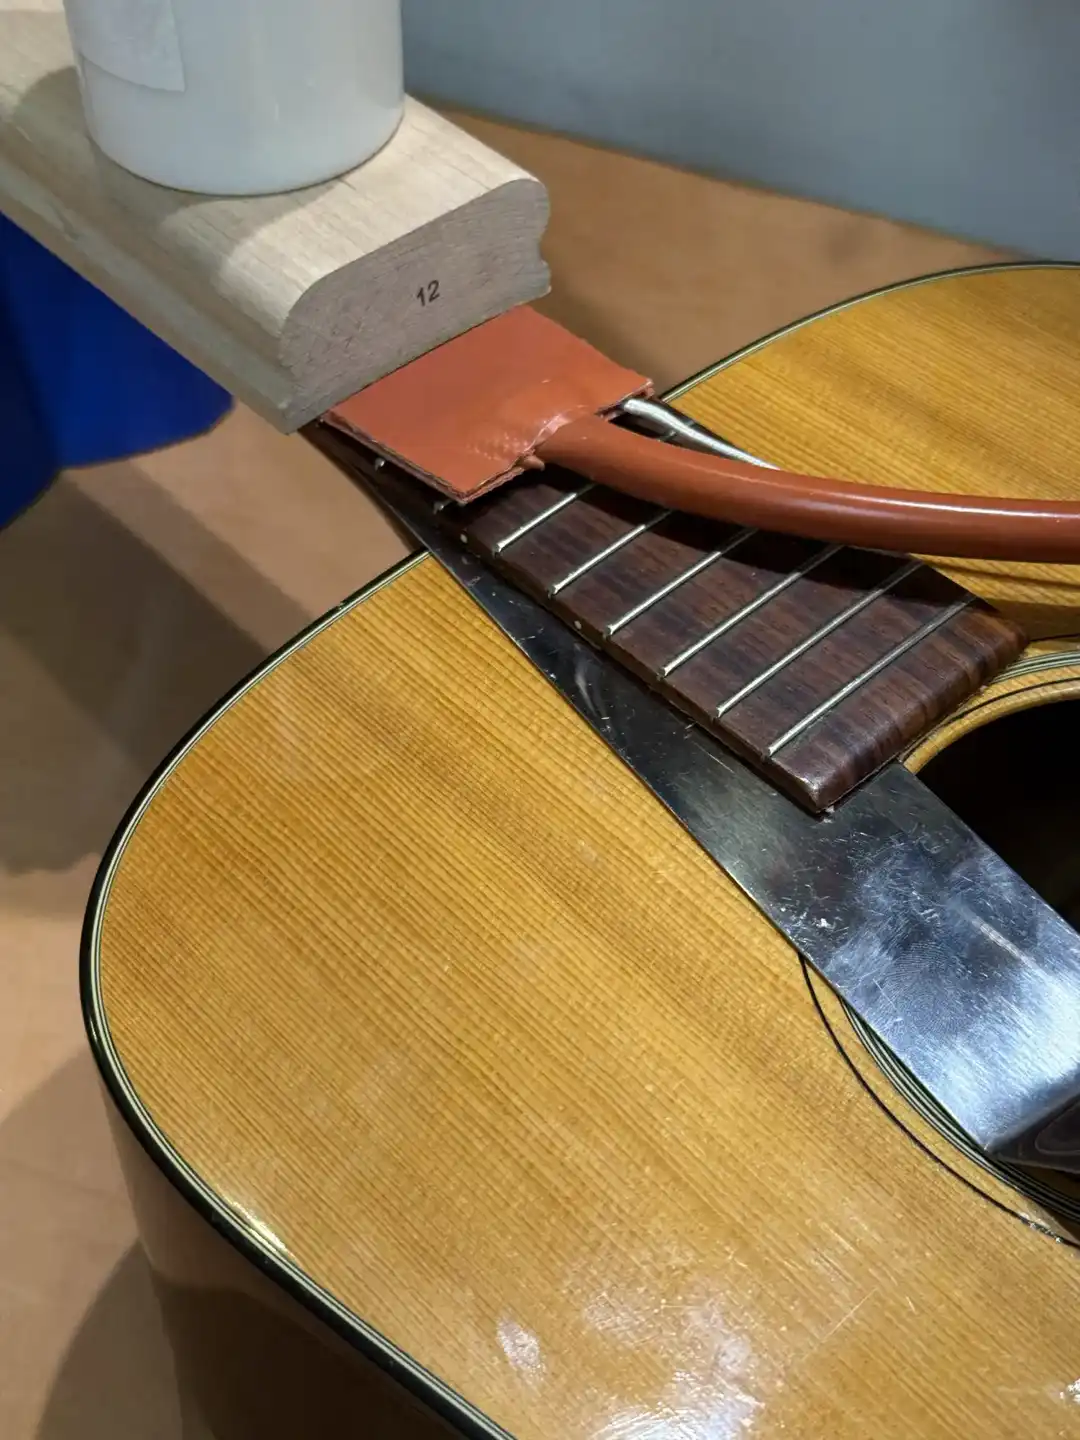
But I'm not stopping after releasing the fretboard extension from the soundboard. I slide the small heat blanket assembly a short distance up the board and work the palette knife (or knives, as needed) to separate the fretboard from the Mahogany neck. Cast your gaze upon this beautiful site:

Lather, Rinse, Repeat. I work my way up the fretboard, letting the heat and the knife's resistance to the glue guide me. It is so important to maintain sufficient temperature transfer, and let the heat do the heavy lifting. If my setup is too cool, I risk damaging the wood. If it is too hot, the wood will discolor / burn.
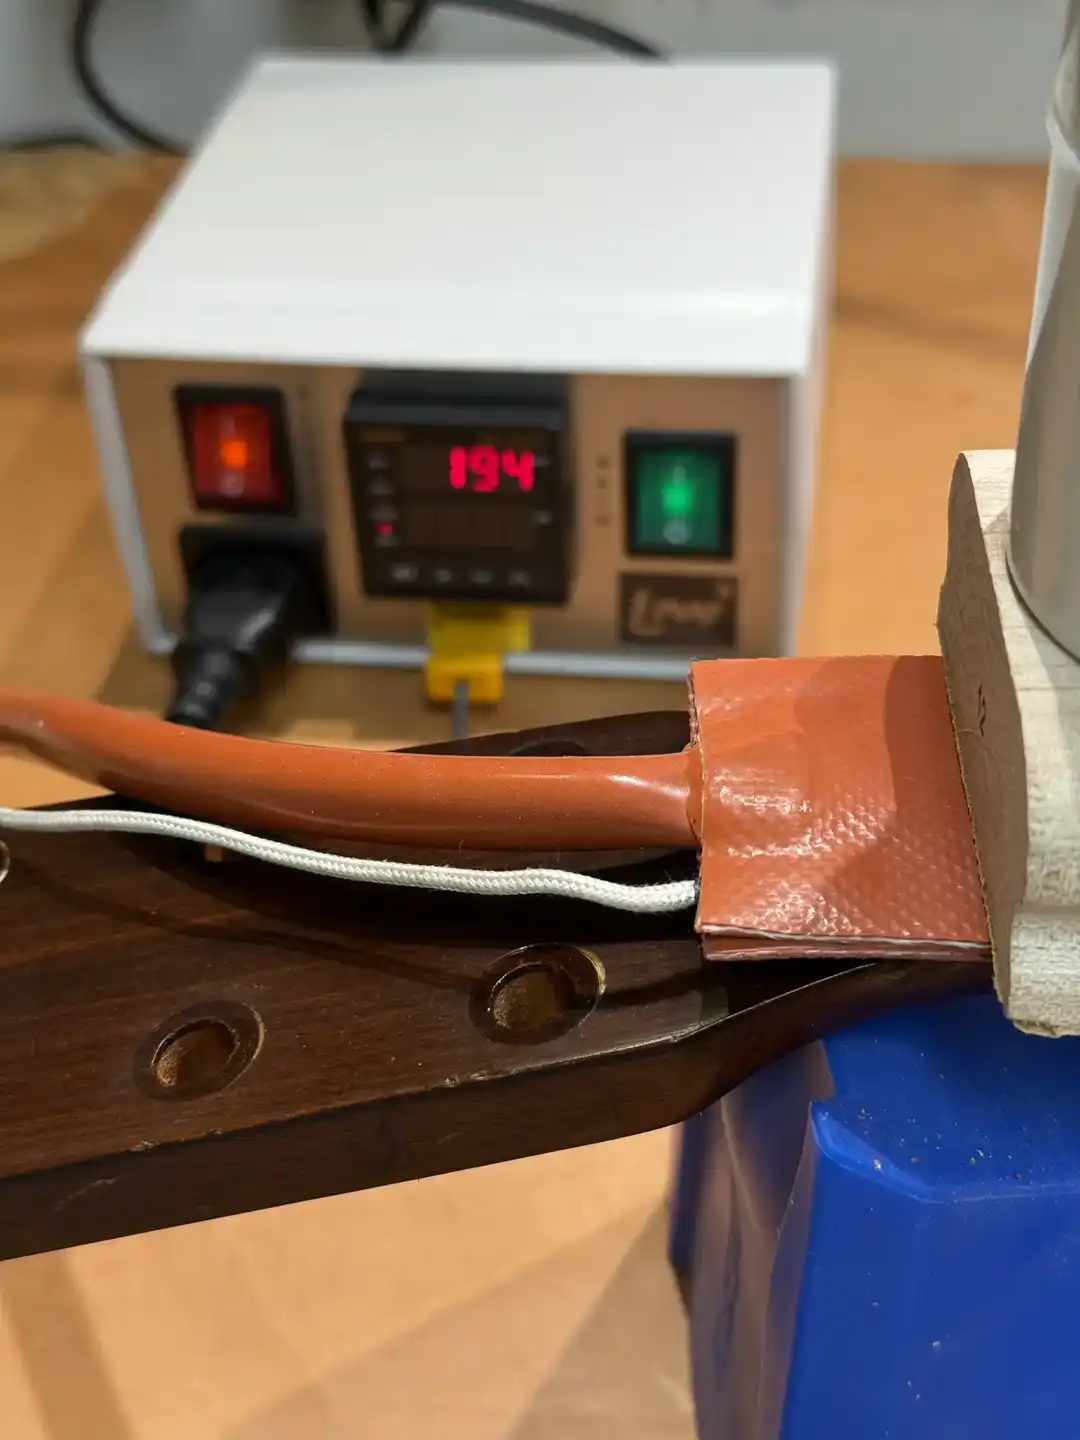
As you can see in the photo, above, I reversed the direction of my short blanket once I got up to the first fret. Using my little assembly of blanket, caul, and weight, his let me get better contact with the very end of the board.
The results speak for themselves. A very clean fretboard removal.
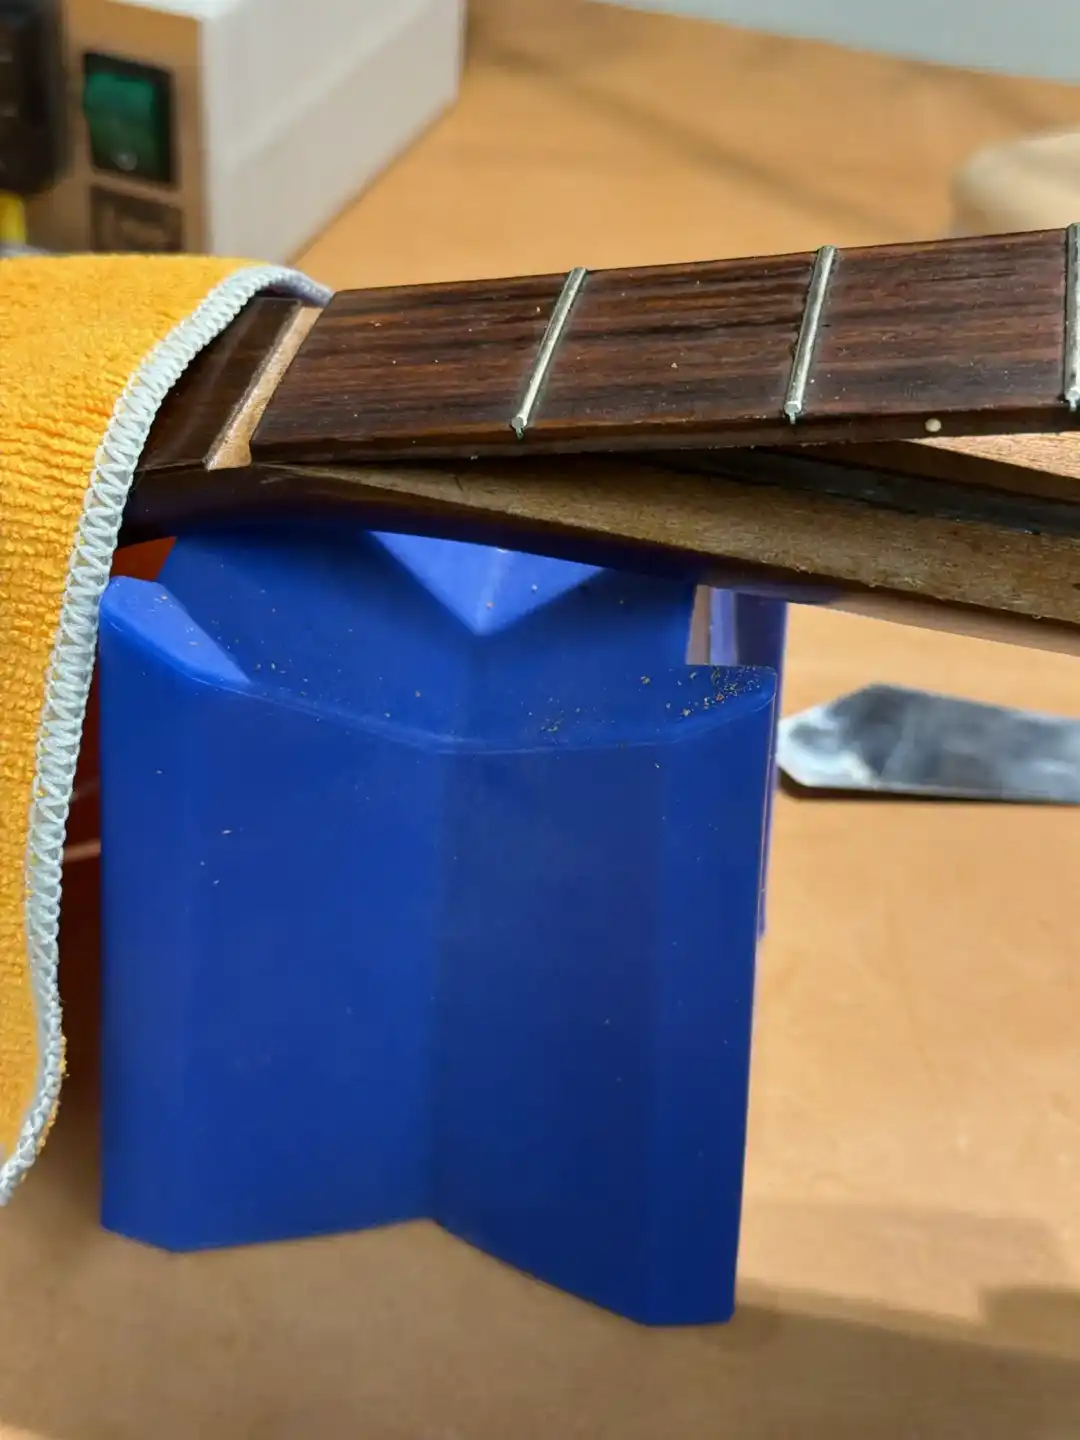
You get a clear view of the infamous 3/8" square tube. Take note of the dark stripe running down the length of the steel. The tube is marked on one side, the side intended to face "UP" during installation. It is the side that will be in contact with the fretboard. I will reference this stripe again, a bit later.

The underside of the fretboard is very clean, as well, but for a section of the fretboard extension. There is a reason for that, as we shall, shortly.

Forensic Moment
You may have already caught site of it, but here is a close-up showing evidence of a previous neck reset. Two holes were drilled through the board at the 15th fret, spaced so as to avoid hitting the steel square tube, all to gain access to the space between the end of the tenon and the back of the mortise in the neck block. That almost worked.
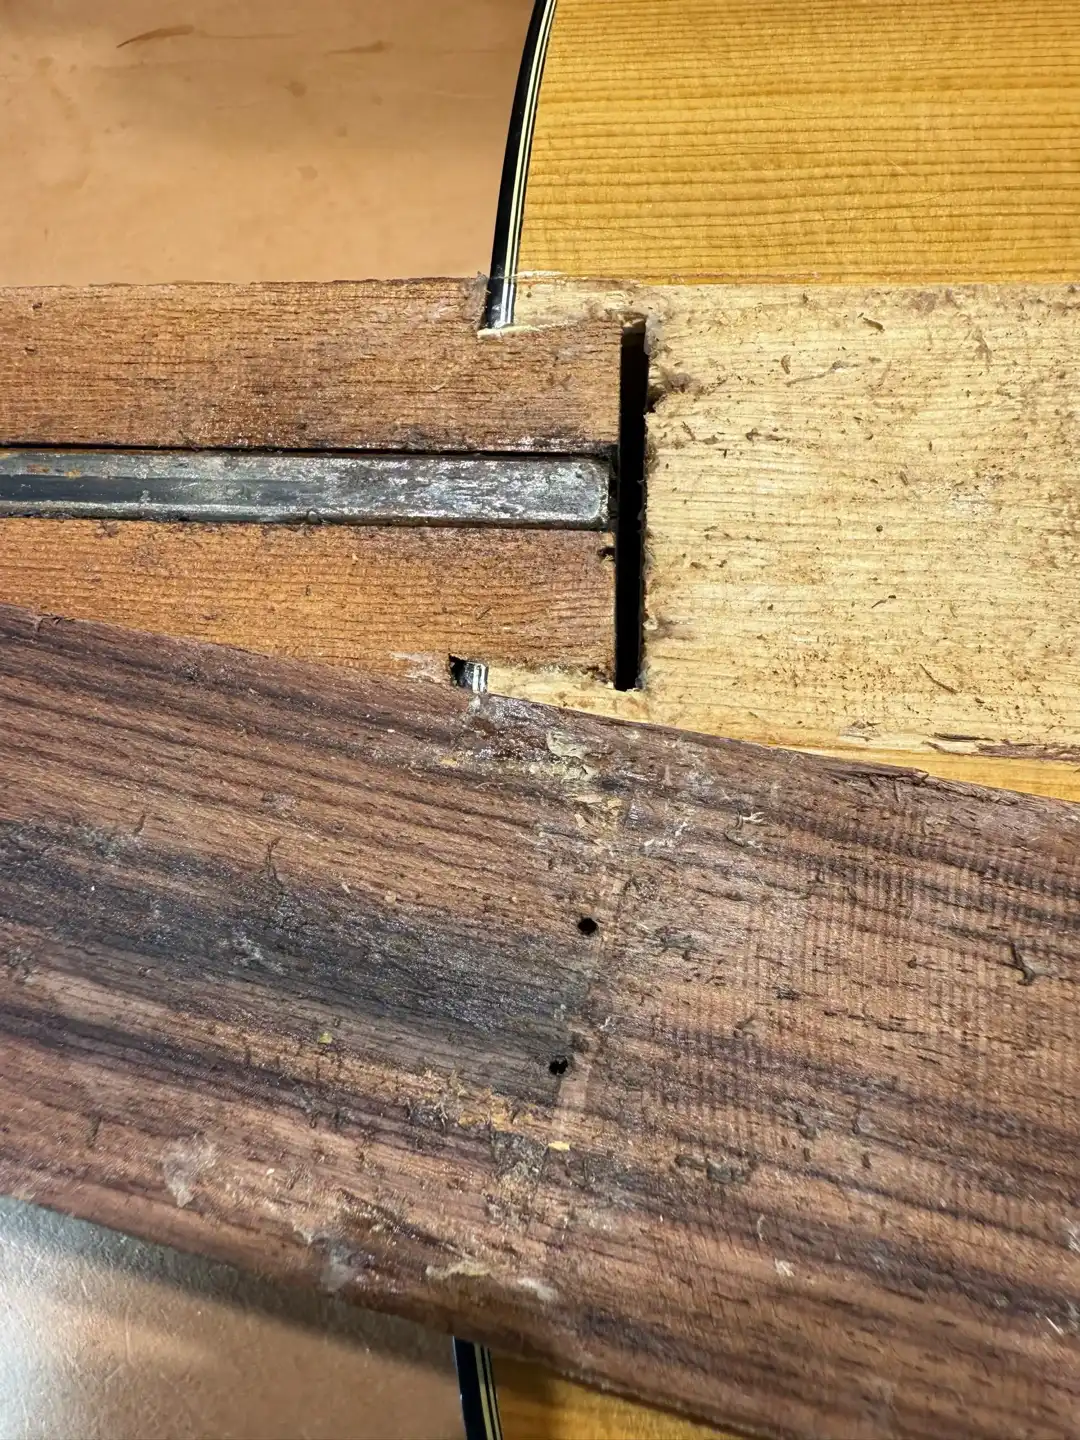
When the neck was replaced, it was shimmed (those thin, light-colored wood on both sides of the dovetail).

Here is a better view of the area of the soundboard beneath the fretboard extension. The Spruce is in remarkably good shape, especially considering that this is the second time the fretboard has been removed.

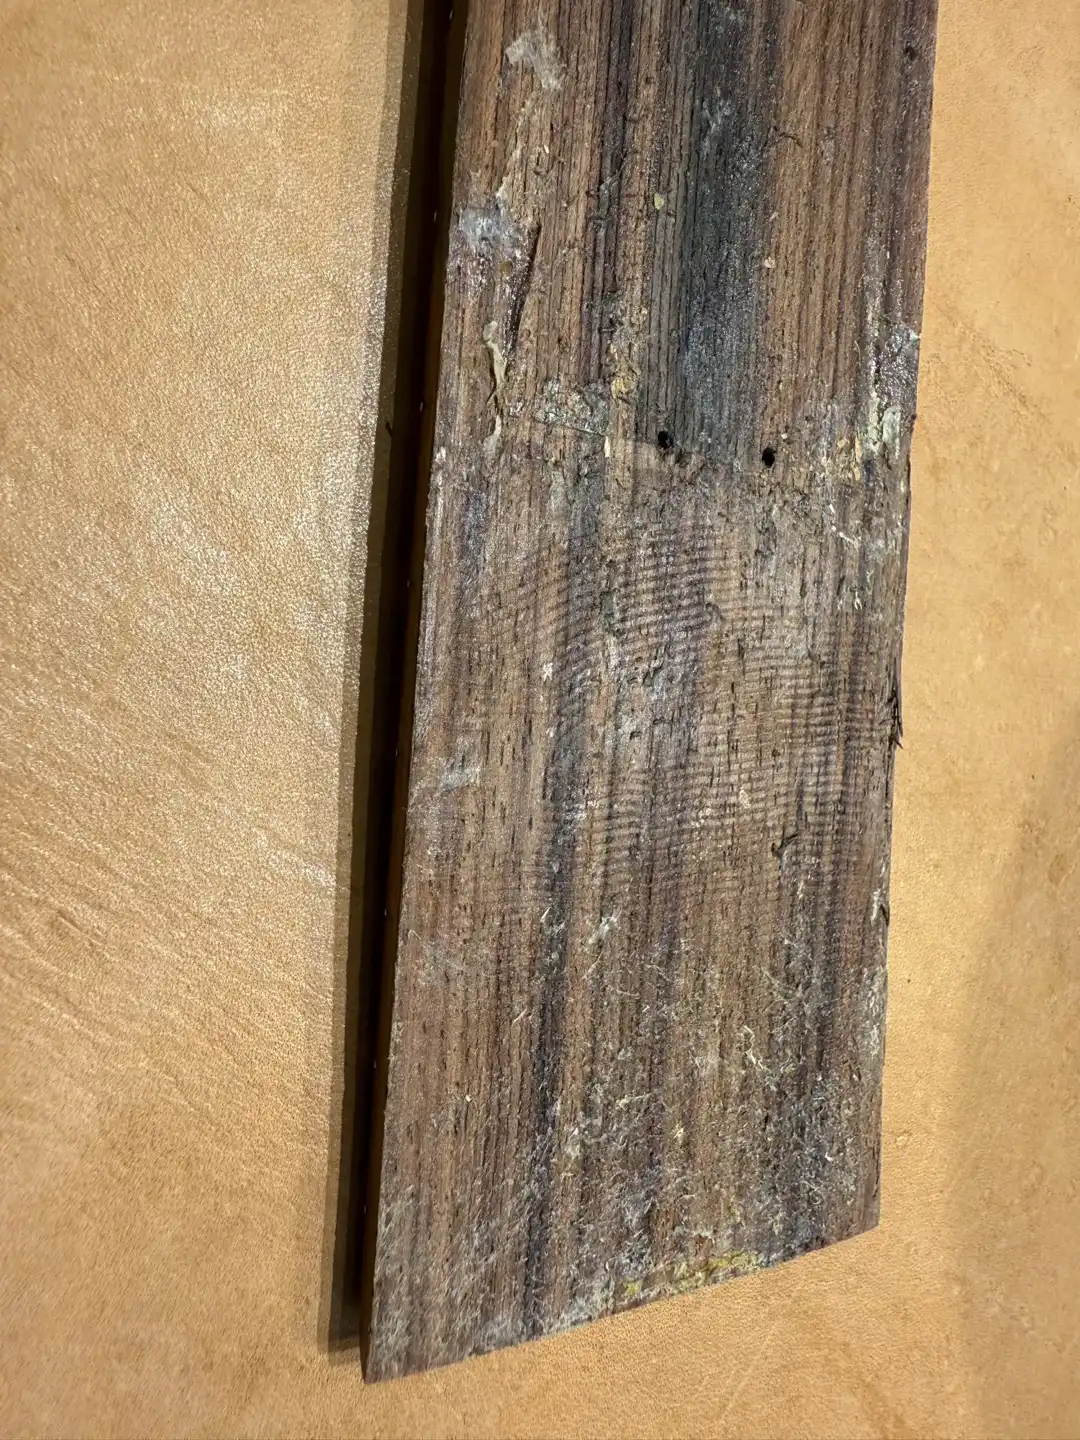
Here is a corresponding view of the underside of the fretboard. Neck removal #1 tore its share of fibers loose from the Spruce top. Gone was the 220-grit smooth sanded surface that was present when the guitar was built.
A generous amount of adhesive was (re-)applied after that first neck removal, adhesive that had an opportunity to find lots of new surfaces to bond with, making future removal(s) more difficult.
I don't have any hard numbers on what percentage of necks are reset with a "Not my problem" approach regarding future repairs. From my own encounters, I am convinced it is a compounding issue.
No soundboard can withstand this, at least, not for very long. Whether, like me, you consider this to be a damage condition, or not, you have an issue with your guitar that time will exacerbate.
Removing the Square Tube
I laid the fretboard heat blanket on the surface of the neck and warmed the square tube for ≈ 10 minutes. After setting the blanket aside, I switched to my trusty heat gun. I worked the body end of the neck first, focusing heat on ≈ 6 inches of metal at a time.
I switched to the headstock end and repeated the heating. Using a slot screwdriver as a lever and a sacrificial stick as a fulcrum, I worked a little on both ends of the tube, pausing my prying to re-heat the metal. First on end, then the other, back and forth.

The heat softens the glue sufficiently to permit a gentle prying to release the bond.

No drama. The square tube lifted out cleanly. Total elapsed time: < 10 minutes.
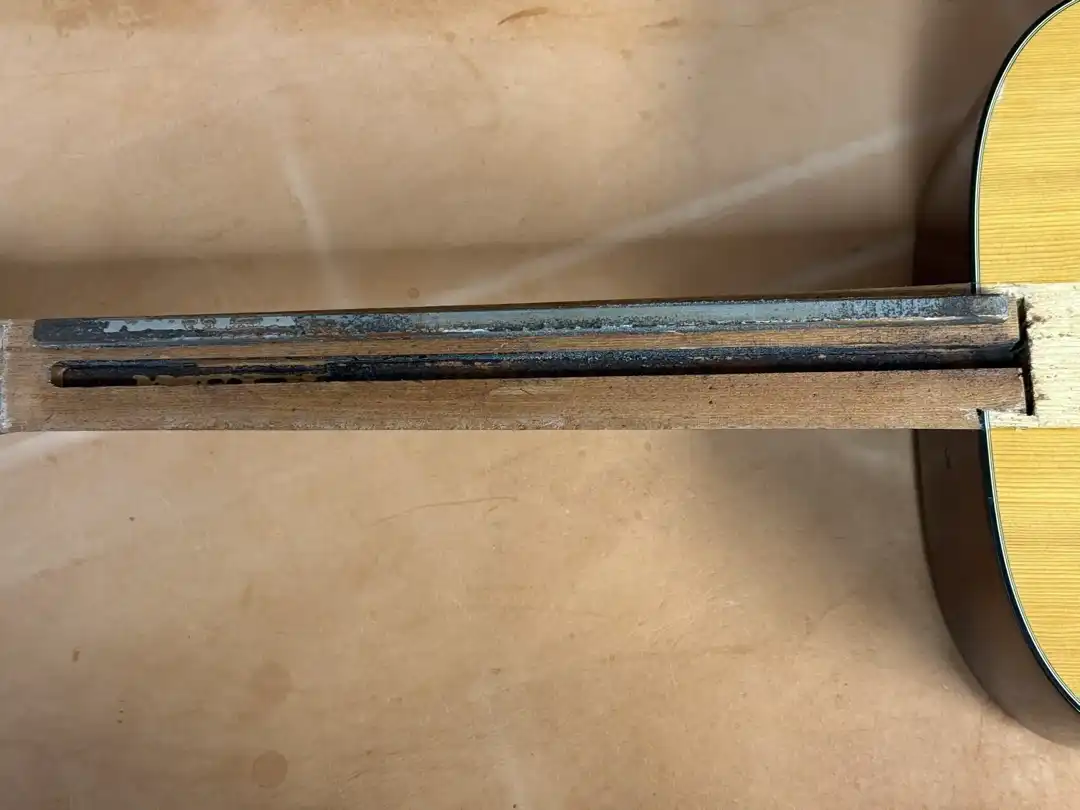
The question of neck material depth comes up from time to time, so this is a good opportunity to document it. Using a depth gauge, I can measure the thickness of the neck remaining between the bottom of the groove and the back of the neck.

One revolution around this particular dial indicator is 10 mm. That means there is 6.7 mm (0.26 in) of neck material remaining beneath the 1st fret. This neck increases in thickness as I move toward the heel, though the groove remains the same depth.
Stiffness is all about height. For example, imagine incorporating an "I" beam into a guitar neck. One plate would be affixed down the center of the back of the neck, and would be tied to a second horizontal plate running along the surface of the fretboard.
While it might make for the world's stiffest neck, such a design is impractical for obvious reasons. Additionally, an I-beam would not have the torsional benefit of a square tube, meaning an I-beam would provide less resistance to twist. But a square tube cannot have the same height (depth) in the neck.
The square tube measures precisely 0.375 in (9.53mm).

Martin would have selected a 3/8" square tube as a stiffener because it was as deep as they could reliably inset a SQUARE into a neck that is ROUNDED on its back without the edges of the square breaking through.
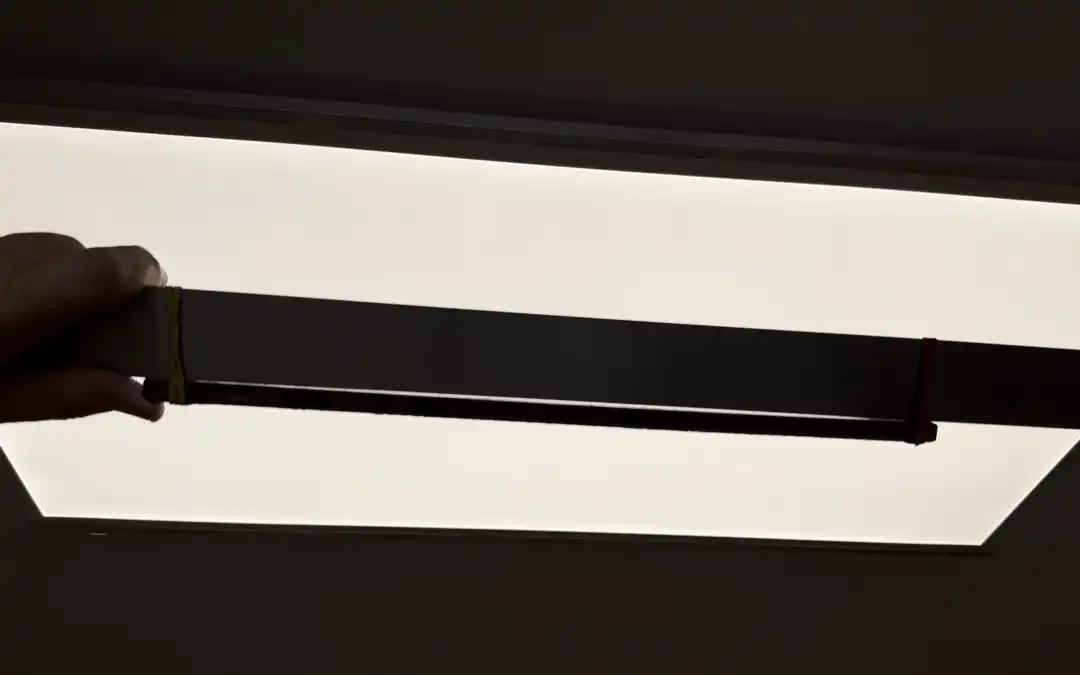
I placed the side of the square tube having the dark stripe running down its length up against a dead flat straightedge, I could just barely get a 0.030" feeler gauge between the two. It is most definitely "bent", bowed by the same amount that I measured in the neck with the strings removed.
Here is a photo with the square tube rubber-banded to the straightedge and held up to the light. You can clearly see the bend in the steel.
Removing the Neck
I have reset many a cantankerous Guild neck using this HeatStick, though it does require drilling two LARGE holes through the fretboard that are NOT covered by replacing a fret. With the fretboard safely out of the picture, and with the massive gap between the neck tenon and the mortise in the neck block seemingly begging for it, I decided to try this yet one more time.
There is no "hole" into which to insert the hot metal wand. Instead, there is a cavernous slot, filled with air, into which I drip a small amount of distilled water in order to generate steam. The goal is to soften the glue. This scenario always works in my head, but it is not as successful in practice.
If you are unfamiliar with the whole disassembly process, you might assume that removing a neck where the fretboard has already taken off would be a breeze. Well, that isn't necessarily the case. An attached fretboard works much like a lid on a pot, holding the warmth in. My pot has no lid.

As with the 6 times I've tried using a HeatStick like this, previously, I switch over to steam.
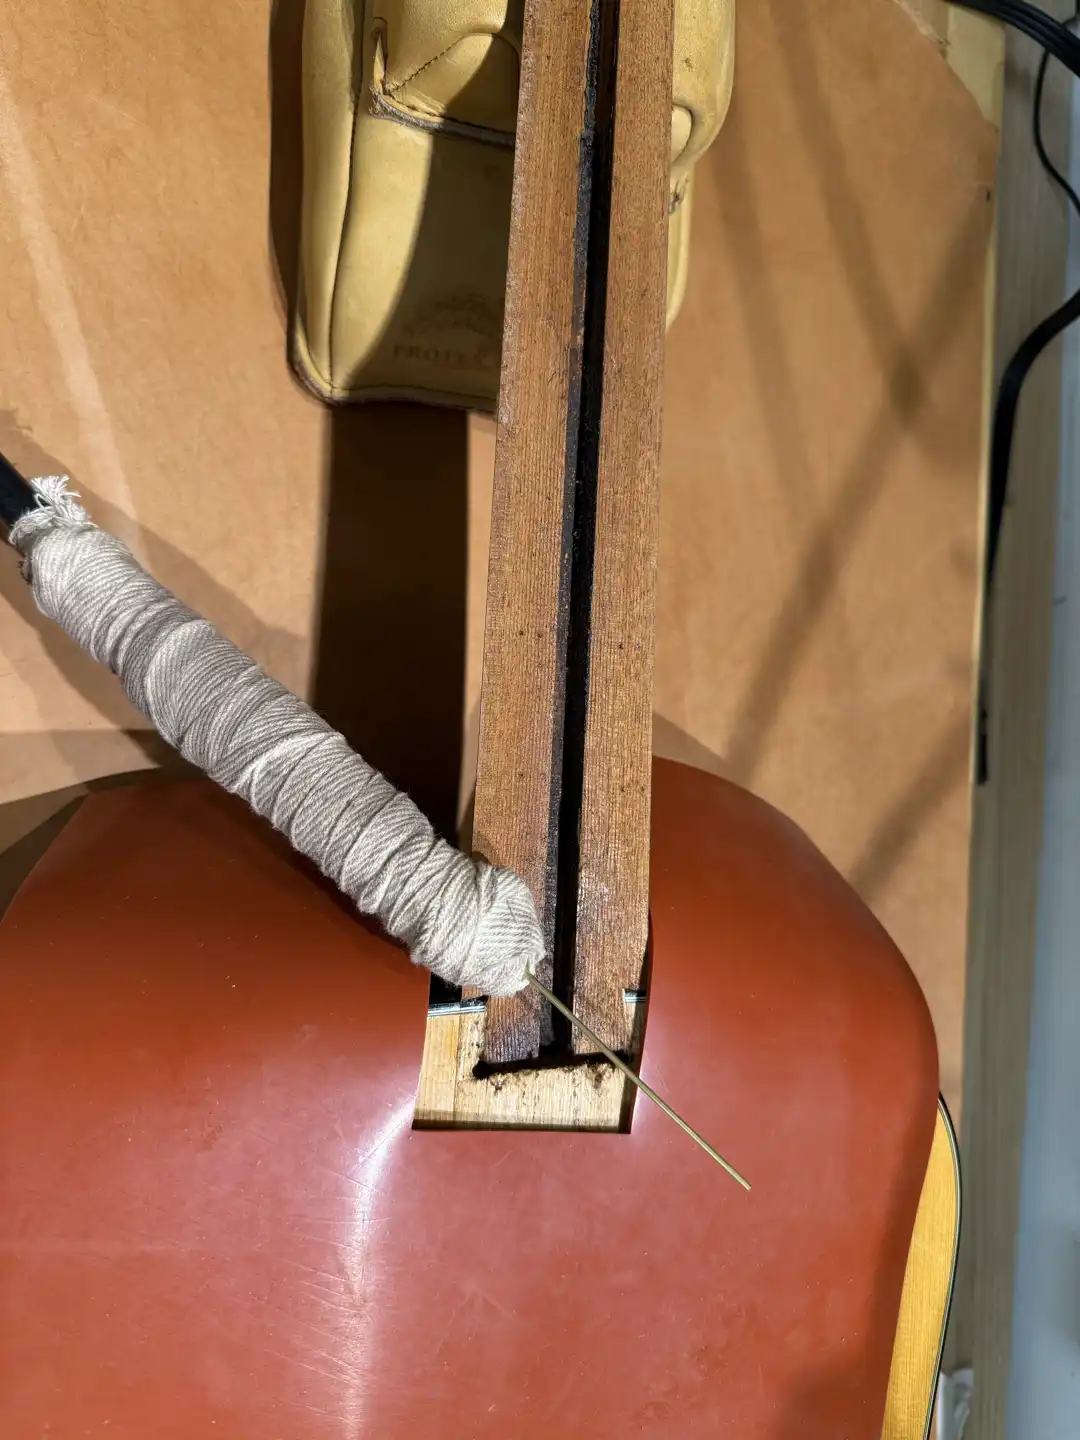
It is a tried and true method. It does seem to take longer than when a fretboard is still attached, due to the open area being subject to more rapid cooling. But it works.
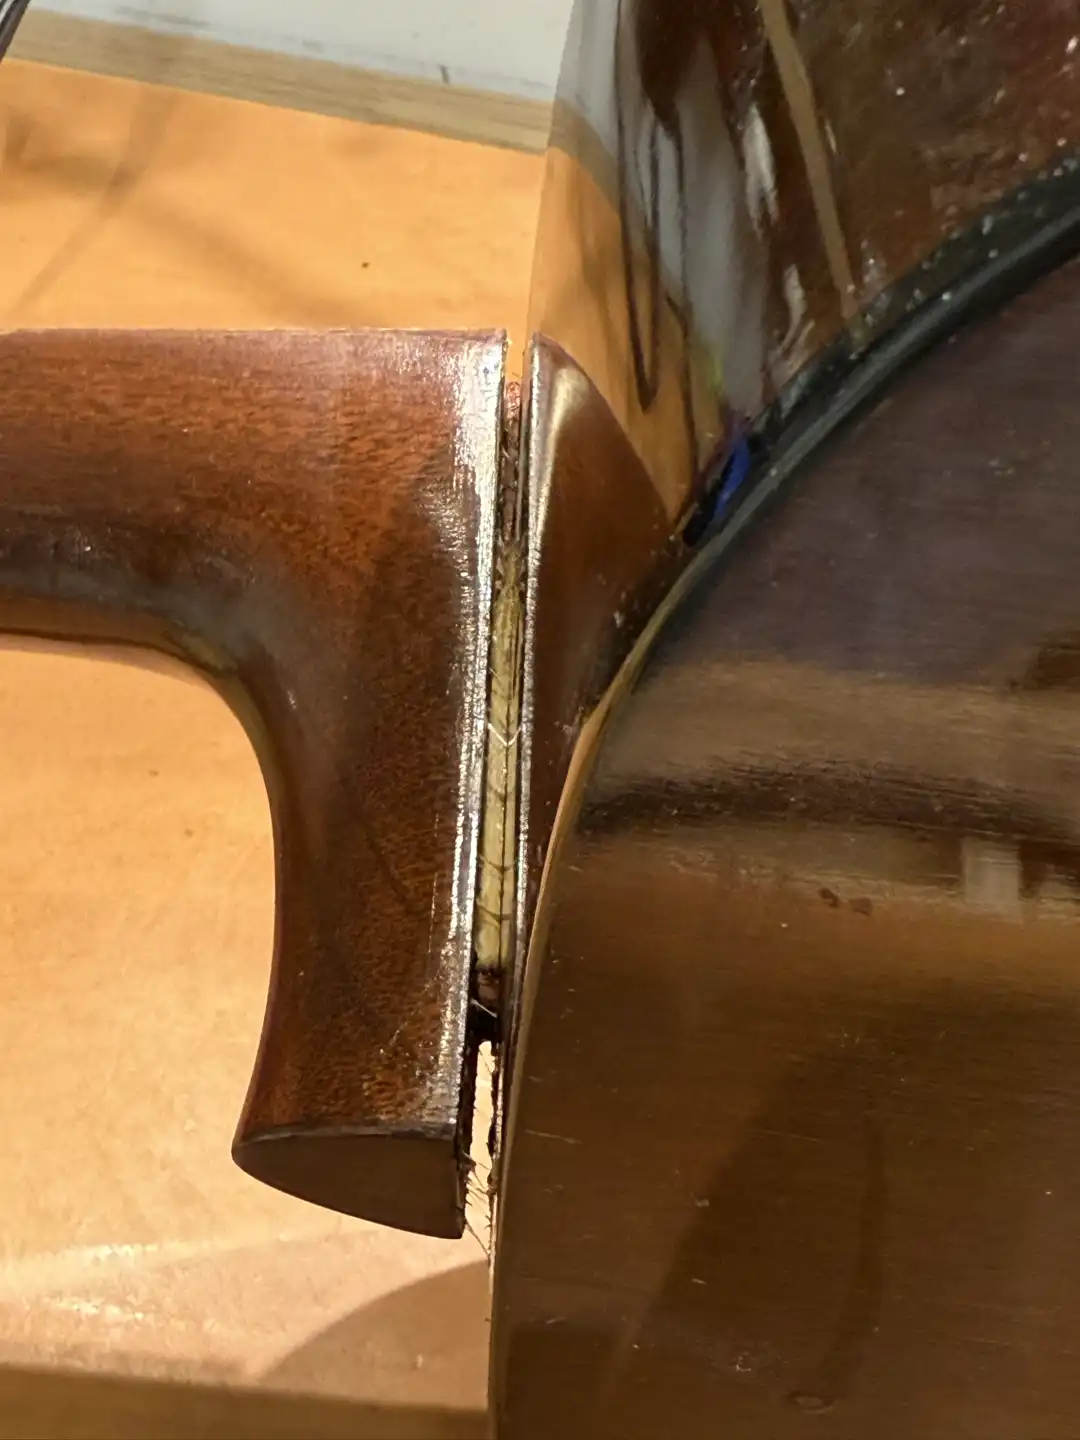
The neck is off, cleanly. The previous neck setter did a nice job.

You may recall, I had measured the permanent forward bow in the neck at 0.031" before I removed the fretboard (see the "Measurements" section, above).
With the neck off, the fretboard removed AND the steel square tube removed, the Mahogany neck has a permanent forward bow, measuring 0.030". I'll fix that with the carbon fiber.