Making Acoustic Guitar Body Molds

Introduction

Here is how I make my own custom acoustic guitar body molds, the wooden forms that determine the shape of the guitar body and hold it in place throughout construction. This article details how I use a bandsaw, router table and spindle sander for the task.

Of all the fixtures and jigs in my shop, perhaps the single most important is the body mold. There are several acoustic guitar body molds readily available for purchase, so long as you happen to be building the instrument the mold was sized for. But what if you want to build something different, a guitar that deviates from the popular, factory-made guitar shapes and sizes? You make your own body mold, of course!

Cozad Guitars - Cozad Body Mold

Is it okay to make a simpler body mold than what I show in this article? Of course! That is what I often do when I am prototyping. For my established body shapes, however, the ones I use over and over again, I invest the effort into what you see in the photo, above. These jigs/fixtures become "shop furniture" that will outlive me.

The Body Mold

When I alter an existing guitar body or introduce a new body shape or size, I will first lay it out on paper. Paper is great for sketching out concepts and making measured drawings for future reference. If I am trying to replicate an existing guitar, I can carefully trace the outline of the body directly onto the paper, and then verify my drawing with actual measurements.

I have a collection of paper drawings that are decades old. They have remained well-preserved, as I don't use them for construction purposes. Instead, upon completion of a new drawing, I will immediately create an acrylic or hardboard template from that paper drawing. This non-paper template will be subjected to repeated use in my shop.

Creating a body pattern template out of clear, hard plastic or hardboard by hand may seem a bit tedious, but it will serve multiple purposes and is well worth my efforts.

NOTE: My shop-made templates are sized to the outer dimensions of the guitar body (we will re-visit this issue later, in the section subtitled, "Adding the Body Shape"). Using my paper drawing, I trace/scribe the body shape onto my choice of template material, rough it out on the bandsaw, clean it up at the disc and belt sanders, and perfect it by hand.

A simple shop-made body mold is then constructed by laminating multiple layers of a strong, stable material into a block, band-sawing the block lengthwise into two pieces along its centerline, tracing the outline of the body of the guitar onto each half, band-sawing the contours out of each of the two halves, and finally utilizing some method of holding the two halves together to form one unified body mold. If you are curious as to why the block for the mold is cut in half, as opposed to being left intact as one piece, it is to allow for disassembly and removal once the guitar body is complete. It could be risky to build an entire guitar body in a one-piece mold and then attempt to remove the body from the mold once complete. It is much easier to spread the mold apart and take the body out.

In the photo, below, I have laid an acrylic template on top of the plywood I will use to make the body mold. The acrylic template represents the precise exterior dimensions of the body of the guitar I will be making the mold for.

Cozad Guitars - Body Mold Acrylic Template

If you are wanting to build a mold similar to what I use, I recommend reading through my article, first. You may choose to alter your own approach which may, in turn, affect your own materials list. I have include a basic materials list, below, for what I build.

List of Materials
  • 3 pieces of 3/4″ (23/32" or 18mm) plywood, approximately 24" x 24"
  • 2 pieces of 3/8″ (11/32" or 9mm) plywood, approximately 24" x 24"
  • 2 pieces 1/8" (up to 1/4") hardboard or plywood, approximately 24" x 24"
  • 2 pieces of 3/8" hardwood doweling, at least 3-1/2" long
  • 2 pieces 5/16-18 threaded rod, approximately " long
  • 2 nuts
  • 2 washers
  • 2 cross dowels, threaded for 5/16-18
  • 2 pieces of 3/8″ aluminum dowels (hardwood dowels will also work just fine), 2-1/4″ long
  • 1 plunge router
  • 1 brass inlay set (Whiteside 9500)
  • 1 piece 1/8″ spiral bit (Whiteside RU1600, or equivalent)
  • 1 pattern/flush trim bit
  • 1 drill bit 3/8" x 12" long
  • Wood glue
  • Double-sided tape
  • 1 set of 3/8" dowel centers (optional)

Layup

I like to use plywood for my mold and jig construction. Inexpensive plywoods often contain very large voids in the veneers ("plies") which, if ignored, can introduce inaccuracies in your finished work. You are welcome to hunt down the voids, fill and sand them smooth. You may be able to save some money in the process. If you have access to higher-quality plywood, you can avoid a lot of grief and save a lot of time. MDF works, also, though I don’t much care to deal with MDF sawdust anymore, and cut it as little as possible. I do not recommend particleboard or strand board (OSB), but your mileage may vary. Solid woods may be used *if* you are willing to laminate several thinner layers together, consciously altering the grain direction for dimensional strength and to avoid environmental issues (warping, cupping, expanding, shrinking, twisting, bowing, etc.).

My body mold contains five (5) layers of plywood; three (3) inner layers of 3/4″ (23/32" or 18mm) and two (2) outer layers of a thinner, 3/8″ plywood (11/32" or 9mm). After glue-up, this block measures just shy of 3" thick/deep (2-29/32" or 74mm). If you have a CNC, or are working diligently to conserve material, you may choose to proceed differently. I am not trying to build the most slender and lightweight form the world has ever seen. I want to support as much of the width of the sides as is practical while still allowing for radius dish access. In the approach I have presented here, all five (5) pieces are cut roughly to 24″ x 24″ square prior to "sandwiching" them together.

Cozad Guitars - Body Mold Plywood Pieces

I dry-assemble the plywood pieces, which means I stack all 5 pieces on top of one another without glue, in the order in which they will be glued, check them for square on one corner and clamp them together. I lightly draw my guitar body shape on the plywood as a reference (these are NOT cut lines).

Being mindful of the body shape I have just drawn, I drill two (2) holes completely through all five (5) layers, one hole on each side of the plywood "block", in (what will become) the waste area of the plywood. A dowel will be driven into each hole after applying glue, to properly align the plywood pieces.

Doweling the plywood pieces, while entirely optional, allows me to focus my attention on simply clamping the plywood together when I begin adding glue. Without the dowels to register the laminate layers into position, I get to deal with trying to keep five (5) separate pieces of wet, gooey, glued wood aligned as they slip in various directions while I am applying clamps. It is possible, but it is not fun.

For the dowel registration holes, I drill a 3/8″ hole into which I will hammer a 3/8″ hardwood dowel. While most any diameter of dowel will work (1/4′, or 1/2″, etc), too small a diameter of dowel can break while I am hammering it in through this many layers of wood. If you are making a thinner body mold, you may have better success with smaller diameter dowels.

Cozad Guitars - Body Mold Alignment Holes

The stacked plywood pieces are clearly marked on one edge for proper alignment during re-assembly. If you are unfamiliar with glue-ups like this, draw two legs of a triangle, like you see in the photo. Lay out your sheets of plywood so that, as you apply glue and re-stack the sheets, you "re-assemble" the legs of your triangle.

Cozad Guitars - Body Mold Reassembly Marks

The plywood pieces are then unclamped, staged (set aside, but in proper sequence for gluing and re-assembly), glue is applied, the layers are assembled and pinned together using the dowels (for alignment/registration), and finally clamped tightly back together again. Your favorite wood glue is applicable, here, as most anything will do. I have probably used all of the available glues over the years: whites, yellows, epoxies, though I have been using polyurethane glue for lamination projects like this, more and more. If you do choose to use (or audition) one of the polyurethane glues from Titebond or Gorilla, be sure to lightly wet ("spritz") the wood prior to thinly applying the glue. Polyurethane glue depends upon moisture in order to cure. I apply the glue to one face using a card scraper or thin piece of wood, and I wet the other face with a spritz bottle of water. Polyurethane glue will expand up to three (3) times it’s volume as it dries, so a little goes a long way.

Regarding clamping, if you have knowledge of using cauls with clamps to span sections of wood that clamps alone would not otherwise reach, use them. The objective is to glue these layers together and end up with a flat slab of consistent depth. If you are using wavy or bowed wood in your layers, cauls are really necessary to achieve that objective. If your material is dead flat to begin with, cauls may not be necessary, at all. Clamps around the perimeter are typically sufficient.

Cozad Guitars - Body Mold Glue and Clamp

Once the clamps are removed the plywood block gets trimmed and trued up. This block is very heavy at this stage. Trimming it to size now reduces the weight I have to deal with in subsequent steps. The length of my finished body mold will be equal to the length of the guitar body plus 1-5/8″ at both the neck and tail block areas (2 x 1-5/8″ = 3-1/4″). Those dimensions are not all that critical. If you wish for your mold to be larger or smaller, then make the appropriate adjustments. The overall width is equal to the width of the guitar body at it’s widest point, the lower bout, plus that same (in my case) 3-1/4″ PLUS the width of the saw blade that will be used to cut this huge block in half, lengthwise (this will make sense, later).

Remember that I said the traced outline on the top layer of this slab is *not* the cut line. That is still the case. I needed to gain a general idea of where the guitar body would be cut out in order to determine where to drill my dowel registration holes. I'll return to this topic one more time ...

Cozad Guitars - Mold Block Trimmed

Making the Two Halves

Critical to the design of my guitars, particularly regarding how the neck joins to the body, is that the portion of the body mold supporting the neck block is perfectly true. It must measure 90° perpendicular to the centerline (which I derive from one edge) and be cut at a 90° right angle from the face. Failure to follow this will result in a mis-aligned neck. The centerline is my cut line. If you are deliberately altering the angle at which the heel block will contact the body of the guitar, then you can safely ignore this paragraph.

It is time to cut the block in half, lengthwise, a step I can perform at the bandsaw or table saw. If I have rough cut the block in half on the bandsaw (or even using a hand saw), I can pass the cut blocks across the table saw to perfect the rougher edges, or run it over a jointer, or even hand plane the cut edge perfectly flat.

Cozad Guitars - Mold Block Halved

While the block is still intact (no curves or shapes have been cut into it), I will add the clamping mechanism(s). There are many ways to hold these plywood blocks together, including using a large wood screw. It is very common to see DESTACO clamps used, either on both the neck and tail block ends, or a single clamp on one end and a hinge on the opposite end. I find these clamp parts tend to get in the way of trying to clamp head and tail blocks to the sides during glue-up, and I do not use them. But many builders do use them successfully.

Cozad Guitars - Body Molds

Another popular method for holding the two halves of your mold together extends the mold at both the neck and tail blocks. A bolt is passed through a hole in each of those extensions and is used to clamp the two sides together. This extension can be integral to the plywood (when each laminate layer was cut), or it can be attached as a block, later.

Cozad Guitars - Body Mold Bolted Closed

You can easily convert an existing mold that has been fitted with DESTACO or similar clamps, adding square blocks in their place. The blocks are glued and screwed to the body mold, and are held together with a bolt and nut (see below).

Cozad Guitars - Body Mold Convert Clamp to Bolt

Cozad Body Mold

Most of the popular body mold attachment methods support disassembling the molds for removal. I have developed a slightly different approach to those described, above. I have never had a reason to completely disassemble my body molds in order to remove a guitar body. A simple loosening is all that is needed to extract the tightest of guitar bodies.

I paused to reflect on this ... After that first assembly, except for an occasional demonstration, I don't believe I have ever taken any of my molds completely apart. It just isn't necessary.

Cozad Guitars - Body Mold Opening

At each end of one of the mold halves, on the inside (mating) edge, I secure a 5/16-18 threaded rod into a cross dowel. The 3/8″ hole drilled for the 5/16" rod is centered across the width of the five (5) boards, set back 13/16″ from the end of the block, and drilled 2″ deep from the mating edge, where it intersects the 7/16″ hole drilled for the cross dowel. This hole is also set back 13/16″ from the end of the block, though it is drilled on the face of the block 1-3/4″ from the inside (mating) edge.

Technically, this is all that is needed to hold the two halve together. But there is a potential for misalignment, one that I overcome with a little more effort.

Two (2) pieces of 3/8″ aluminum dowels (hardwood dowels will also work just fine), 2-1/4″ long, sit parallel to each rod. These extra dowels act as alignment/registration guides, keeping the mold from shifting out of place when it is opened and closed again.

Cozad Guitars - Body Mold Disassembled

Note that the 3/8″ hole for the cross dowel does not extend all the way through, though it would be fine if it did. It is replaced by a small hole, just large enough to access the cross dowel for finite positioning, if needed, during initial assembly. I use a thread-locker adhesive to secure the threaded rod in the cross dowel (not yet, but during final assembly).

Cozad Guitars - Body Mold Cross Dowel

Each half of the wooden mold gets mirror image holes drilled into it’s edge. I can accurately position these holes by first laying out and drilling holes in the edges of one of the halves. Into those holes I place small inserts known as dowel centers, lay the two halves together, edge-to-edge, and press them together. The dowel centers mark the exact centers of the drilled holes in the one half onto the correct location on the opposite half.

Cozad Guitars - Body Mold Dowel Centers

The twin holes that house the aluminum dowels are drilled to the same depth, 1-1/8″, as their mirrored mates. The center hole housing the threaded rod, however, gets drilled all the way through to the opposite edge of the wooden block. I have a long drill bit just for the task. A secret to accurately drilling such a long hole by hand each and every time is to drill from both edges and meet in the middle. At 3/8", the hole is a bit oversized for the 5/16" rod (the hole is larger in diameter than the threaded rod), in order to provide a margin for error when drilling that lengthy hole. You do not want to make a mistake at the edge of the material, where the pieces mate up. If you do make a mistake, let it be buried deep in the wood.

Cozad Guitars - Body Mold Long Hole Drill Bit
Cozad Guitars - Body Mold Holes Drilled
Cozad Guitars - Body Mold Holes Aligned

With the hardware installed, I re-assemble the two halves of my block for a test fit. Sweet! To the untrained eye, it looks like one giant slab of plywood. But you and I know that there are two separate slabs of plywood that mate together perfectly!

Cozad Guitars - Body Mold Block Assembled

Adding the Body Shape

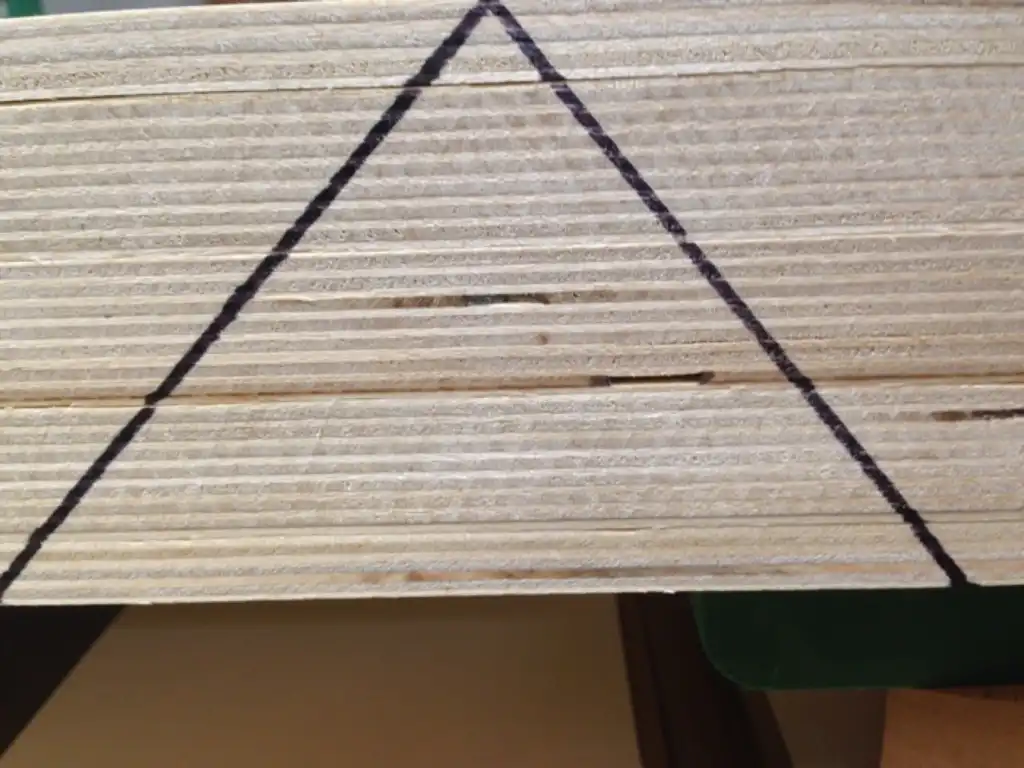
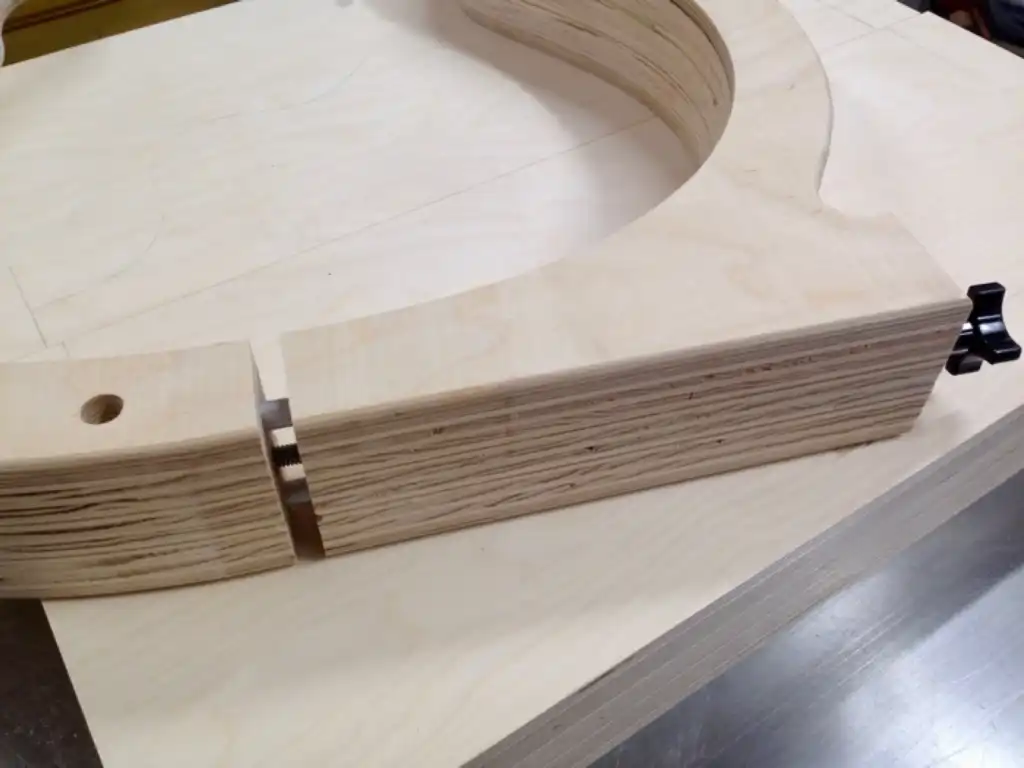
Had I attempted to cut the shape of the guitar out of the plywood block PRIOR to cutting the plywood block in half, I would have reduced the width of the body mold by (at least) the width of the saw blade used to cut the mold in half. In other words, I would have altered the shape of the guitar, making it narrower than my template (or drawing). This is why the original traced outline was never intended to be the cut lines.

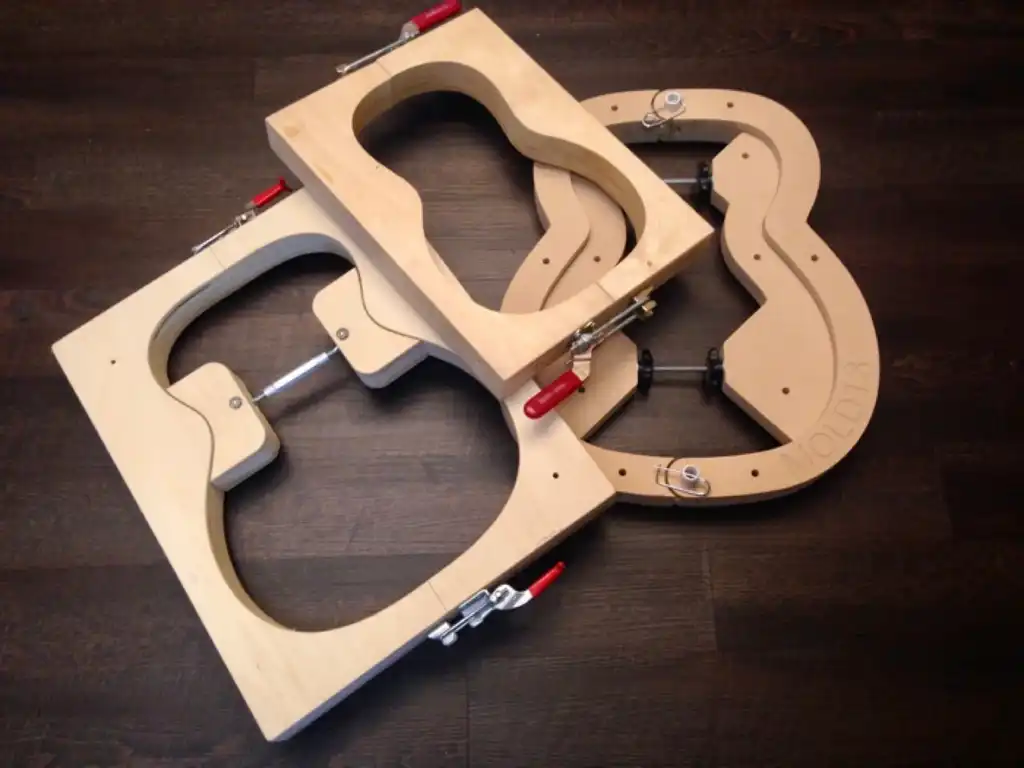
My body molds are cut with symmetrical interiors. However one mold serves multiple purposes. In addition to being able to house a traditional symmetrical body shape, by adding custom inserts, I can build Venetian or Florentine cutaways, as well. This gives me more flexibility with one body mold, as opposed to building at least two or three molds for each guitar size, one for each style of cutaway and an additional mold for a non-cutaway.

Asymmetrical body designs are typically built without inserts. They are "standalone" body molds. For prototypes, I will often "throw together" a mold using one of the less-involved assembly techniques, at least until I know that I want to use it more often.

IMPORTANT: You may recall reading at the every outset of this article that my acrylic template was sized to the outer/exterior dimensions of the guitar body. The template must fit perfectly within the finished body mold. To make this happen, I use a special 2-step router inlay process to transfer the shape of my template to the plywood block. First, I create a slightly oversized (precision enlarged) cutout in hardboard (or some suitable material) using my acrylic template as a guide in conjunction with a special router bushing, and then, using that new hardboard cutout as my new guide, I rout a perfectly sized shape into the plywood.

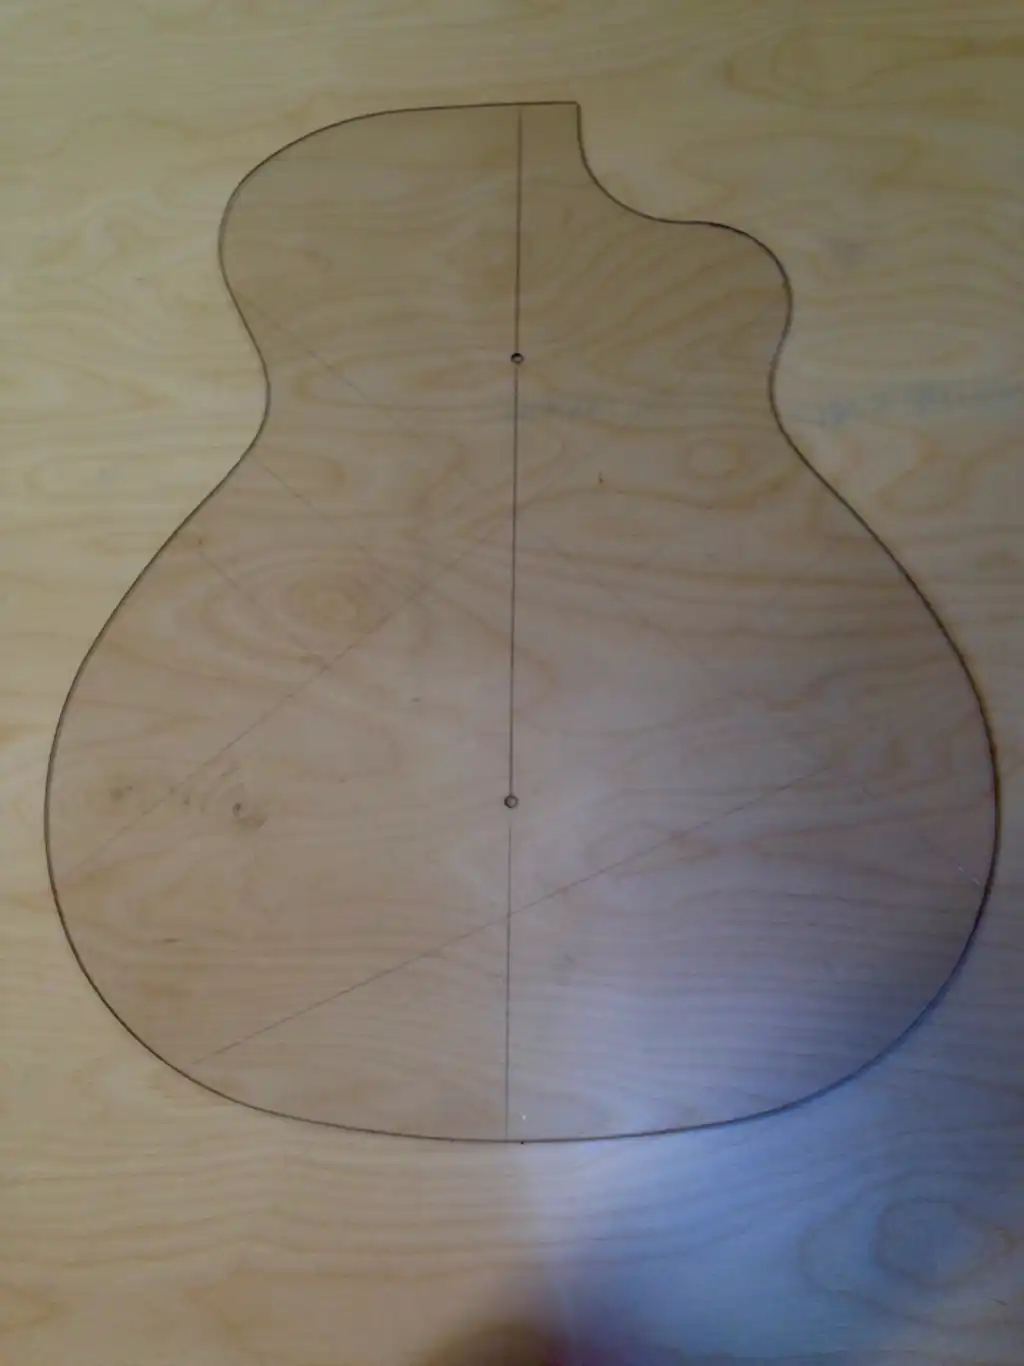
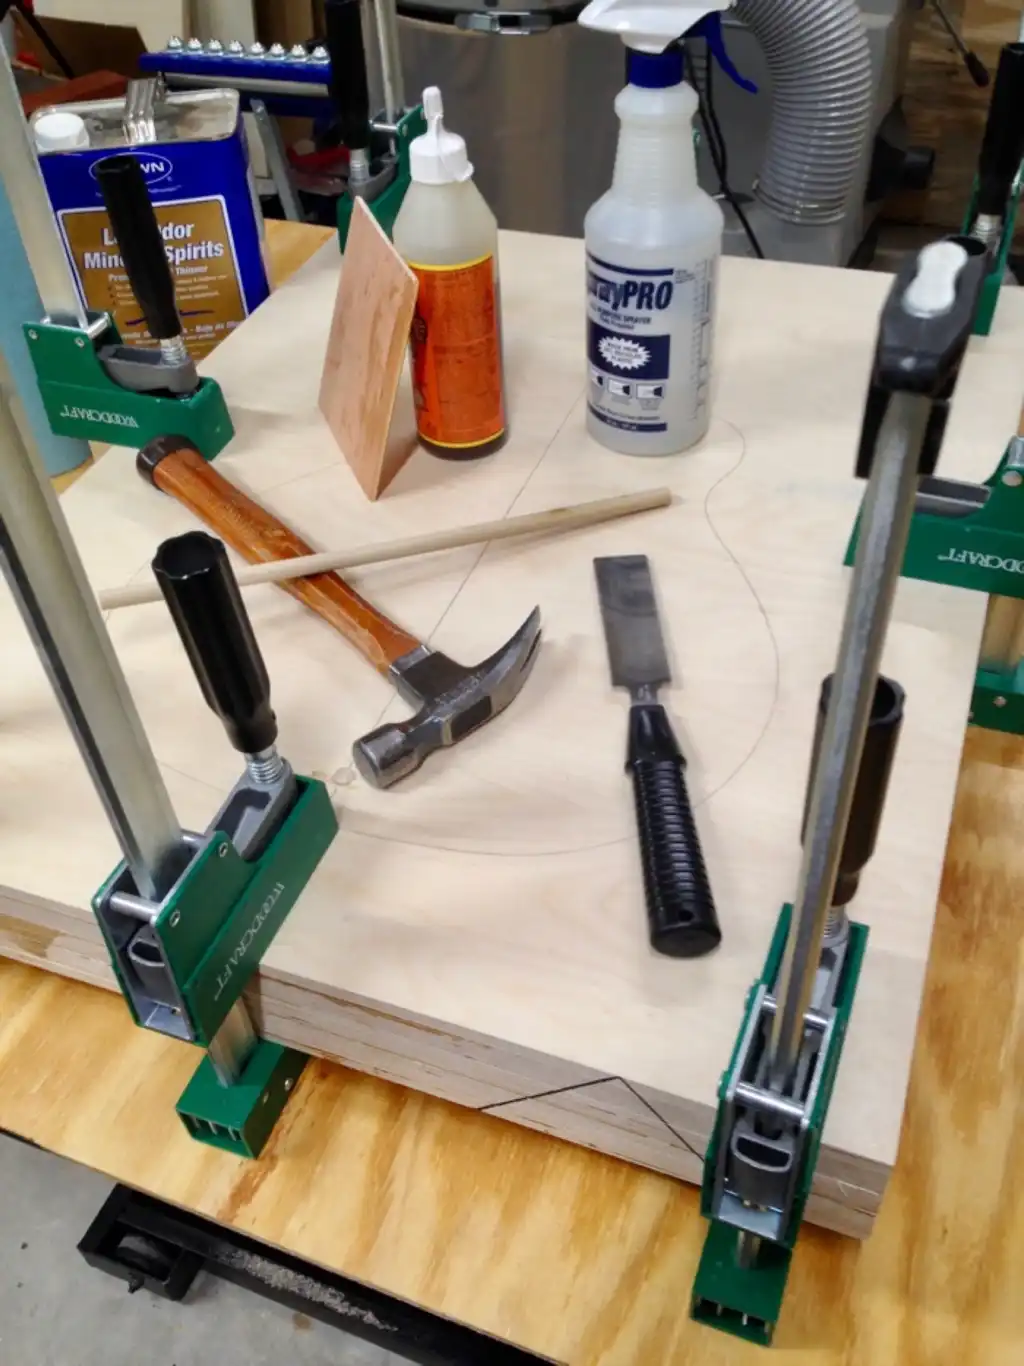
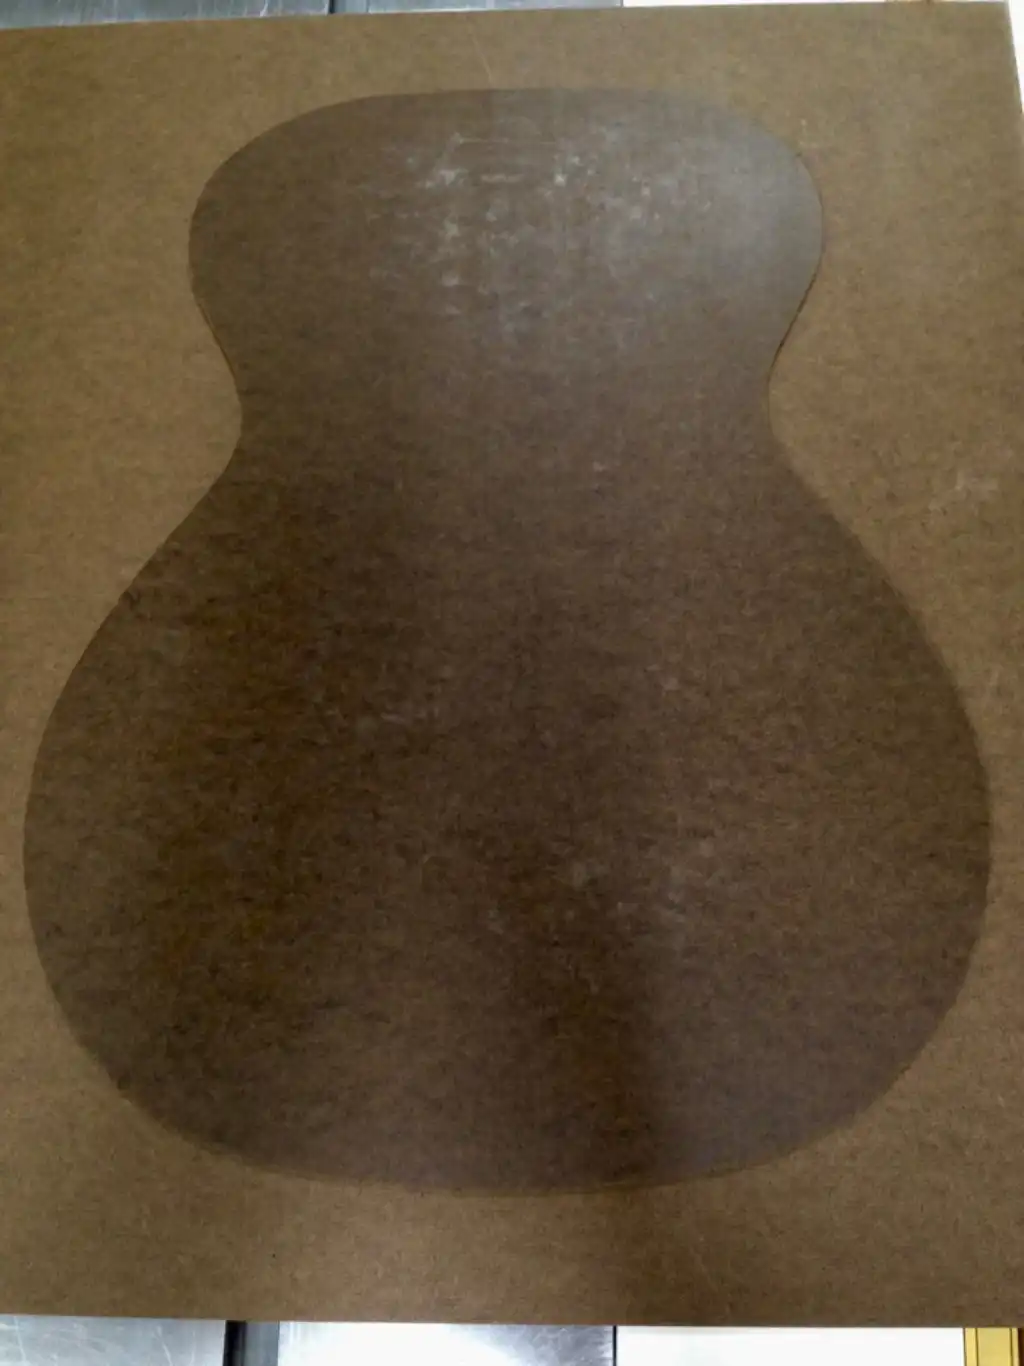
Here is how that "reverse image" router process works: I double-stick tape my acrylic template (which is the exact size of my desired guitar) onto a thin piece of hardboard (Any thin, flat board would do). I have marked the center of the hardboard, lengthwise, and am careful to center the template over that centerline.

In the photo, below, (for some reason that escapes me) I have substituted a hardboard body template (the darker guitar-shaped board) for my acrylic template.

Cozad Guitars - Body Mold Taped Template

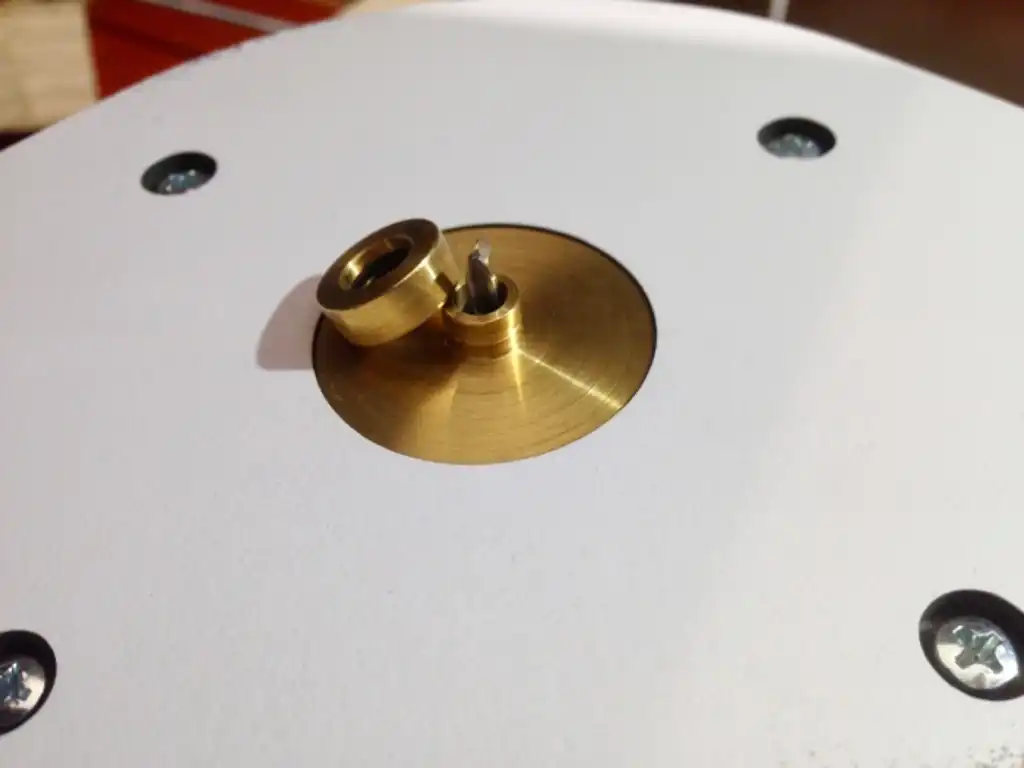
Having a properly-sized template made from a hard material makes this next step easy *if* you use the right tools. I use a brass inlay set (Whiteside 9500) along with a 1/8″ spiral bit (Whiteside RU1600). This inlay set requires a two-step process to achieve a reverse image. 

Step 1: Create the reverse routing template. It is necessary to (temporarily) remove the outer collar from the router guide bushing prior to tracing around my original template (see the photo, below). I then rout around the outside of the template, creating a slightly oversized cutout in the hardboard. In other words, the thin hardboard sheet that my template is taped onto is cut by the router to be slightly larger (all the way around) than my template.

Two pieces of material are taped together at this point. One is my original template, which I will remove and store it away safely, for future use. What remains is the cutout. Believe it, or not, this is waste material (use if for something else, as it is no longer part of our project).

Cozad Guitars - Body Mold Inlay Set

The difference between the size of the guitar body, here represented by my original hardboard body shape template (the lighter colored board, in the center of the image, below), and the perimeter of the oversized reverse routing template we just created, is cleverly controlled by the thickness of the offset bushing (seen in the photo, above) plus the diameter of the router bit. No calculations are necessary to achieve this.

Cozad Guitars - Body Mold Hardboard Cutout

Using double-stick tape, I secure my newly made hardboard reverse routing template (this is the square or rectangle board with an oversized guitar shape cut out of it, NOT what I cut out of it) onto my laminated plywood slab, careful to center the hardboard along the split down the center of the block.

After fitting the inlay collar back onto the router bushing, I rout around the inside edge of the hardboard reverse routing template, routing the shape into the plywood (into which, by the way, my original body shape template will fit with precision).

Why not simply saw out the center waste material and use a pattern bit to follow the hardboard template? To do so would require creating a perfectly sized template to follow with the pattern bit. This is not a small effort! We will still use a pattern bit, but we approached this in reverse, first creating a template that is the identical shape of our desired guitar body. Because we are making this "by hand" (a CNC is not cutting it out for us), it is much easier to get the exterior of this template perfect, as we can sand or file the outsides of curves. Do this the other way, trying to file or sand interior curves while maintaining accurate measurements is so very difficult. We then use a special router bit, bushing and collar combination that permits us to make a reverse image template that we apply to our slab and rout that perfect cut.

Our hardboard reverse routing template was deliberately oversized. By first fitting the special collar onto the router guide bushing and then tracing along the hardboard with the router, I create a ledge at the EXACT location for my pattern bit to follow.

Cozad Guitars - Body Mold Trace Cutout

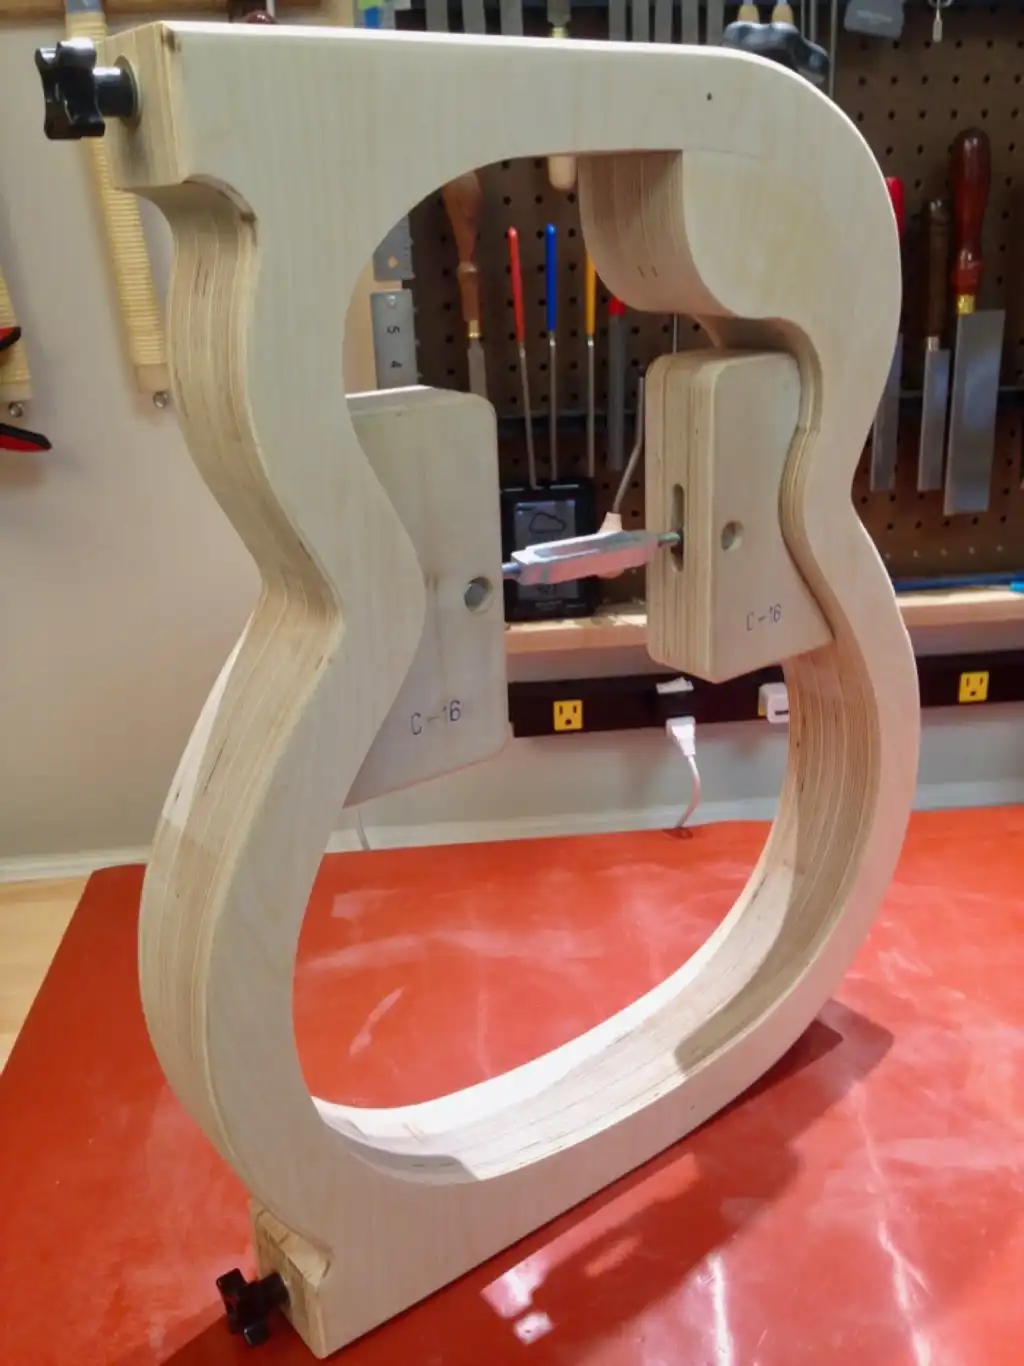
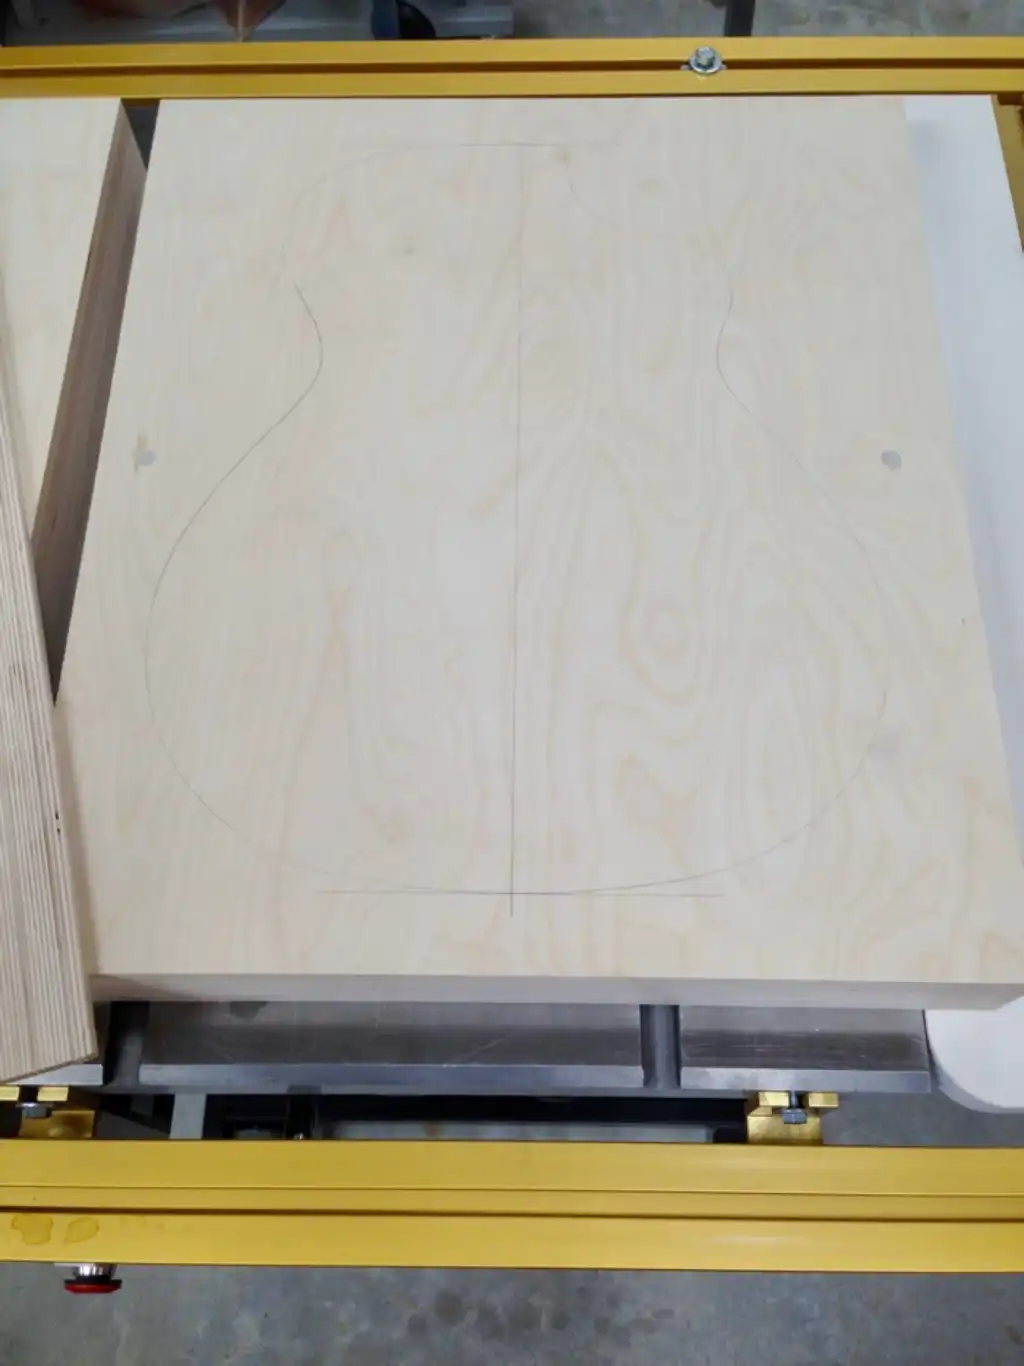
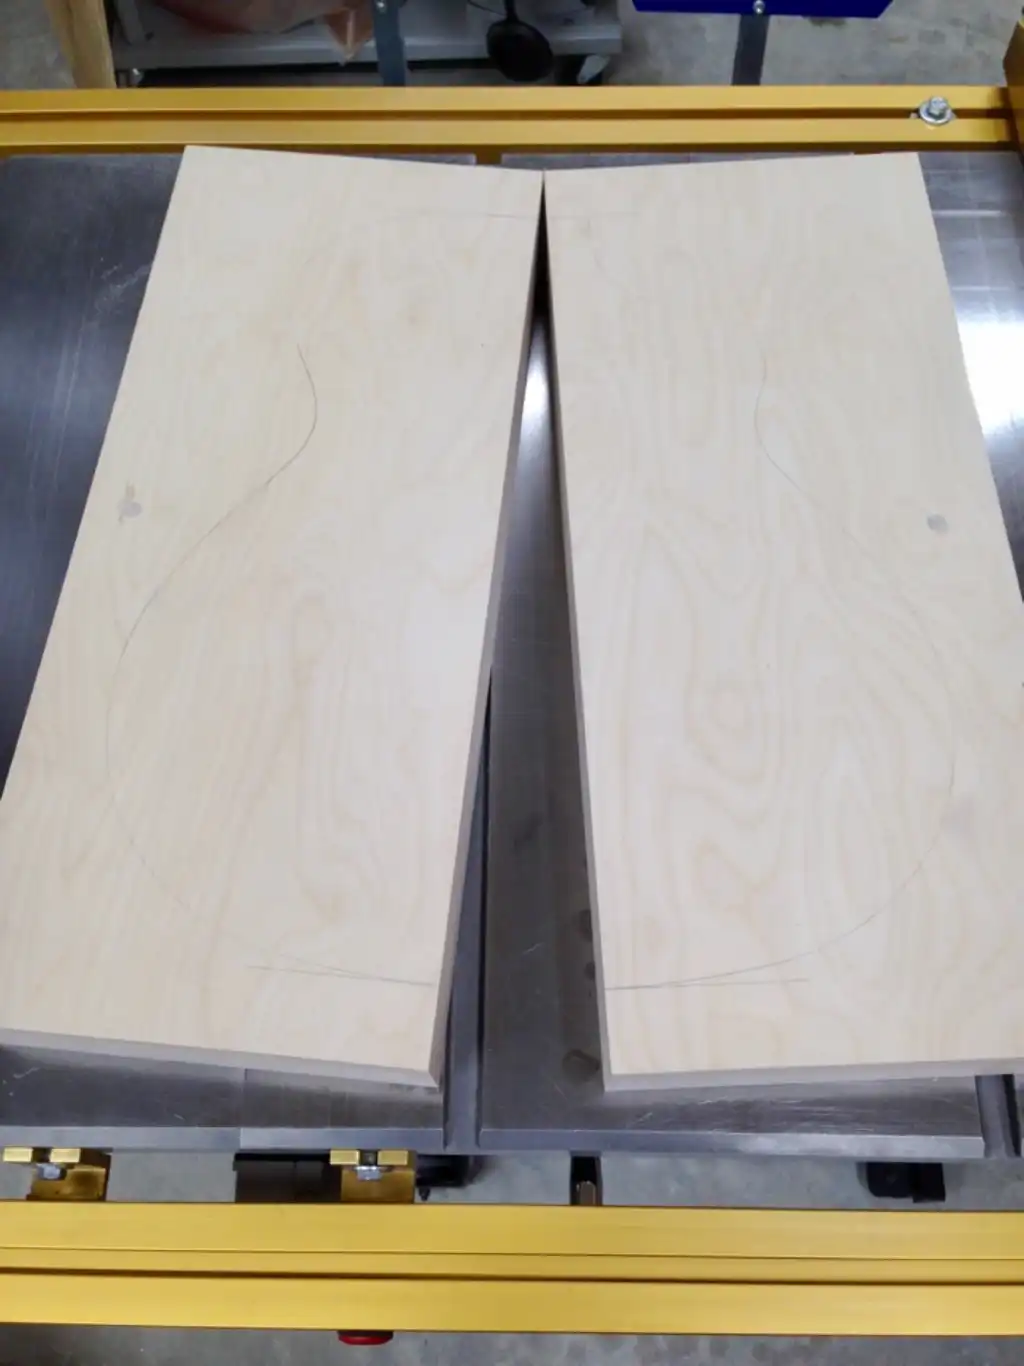
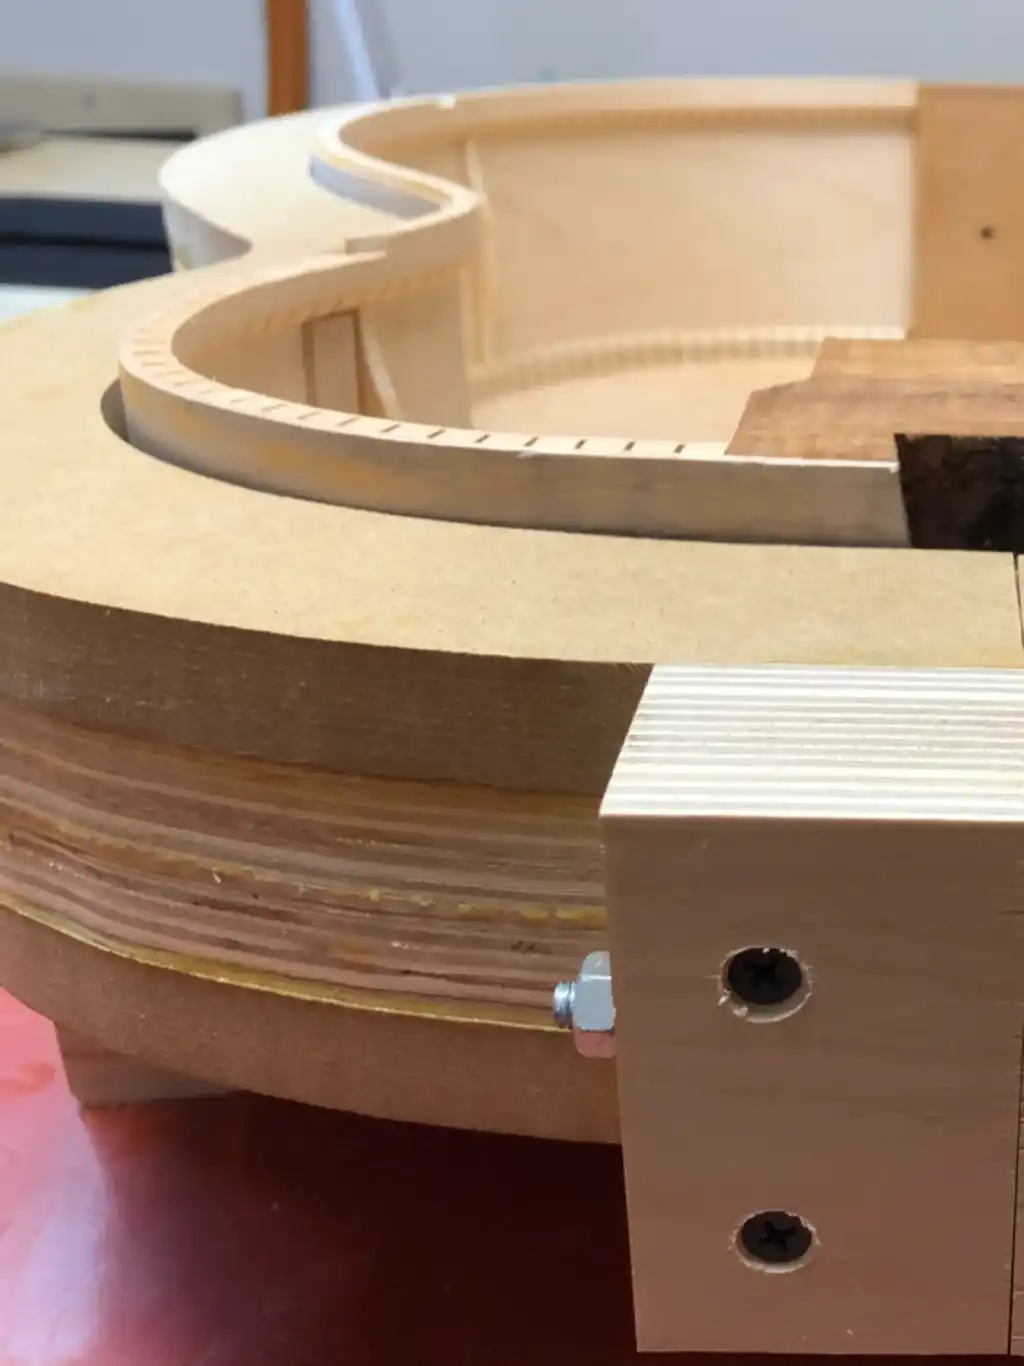
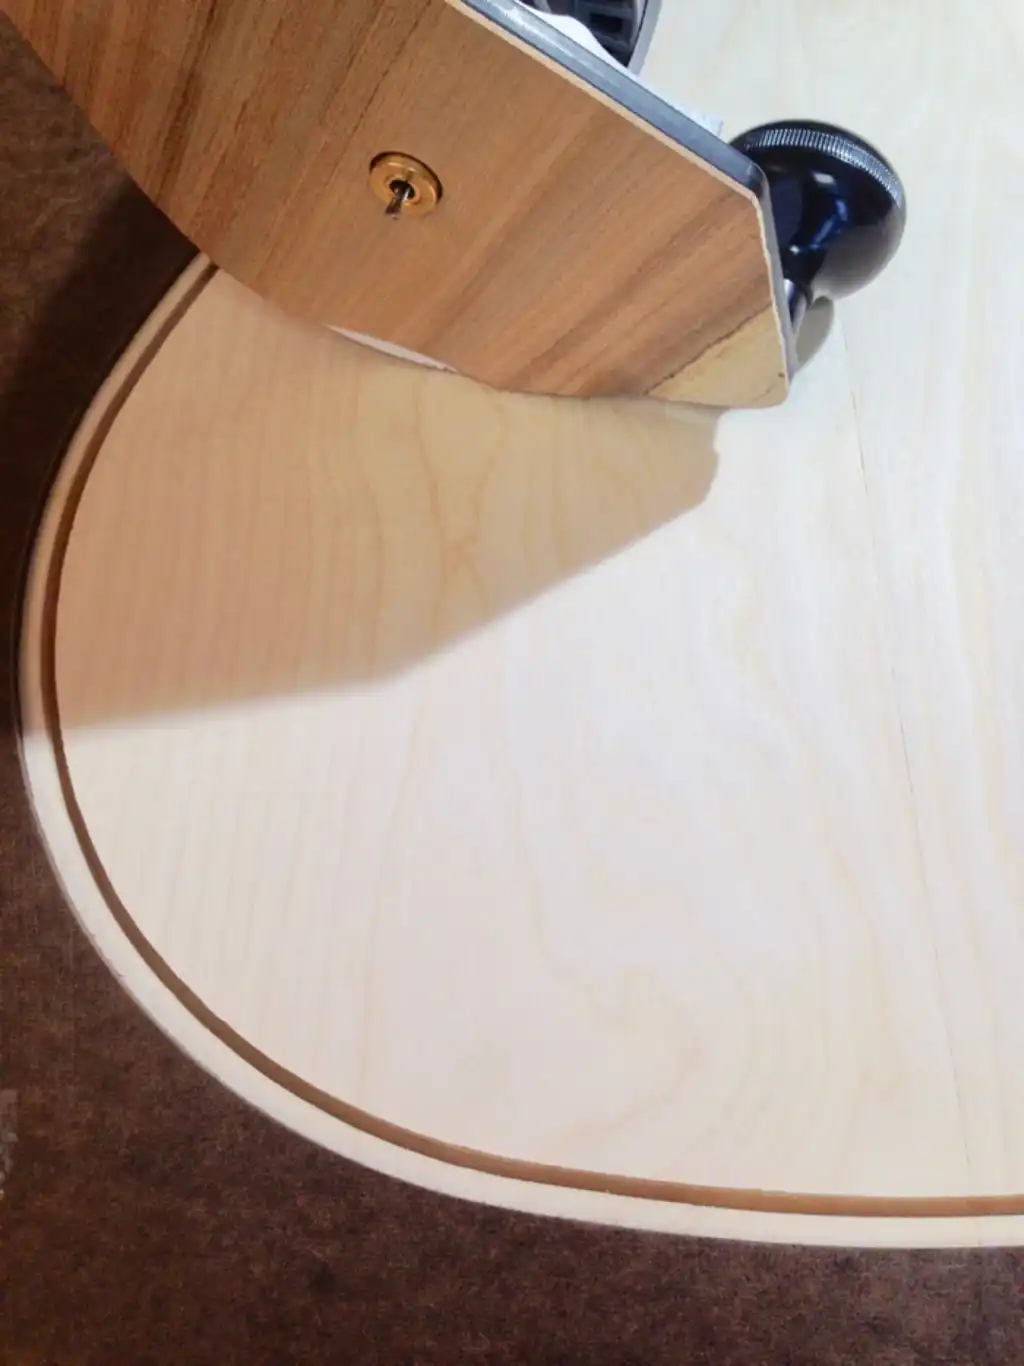
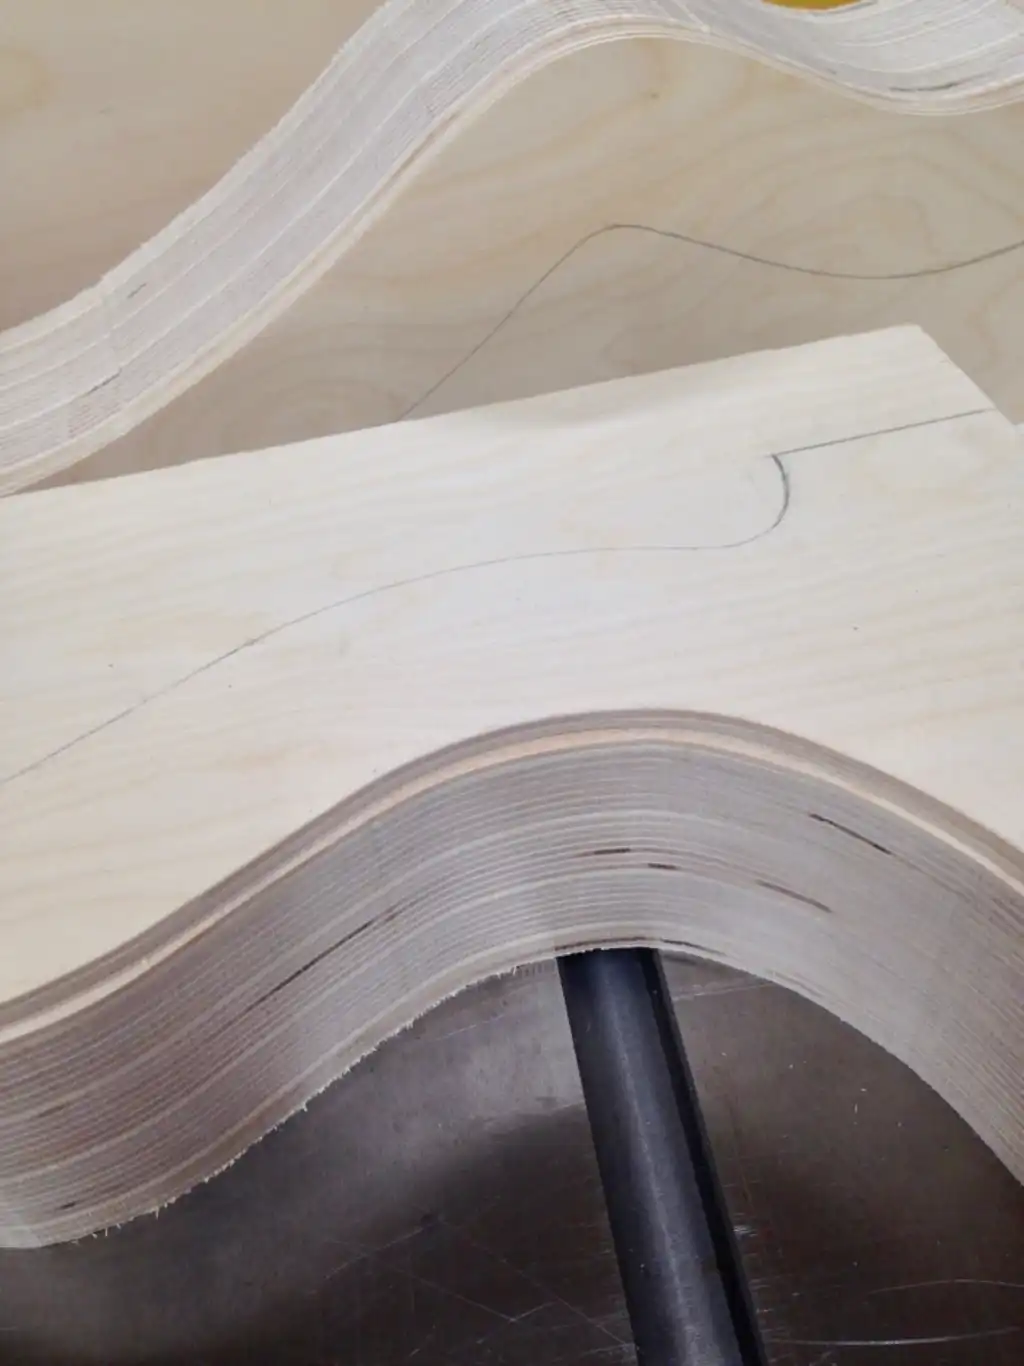
I remove the hardboard reverse routing template, then disassemble the plywood slab into two halves. I carefully remove the waste material from each of the two (2) halves at the bandsaw (see the photo, below). I stay close to the routed groove, and I am careful to not saw into it.

Cozad Guitars - Body Mold Waste Removed

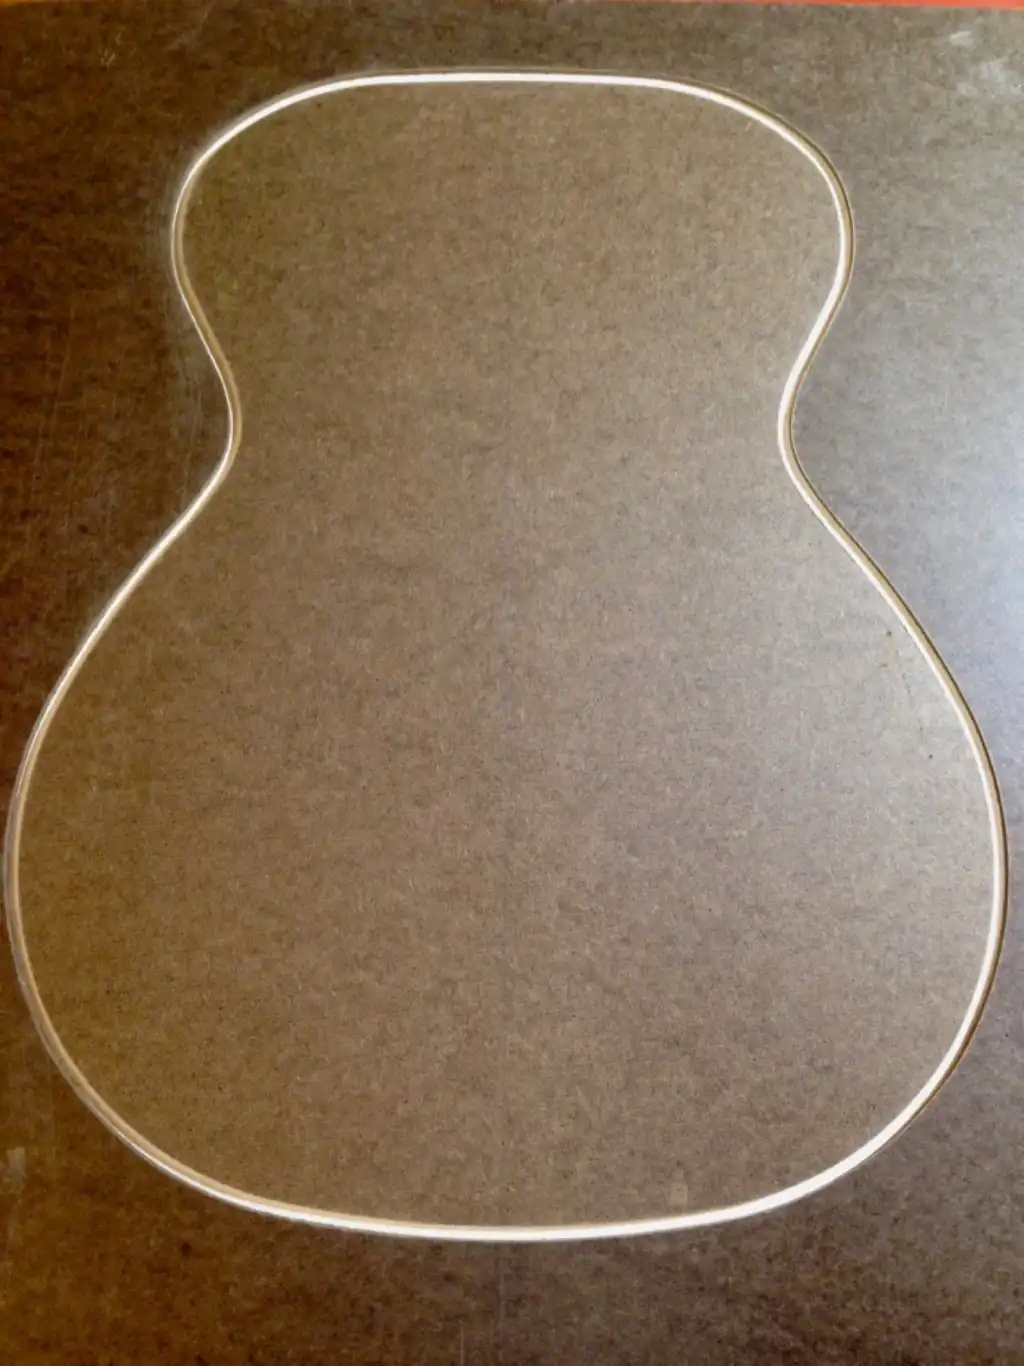
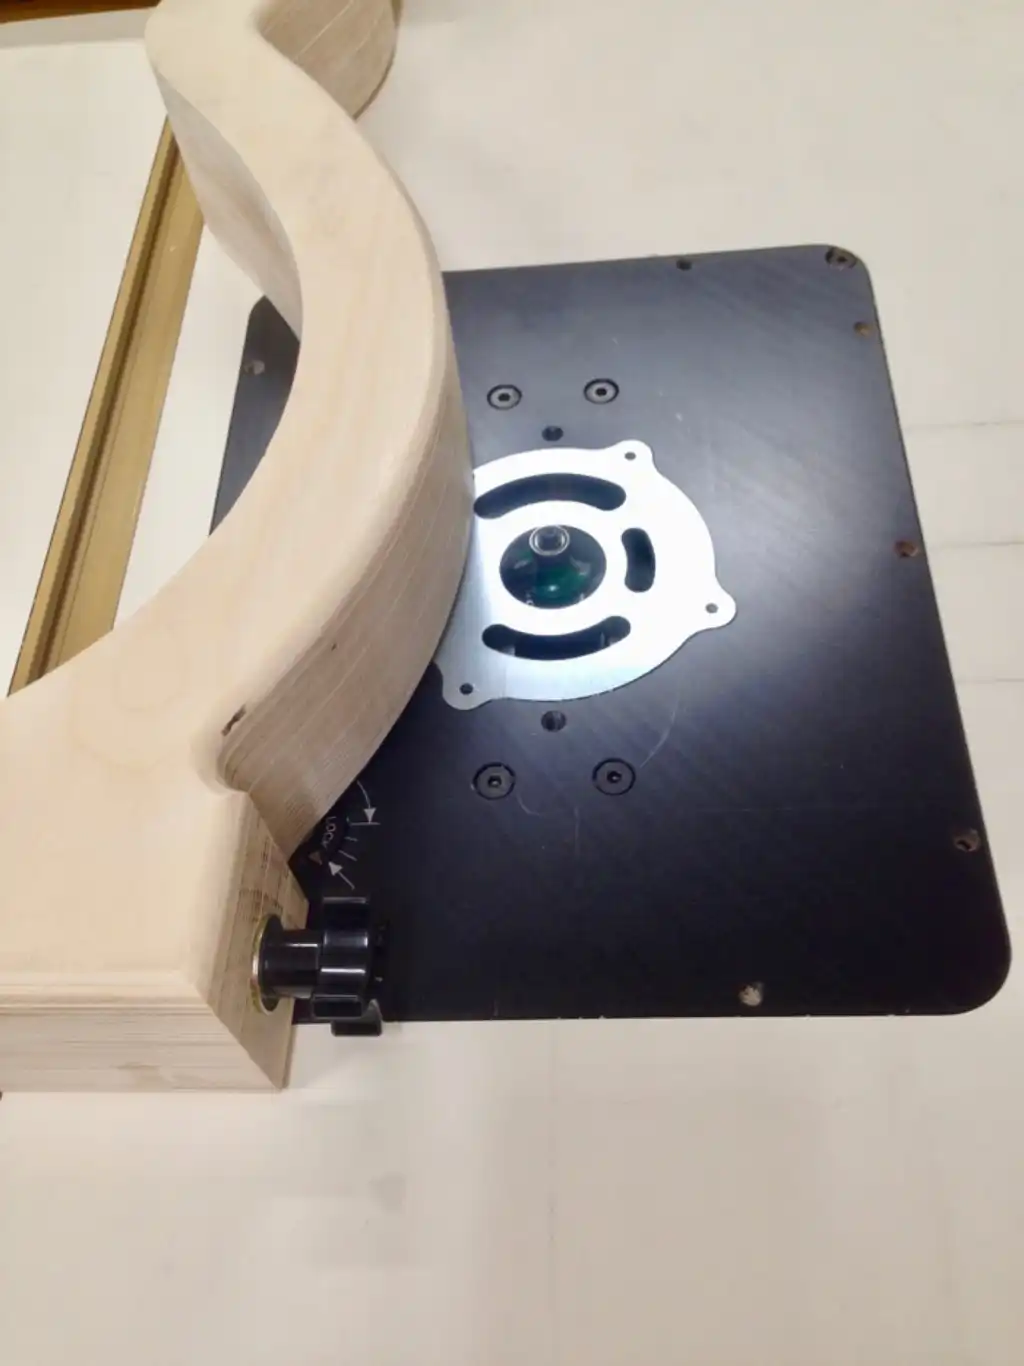
It is now necessary to follow the routed groove with a pattern bit in order to clean up the band sawn lines. I set a bit into the router table and follow the routed path, trimming the material away from the inside of the body mold. I could stop at this point, as the body mold is completely usable, though it is still a bit heavier than it needs to be.

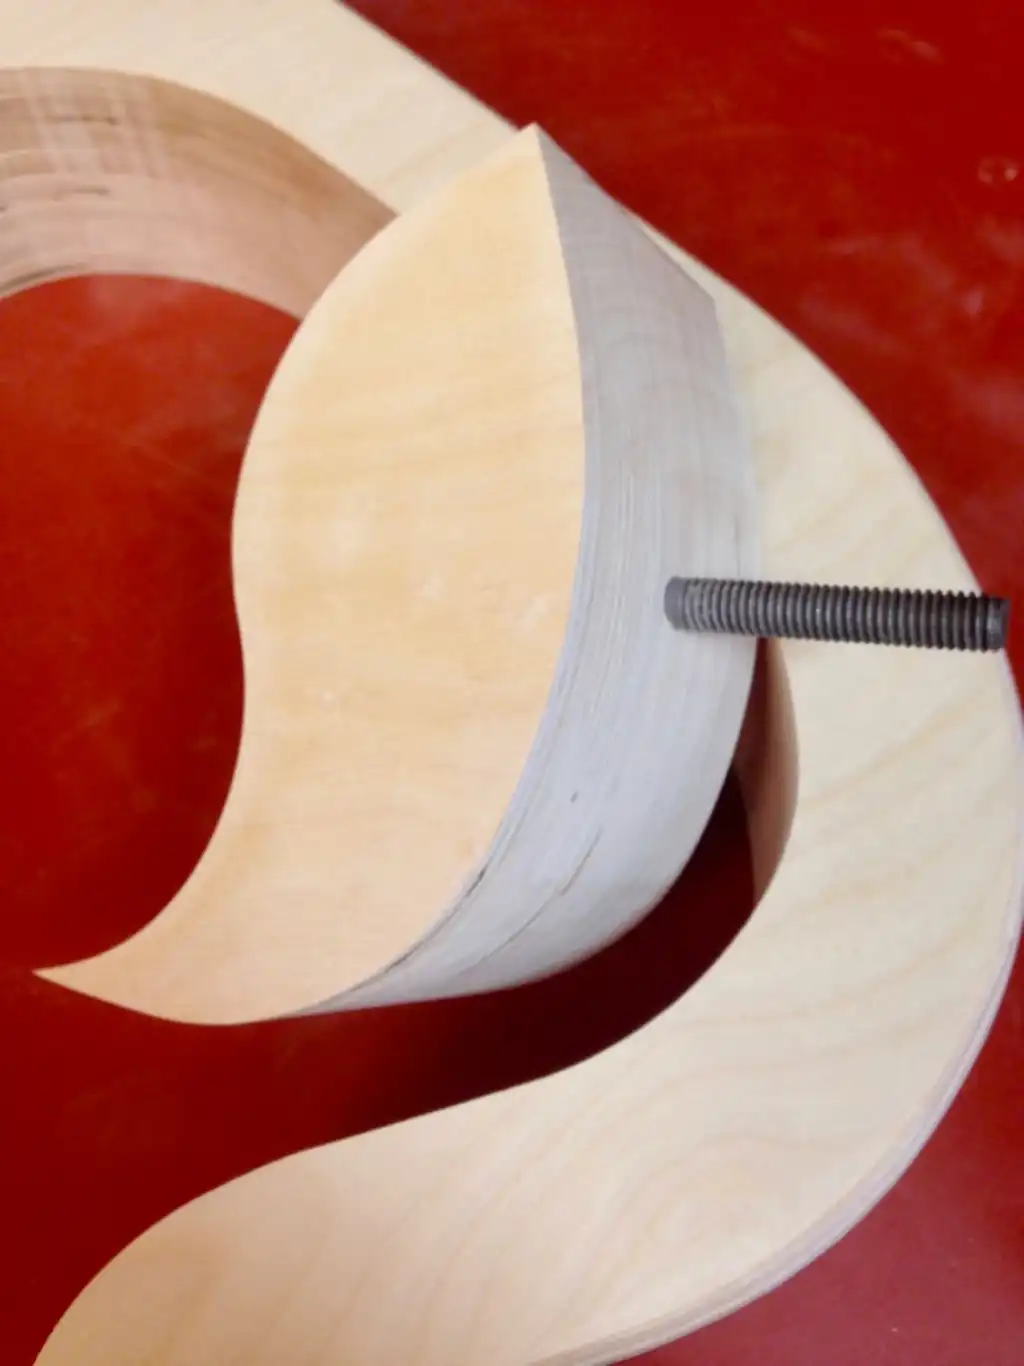
And, in the event you were wondering, my original guitar shape template fits perfectly inside the newly-dimensioned body mold!

Shaping the Outside

Using a compass opened to 1-5/8", I trace around the inside edges of the mold, drawing a line I can cut with the bandsaw. I am careful to remember where my threaded rods reside so as not to attempt to saw through them. A short time at the oscillating drum sander lets me clean up the lines. Using a roundover bit at the router table, I soften the outside edges of the entire body mold for more comfortable handling.

Cozad Guitars - Body Mold Outside Edge Complete

Spreaders

I fashion a spreader to hold the sides tightly against the body mold at the waist of the guitar. The purpose of a spreader is twofold:

Purpose of a Spreader
  • Eliminate the possibility of the shifting of the body in the mold during radiusing. If the body can flex and move about, your best efforts at radiusing will still produce inaccurate results.
  • Minimize any movement of those thin pieces of expensive wood that could result in a crack or split. It is still possible to damage a side, but a spreader greatly mitigates the risk.

Spreaders can be made from the waste material, which is what I do, but note that this can result in a rather heavy fixture. Some builders prefer something lighter, so they will reduce the thickness of the material. Regardless, a turnbuckle with eye bolts, secured using nuts and bolts, are all that are needed to assemble the spreader. I keep the blocks squared on the inside edges and shape the edges that mate with the waist. I have seen some pretty elaborate spreader schemes, and created a few of my own. The more spreaders added (or the larger the spreader blocks), the less access I have to the body cavity. This can become an issue when attempting to clean up glue squeeze-out along the kerfing or solid lining, or when adding side braces, so more is not always better.

At the very least, a horizontal spreader across the waist is essential. A vertical spreader can be fashioned to press the head and tail blocks against the mold, but I often find it preferable to simply clamp those two blocks to the mold and maintain interior access (see why I don't use the DESTACO clamps?). That is easy to do with my body mold design.

If you wish, you can also screw or bolt those blocks to the body to maintain precision during the build. Why? Securing your body shell inside the mold during the build ensures consistent positioning and prevents a wonky assembly of the front and back plates. This correct positioning becomes crucial when radiusing the sides/linings to receive those plates.

Drill a hole through the end of the mold just large enough to house your screw of choice. The neck block will likely be receiving a mortise of one kind or another which will swallow any hole(s) made in it by an attaching screw and, if you use an end graft and/or will drill for a endpin or endpin jack, the hole in the tail block will disappear, as well. So long as your screw hole falls within these parameters it won't harm your completed instrument. Lest you scoff, more than a few high-end guitars have been held in their respective molds using drywall screws. I know: I've seen 'em in other builder's shops, and I've built a few, myself.

Cozad Guitars - Body Mold Spreader

Cutaway

I fashion a cutaway insert to hold the specially shaped cutaway side tightly against the body mold at the upper bout. It is made from the waste material of our original block. It is shaped to follow both the contour of the upper bout, against which it will reside, as well as contain the shape of the cutaway. Once I have achieved a good fit, I clamp the insert in place and drill a hole from the outside of the mold, all the way through and into the insert. My favorite bolt for the task is a 3/8″ x 4″ hangar bolt. The threaded portion of the bolt will pass through a tight 3/8″ hole in the body mold, where the screw portion of the bolt will need a 5/16″ hole drilled into the insert. It can be retained with a simple nut and washer, although a plastic Star Nut is a nice alternative.

Cozad Guitars - Body Mold Cutaway Insert

To accommodate cutaway designs, I carefully position and cut a 3/8″ to 1/2″ deep slot into the body mold to allow a slightly oversized (longer) side to pass just beyond the neck block and be retained by the body mold - not the neck block - as the glue dries. This excess material (that which projects beyond the neck block) will be trimmed away at a later stage.

Cozad Guitars - Body Mold Cutaway Slot

Summary

Note that I do not round over the interior edges of the body mold, as I do not want to alter the 90° walls that the sides clamp to. However, I will ever-so-slightly ease the sharp outer edges of the plywood mold using some sandpaper in order to make handling a more pleasant, comfortable and splinter-free experience.

If you are in a hurry, it is possible to assemble a body mold much more quickly than what I have outlined above. Spending a little more time and care on what may be the most significant fixture in my shop, a fixture that will easily outlast me, just makes more sense.

Cozad Guitars - Cozad Body Mold