Building the Tonnerre

Introduction

Fast-attack Curly Sinker Redwood is paired with fast-attack felled Claro Walnut, and presented in a deep-bodied jumbo cutaway with an Everett-style transitional arm bevel for the fingerstyle guitar enthusiast. A judicious use of carbon fiber, including the laminated bracing, combines with these superb woods to deliver a beautiful sounding instrument with all the spaciousness, complexity and nuance you would expect from these materials.

Where a 17" jumbo of a bygone era will weigh 5.5 to 6.0 lbs, the 17" Tonnerre barely tips the scale at 4 lbs! You can expect tremendous power from a lightweight jumbo.

Cozad Guitars - Tonnerre Front Plate
Cozad Guitars - Tonnerre Back Plate
Specifications
  • Body Style: Jumbo (Venetian Cutaway)
  • Upper Bout: 11.75″
  • Waist: 10.5″
  • Lower Bout: 17″
  • Body Length: 20.5″
  • Body Depth (Tail block): 5″
  • Scale Length: 25.5″
  • Soundboard: Curly Sinker Redwood
  • Back and Sides: Claro Walnut
  • Bracing: Laminated Adirondack Red Spruce and Carbon Fiber
  • Bracing pattern: Back - Progressive, Soundboard - Conventional X
  • Binding: Ceylon Ebony
  • Soundhole Binding: Ceylon Ebony
  • Rosette: Paua
  • Neck: 5-piece Mahogany
  • Fretboard: Rosewood
  • Fretboard Inlay: Paua
  • Headplate: Gabon Ebony
  • Bridge: Rosewood
  • End graft: Gabon Ebony
  • Options: Arm Bevel
  • Weight: 4.1 lbs (tuners, strings, pickup)

The Body

The sides are thicknessed (thinned) to anywhere between 1.9 mm and 2.2 mm. This is an interactive, highly iterative process where I repeatedly pass the material through the drum sander and manually test the flex of the wood. I am looking for a particular range of response where I am able to bow the side without tremendous resistance. Each wood reacts differently and the thickness measurement can vary. The goal is to have the material thin enough to bend without it breaking, while being thick enough to support the instrument. This instrument will feature a Venetian cutaway, which incorporates a rather tight curve into the bend, so it is a good idea to remove a little extra material to avoid breakage. You can get these sides pretty thin, especially if you support them with ribs. Be aware of the role that varying environmental factors play, especially on very thin wood.

Cozad Guitars - Thicknessed Sides

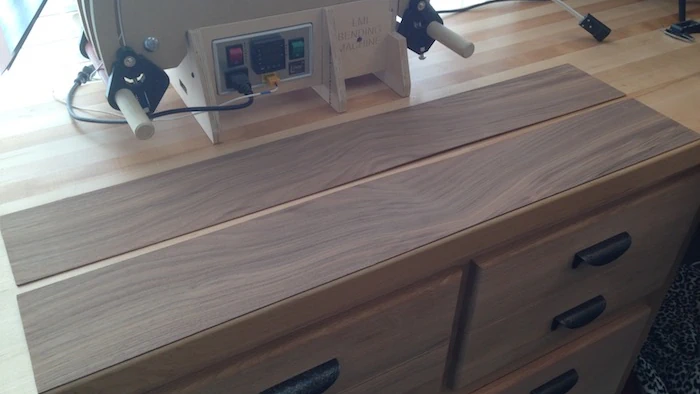
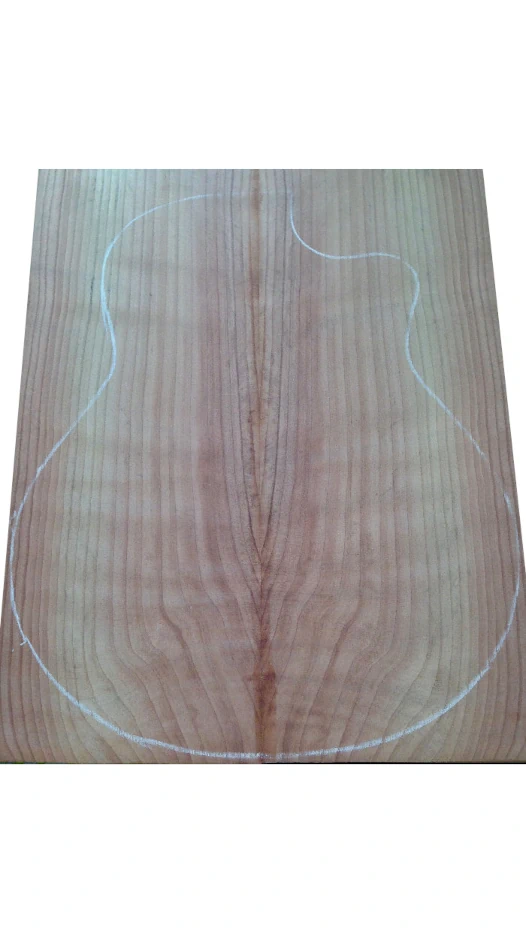
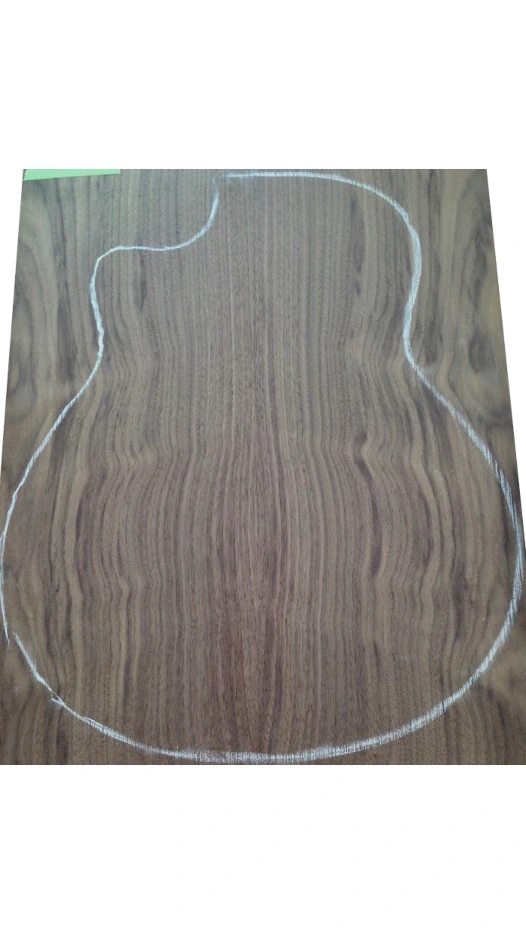
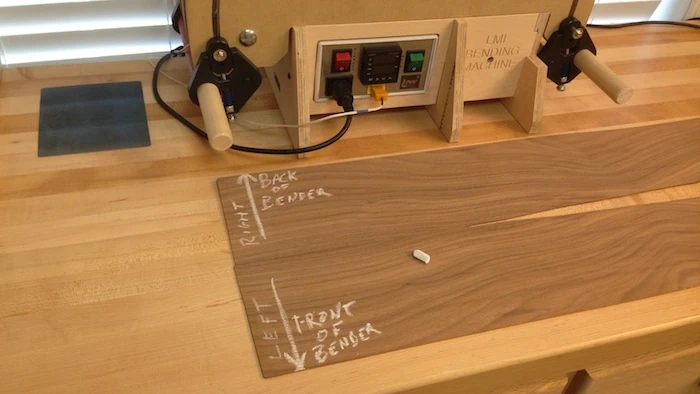
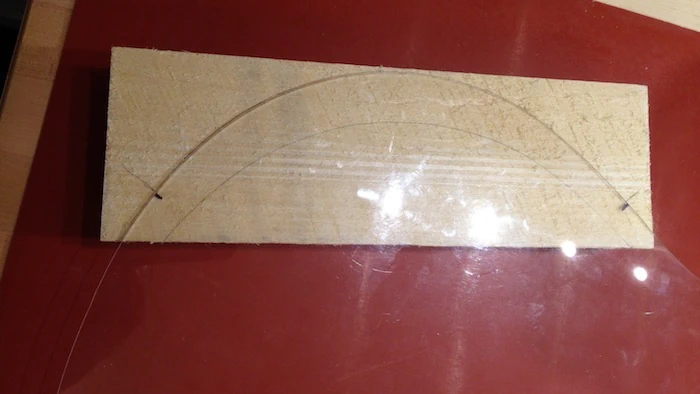
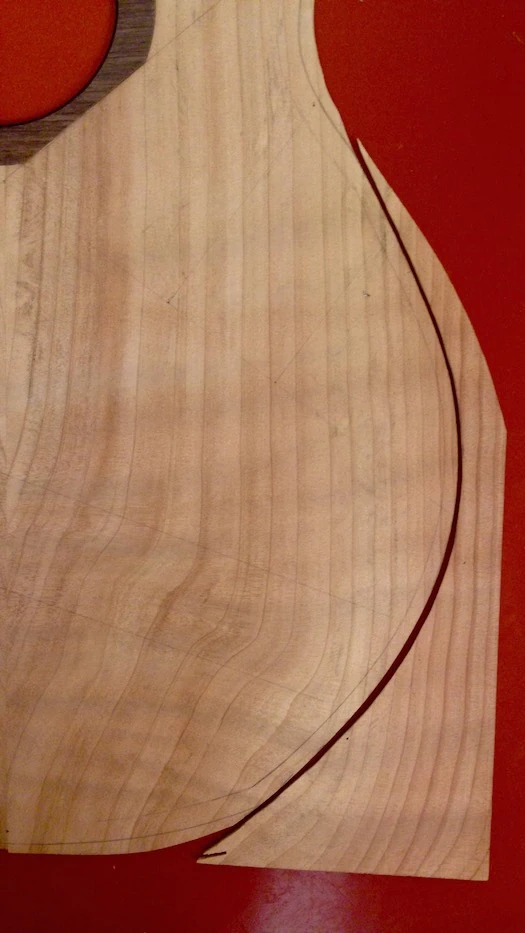
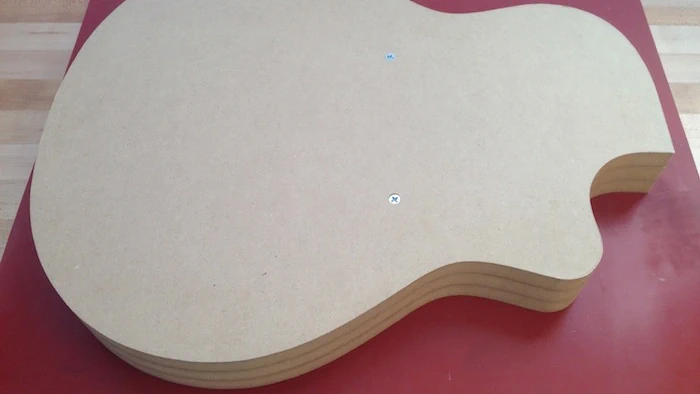
Once the sides are at the proper thickness, I assess their layout. You kind of need to think upside down in a mirror to envision which side goes where. Getting this wrong can result in two left sides, or the grain pattern running precisely where you did not intend it to. The edge that will mate with the soundboard remains flat (my tops have a very shallow radius to them, anyway), so I mark the edge that will join the soundboard as my reference edge. The second reference that I will note is the location of the waist. This positions the bend relative to either end of the piece of wood. The edge that will mate with the back will have a contour (I use a fairly tight radius for my backs).

I could bend the sides as perfect rectangles and manually shape the contour(s) later, but that is a rather tedious process and not without an element of risk. It is possible to crack a side if too aggressive of an effort is made to shape it manually. Yes, I learned that lesson the hard way, too.

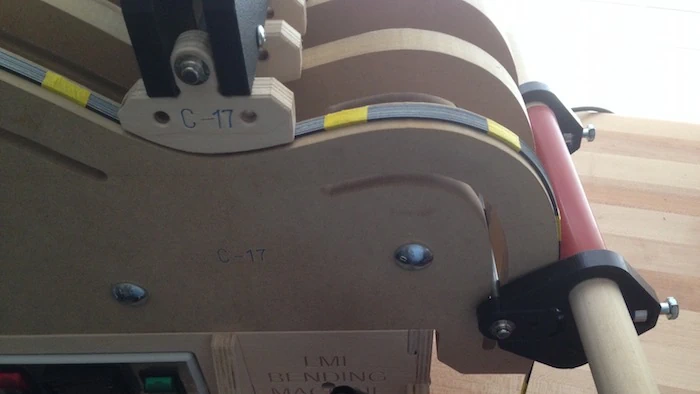
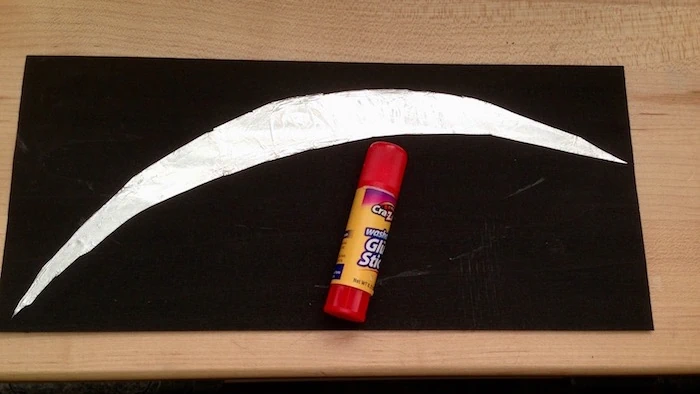
Rather than prototype every measurement, over and over again, I have a template I rely on to approximate the contour along the back edge of the sides, as well as to determine the overall width of the sides. It is important to note that pre-contouring the sides (removing what will eventually be excess material off the back) forces me to be extra considerate of the position of the waist of the guitar as I bend the sides. Indiscriminately bending without paying attention to this location will throw off the dimensions, and could leave me with too narrow a side. With all that in mind, I trace the template, bandsaw off the excess material and verify that the soundboard edge and the waist are clearly marked.

Cozad Guitars - Sides Template
Cozad Guitars - Sides are Ready to Bend

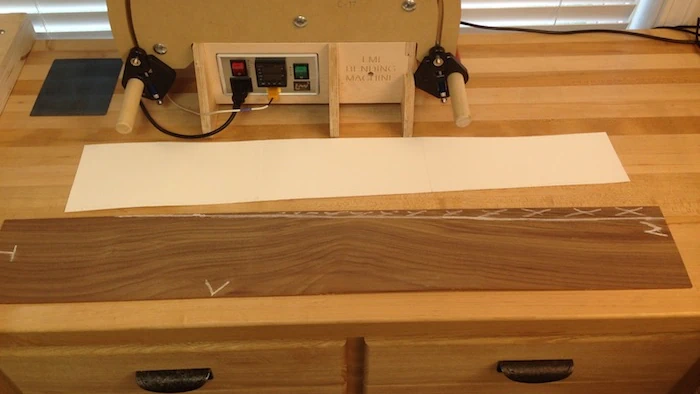
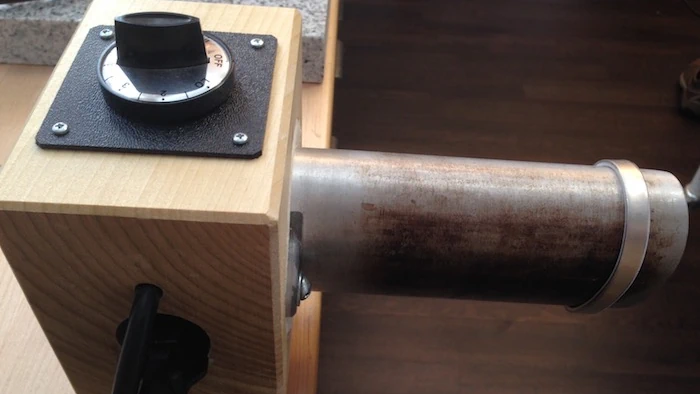
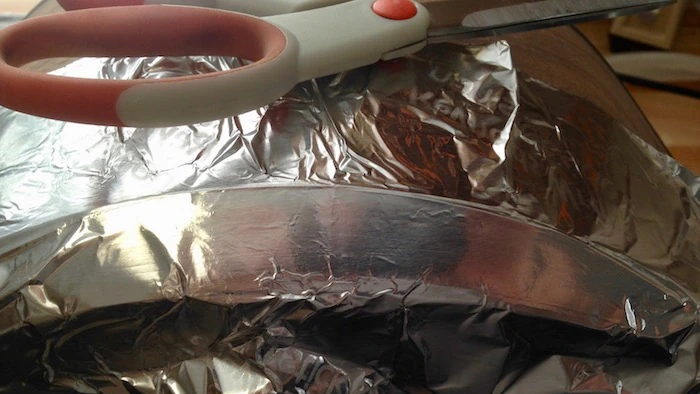
I package a sandwich for my electric blanket side bender. I wrap the wood in aluminum foil so as to avoid any staining that may result from the interaction with the spring steel slats. I transfer the markings from the wood to the aluminum foil, and am now ready to bend.

Cozad Guitars - Sides in Bender

300° persuades the wood to relax and another 15 to 20 minutes in the Side Bender “sets” the bend. I turn off the heat blanket and allow wood to cool down. After carefully removing it from both the Bending Jig and the aluminum foil, I get it into my shop-made body mold.

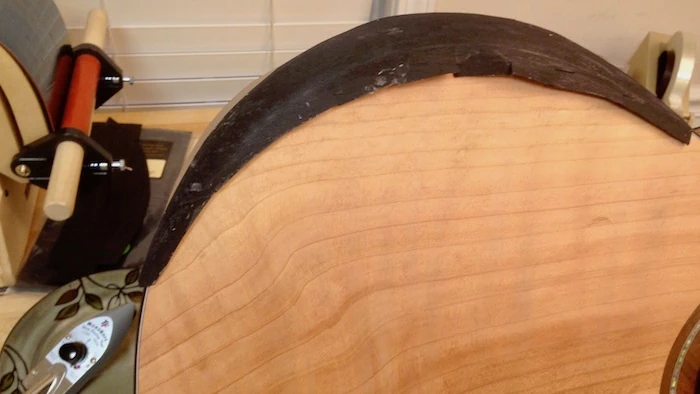
My Side Bender does not (yet) do a good job of bending the cutaway. Thankfully, Walnut is an easy wood to bend. I break out my trusty electric Side Bender and mount it to my bench. I use an iterative process consisting of spritzing the wood with water, applying heat and manual pressure, fitting the side to the body mold, visualizing any changes, and repeating the above as many times as needed to add the tight “cutaway” curves on one of the bent sides.

Make absolutely certain you select the correct side to add the cutaway bend to.

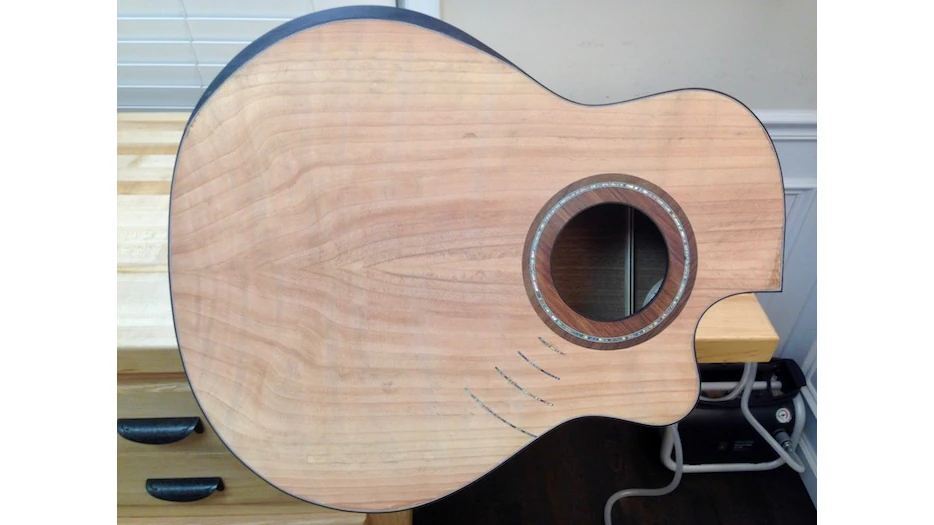
Cutaway? Cutaway is something of a misnomer, as not having the body of the guitar exist in this area of the upper bout is very much a deliberate design implementation from the beginning. While still a major stretch, with a Florentine design one could almost imagine that the wood has been “cut away” from the body of the guitar, and the hollow recess filled in, allowing the hand to reach farther up the fretboard. With the deliberately rounded curves of a Venetian-style design there is little evidence to suggest anything was ever “cut away”. I have proposed renaming this feature a BendAway, as in the wood has been bent, not cut, away from from where it would have been. Or perhaps it could be called an Out-Of-The-Way, as in out of the way of my hand? I really don't think the new name will catch on.

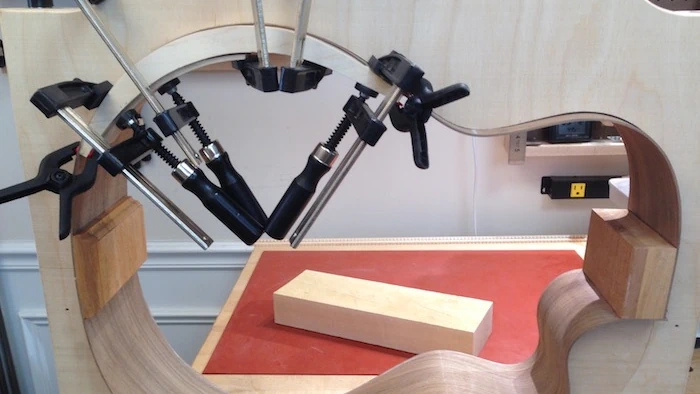
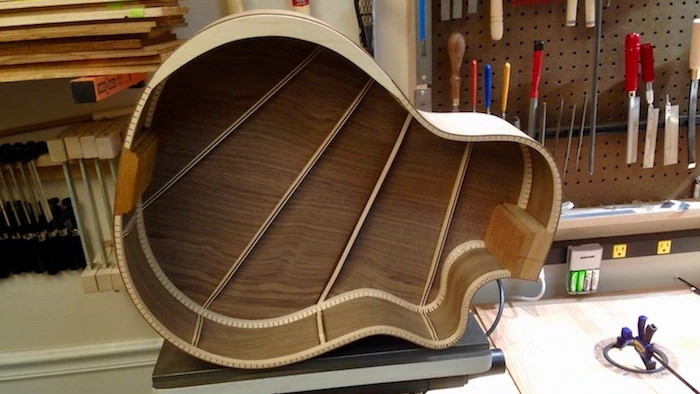
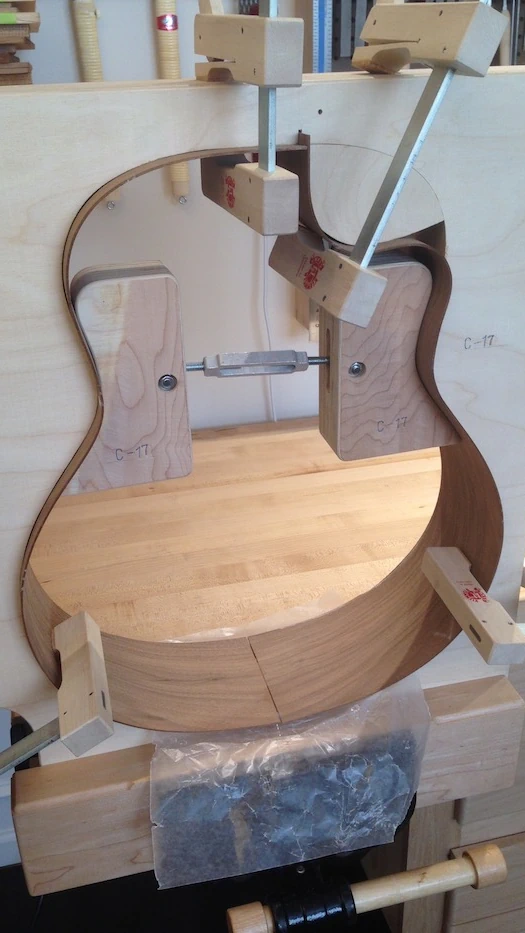
To get this newly formed side into my shop-made body mold it is necessary to calculate and perform some trim cuts. I have deliberately left both of the sides longer than their finished length in order to allow for any shifting mishaps during the bending process. I must remove that waste material now to properly seat these sides into the mold. I will be routing and fitting a tapered end graft onto the tail block ends of the sides, once I add the tail block. This permits me great freedom when trimming away excess material (the two sides do not need to butt up against one another perfectly). The neck block end of the cutaway side is left approximately 1 cm (3/8″) long, and is inserted into a pre-cut slot in my body mold. The other side is carefully trimmed to butt up against it, though binding will later be fitted perfectly where these two pieces join.

Cozad Guitars - Sides in Body Mold

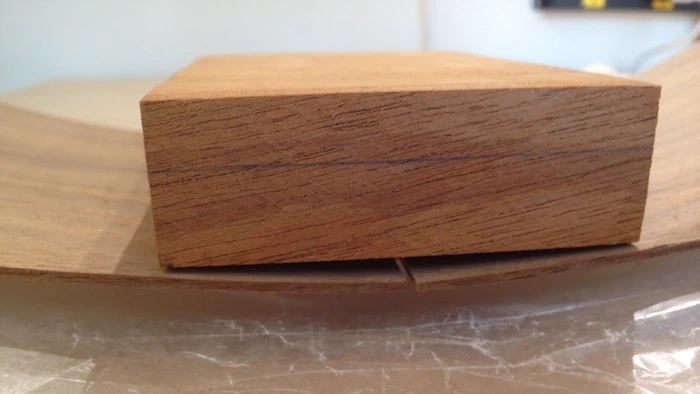
At the lower bout end of the guitar, the tail block gives me a stable surface to splice or join the two sides to, and provides much-needed support for adding a strap pin or a 1/4″ strap jack. On my guitars, this portion of the lower bout has a slight radius so it is necessary to shape the tail block accordingly.

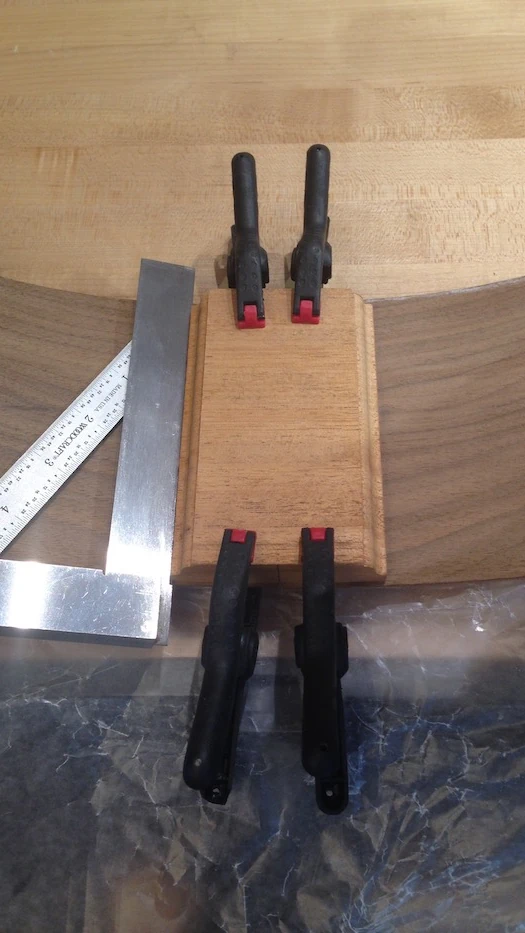
For this guitar, I am using a solid wood tail block (contrasted with a laminated tail block).

Cozad Guitars - Tailblock Radius

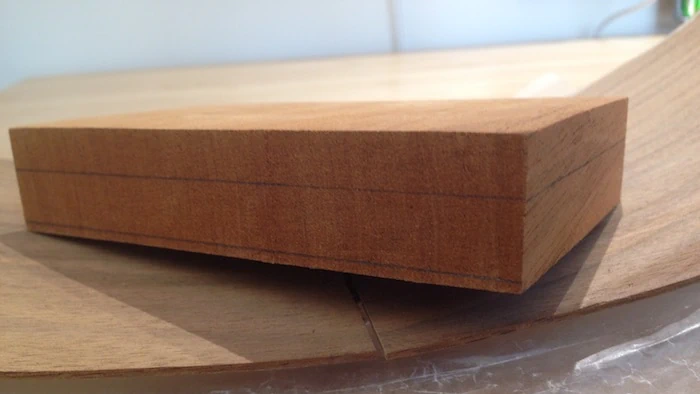
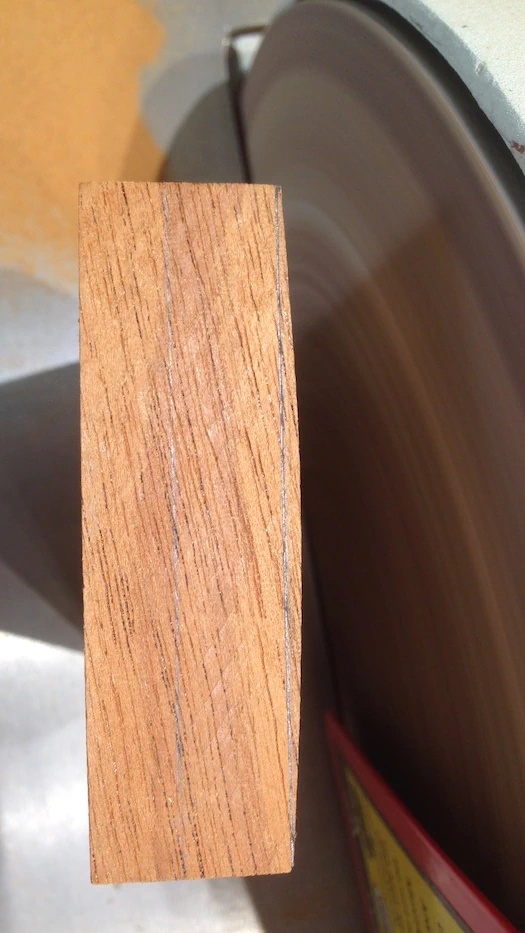
I mark the tail block along each side for a visual reference. The pencil marks are necessary to know where to sand to, and when to stop sanding.

Cozad Guitars - Tailblock Marked

I take the wood to the Disc sander to shape the radius.

Cozad Guitars - Tailblock is Sanded to Shape

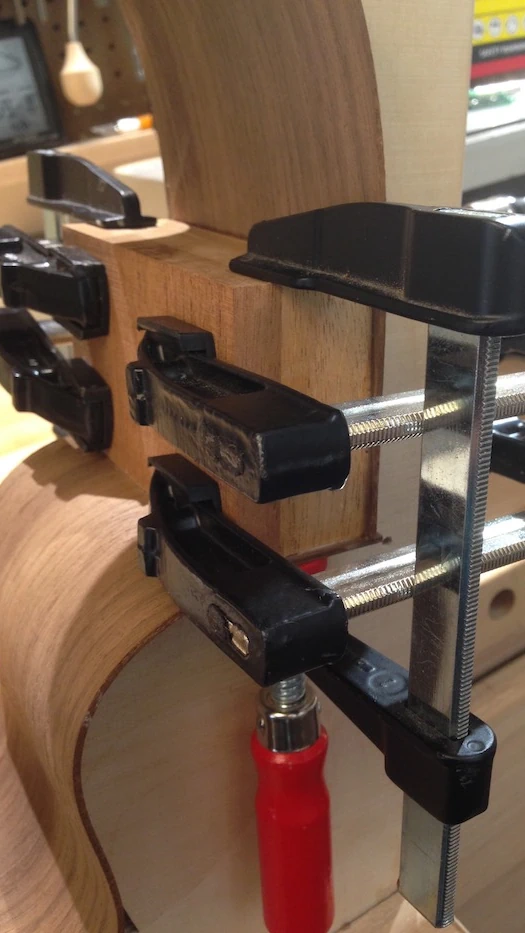
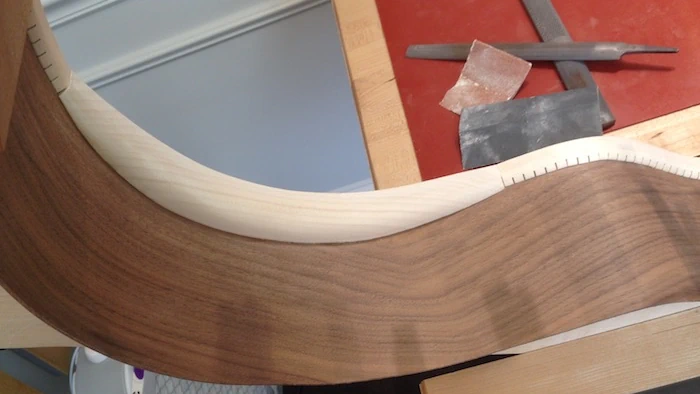
Once the tail block is shaped to fit, I trim (thin) it to size and rout a contour along the edge. I then glue it and clamp it in place, squaring it with the front edge of the sides (this is the “reference” edge of the sides, the edge that was left perfectly straight).

Cozad Guitars - Tailblock Clamped in Place

The process for adding a neck block is similar to adding the tail block. The neck block is squared where it will encounter the heel of the neck. It is slightly shaped to accommodate the curve of the Cutaway.

Cozad Guitars - Neckblock

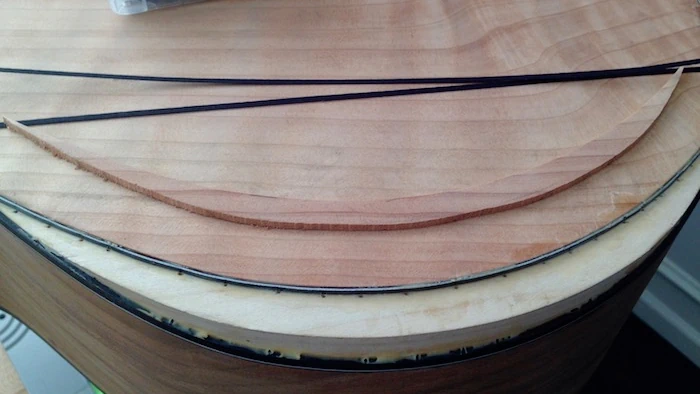
When installed on the guitar, neither the back nor the soundboard are perfectly flat plates. Instead, both of these plates are slightly arched, or domed. Quoting from "guitarmaking tradition and technology" by Cumpiano and Natelson, published in 1993:

"The resilience and strength of the plates are further enhanced by arching them. An arch is achieved by shaping the braces and by contouring the rim of the sides. This doming of the plates helps them to resist the distorting effect of string tension and also allows them to expand and contract safely in response to changes in the moisture content of the surrounding air."

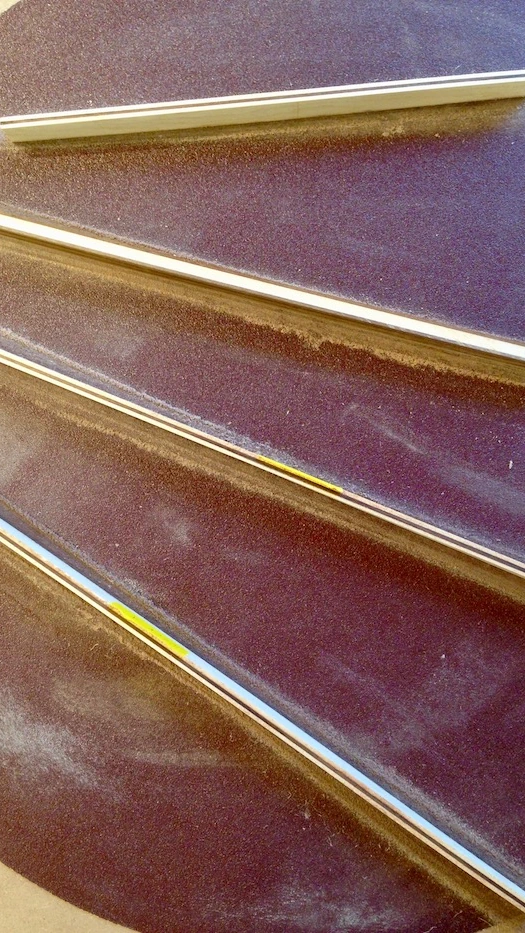
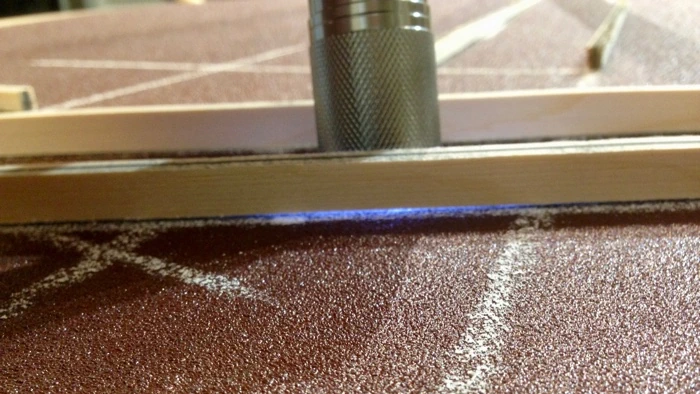
A radius dish, while not mandatory, is most useful for supporting the plate while a series of pre-curved braces are held tightly against that plate until the glue dries.

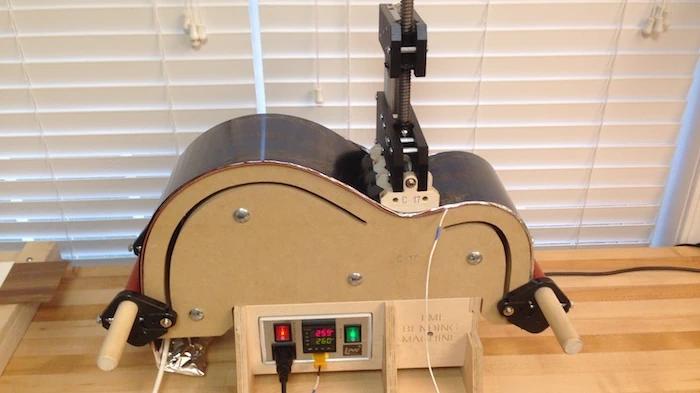
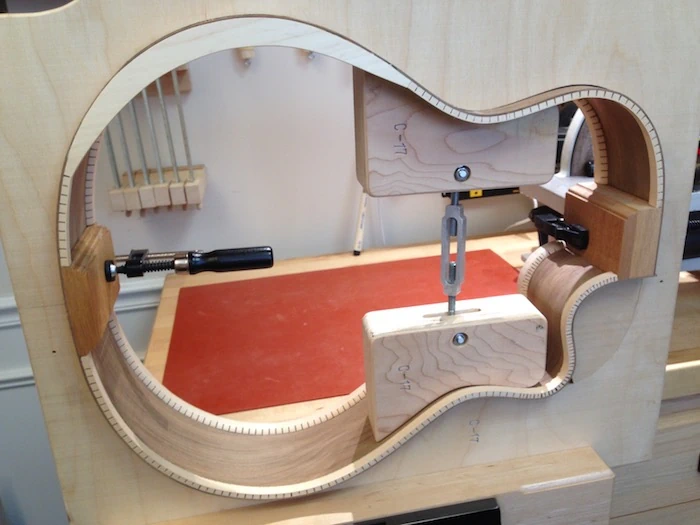
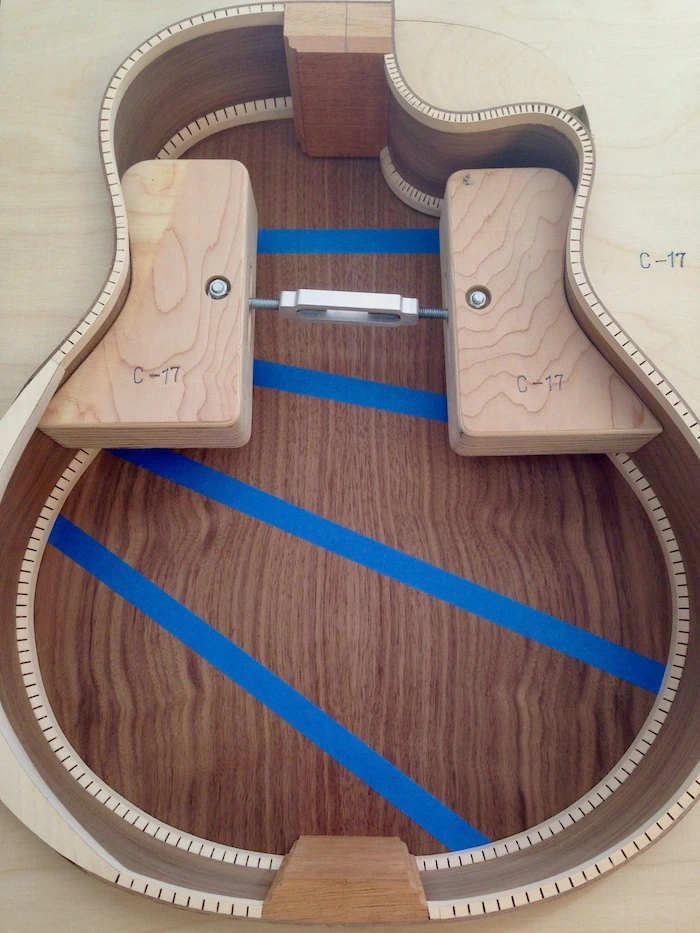
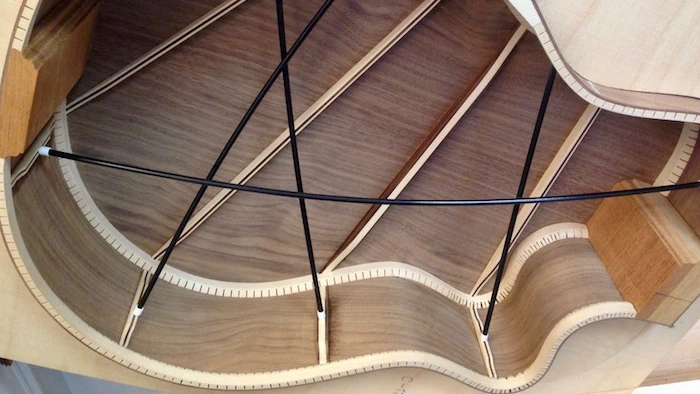
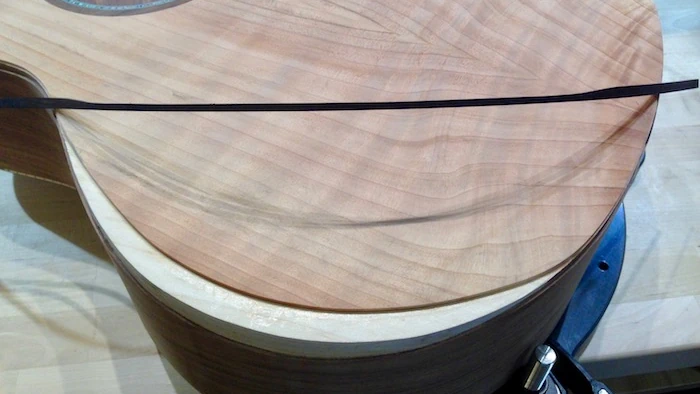
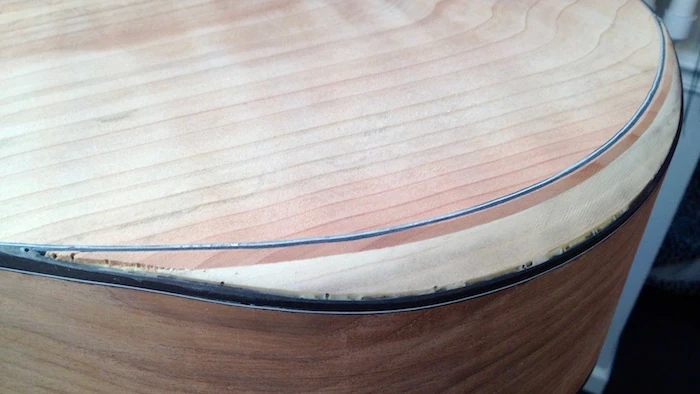
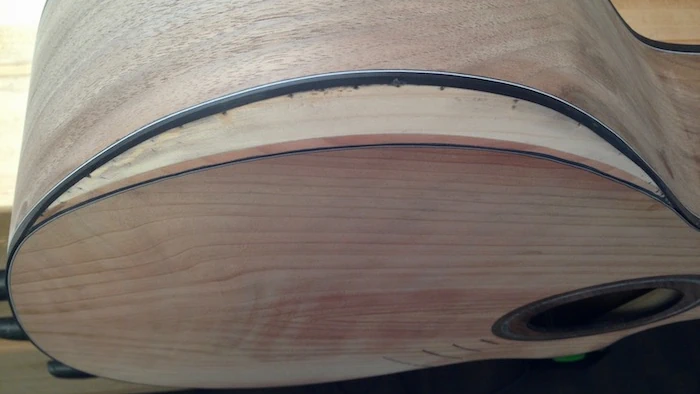
The sides of the guitar body must now be shaped to accommodate these domed plates. Here is where a radius dish earns its place in the guitar maker's shop. With the guitar body shell, consisting of two sides glued to a neck and tail block, secured  to a body mold, and a coarse grit sandpaper attached to a radius dish, the sides of the guitar can be shaped relatively quickly and safely by literally sanding the contour into the body. 

Traditionally, the radius of the soundboard is much more shallow than the radius of the back. Put simply, the soundboard is “flatter” than the back. Typically, less material needs to be removed from the front edge of the sides. The back will get a tighter radius, so a little more effort needs to go into getting this shape sanded.

Keep in mind that it is possible to crack a side if too aggressive of an effort is made to shape it manually. It is also possible to sand right past your target dimensions, so check those measurements frequently.

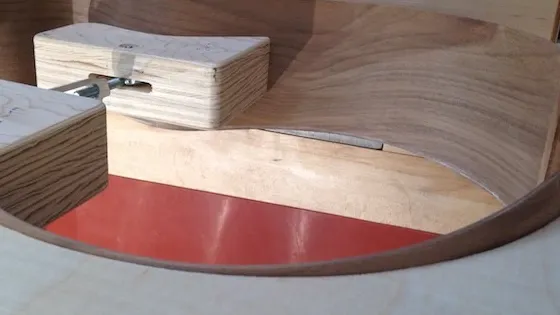
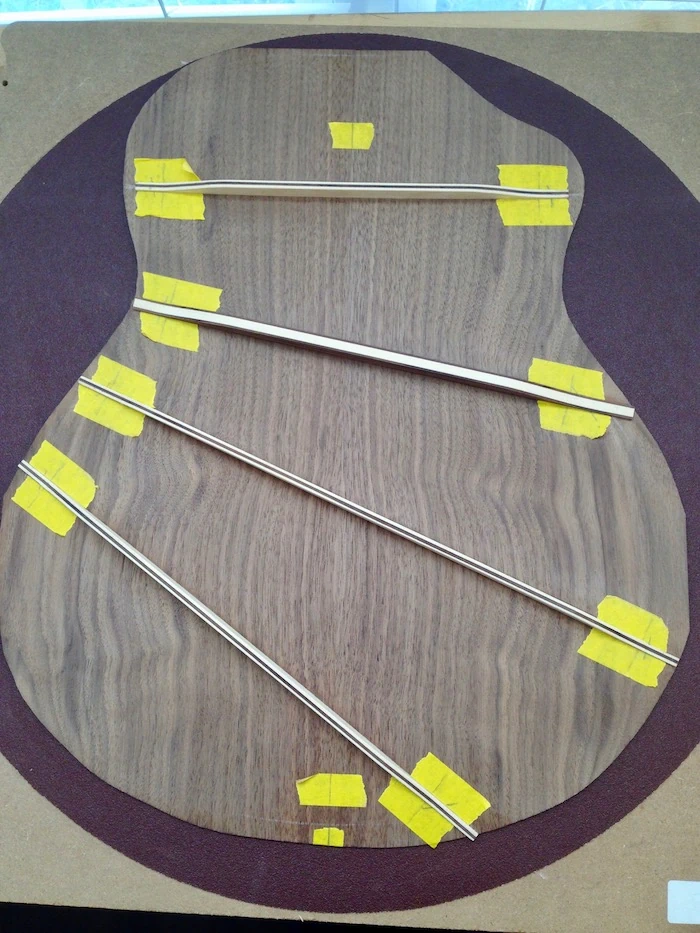
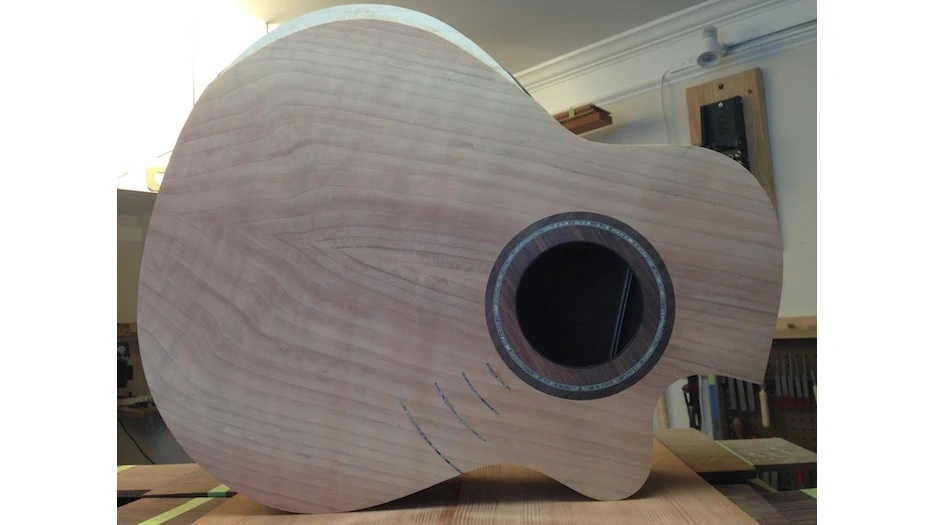
This guitar is to be fitted with a transitional Arm Bevel. A shaped wooden support is attached to the side, interrupting and replacing the kerfing where the arm lays across the lower bout, and forms a ledge on which the soundboard rests. The wooden support will eventually be overlaid with a veneer and blended into the binding, completing a smooth transition.

After deciding where to position the bevel, I mark the area on the side.

Cozad Guitars - Arm Bevel Location Marked

I carry the sides to my belt sander and carefully remove the marked area. I finish smoothing out the curve by hand. Alternatively, I can use a pattern template with a router to cut out the shape.

Cozad Guitars - Arm Bevel Location Cutout

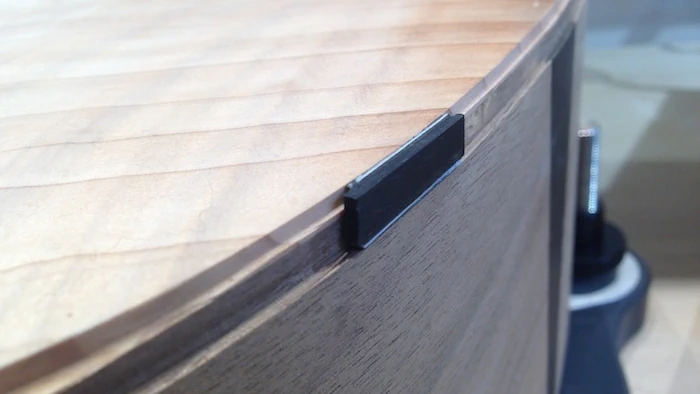
My guitar body template has indicators where the Arm Bevel is position, so I am able to trace the shape onto a Basswood block.

Cozad Guitars - Arm Bevel Traced

A trip to the bandsaw will rough out the arm bevel support block and, using the belt sander, I can achieve a perfect fit inside the body.

Cozad Guitars - Arm Bevel Support Block
Cozad Guitars - Arm Bevel Support Top View

Once the arm bevel support block is glued in place, a little work from the inside of the box removes unnecessary material and smooths the transition into the kerfing.

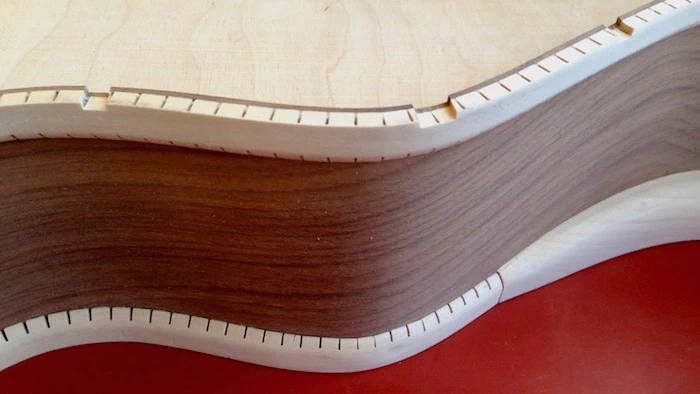
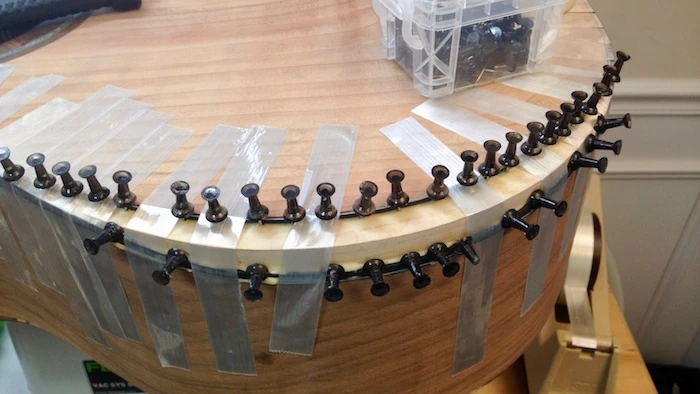
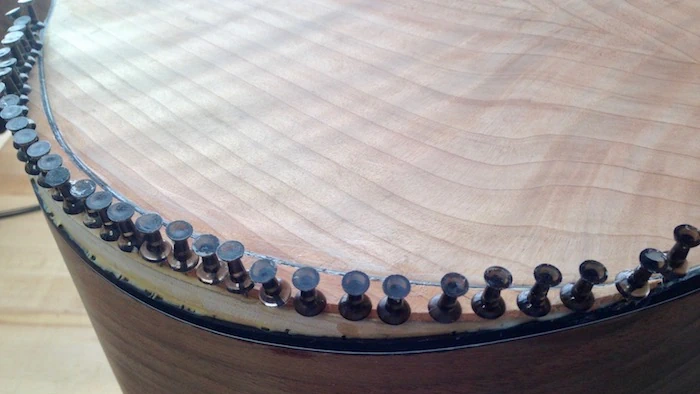
Kerfing is carefully added, and glued in place just a little "proud" of the edge of the sides.

Cozad Guitars - Arm Bevel Support Inside View

Once all of the kerfing is glued in place, the final side height adjustment is completed in the radius dish. If we have done everything correctly, we only need to “kiss” the radius dishes with the body of the guitar, as we are simply truing up the kerfing, at this point.

If you are shaping the sides manually, as I am doing here, you will quickly realize the benefit of the earlier trip to the radius dish. There is less material to remove if the sides are sanded prior to installing the kerfing. The kerfing looks much nicer if it is of consistent height all around the perimeter, and this will *not* be the case if you add it first, then shape the sides.

Cozad Guitars - Kerfing Complete

The Back

Like the sides, the back is thicknessed (thinned) to an indeterminate measurement that, for a solid wood back, typically ends up somewhere between 2.4 mm and 2.7 mm, depending upon the wood. Again, as with the sides, each piece of wood is different and the thickness measurement can vary. The goal is to remove all the unnecessary material that adds weight and dulls the overall tone of the finished instrument while maintaining sufficient structural integrity to hold it’s shape.

The back of the guitar will be glued in place, prior to attaching the soundboard. Since the joint between the kerfing and the back are visible through the soundhole, an opportunity presents itself to attach the back first, and spend some extra time cleaning up any glue squeeze out. HINT:  Without the soundboard in place, yet, the back is readily accessible.

I am incorporating an Arm Bevel, and the soundboard will need to be modified where it lays across the arm Bevel support block. I could use an external template to determine the new shape of the soundboard, but this locks me in to either always creating an identical Arm Bevel, or having to prototype a new template for each and every Arm Bevel variation. It is much easier (and more precise) to use the body of the guitar to determine the exact location of the Arm Bevel. I set the body (still in the mold) face down onto the back side of the soundboard, position it correctly, and trace around the kerfing. Now I can return to preparing the back.

I rough cut the body shape out of the rectangular plate before adding bracing. If you have an existing template, you can simply position it on the (inside of the) back and trace both the perimeter shape and the brace positions.

If you do not have a template, you can center the body, still in the mold if your body mold allows, or carefully removed from the mold - so long as the shape does not distort. Place the body back side down, on the (inside of the) back. You may be tempted to trace around the inside perimeter of the back...In the pursuit of fine craftsmanship, don’t. Instead, trace around the the outside edge of the body. Remember that the inside of the back will be visible on the finished instrument, and pencil lines are unsightly.

Cozad Guitars - Back Shape

In place of the ubiquitous ladder bracing, I am using a progressive pattern, angling each brace away farther from the former, much like a fan.

After carefully selecting the side of the back you want to be visible to the public, please remember to brace the opposite side of the back. Getting that step backwards can be painful.

Here I have laid out the back bracing with blue tape:

Cozad Guitars - Back Bracing Layout

I transfer the bracing layout onto my radius dish using chalk. I can then sand the correct contour into the brace by keeping the brace in its relative position on the radius dish. This sanding technique is not unique to my particular bracing pattern. It applies to any bracing pattern, including the commonly used parallel or “ladder” pattern.

Cozad Guitars - Sanding the Back Braces

The braces are pared down where they meet the sides. I use a low-tack tape that I can draw pencil lines on to help guide me through the manual process of shaping the ends of the braces. I accomplish the task using a curved paring chisel, a scraper, and sandpaper.

Cozad Guitars - Back Braces Attached

The outer rim of the back will lay on the ledge formed by the edge of the sides and the added kerfing. Additionally, I rest the ends of all four (4) back braces onto notches cut into the sides, as opposed to stopping the braces short of the kerfing and solely attaching the Walnut of the back plate to the sides.

Cozad Guitars - Notches in the Kerfing

The back is glued on, clamped tightly in place and left to dry overnight. I add side bracing, next.

I subscribe to the theory that there is greater function to the side brace than merely assisting with the prevention of side cracks (for which a cloth patch would be sufficient). If I understand the transfer of string energy correctly, it is potentially moving to the back via both the bracing and the soundboard / side joint. Rather than employ a velocity dampening agent, such as a cloth material, I extend the reach of the brace material itself, being careful to fit everything tightly together.

Cozad Guitars - Side Bracing

This is a favorite pausing point of mine ... where all this effort actually starts to look and feel like a guitar.

Cozad Guitars - Body Without Soundboard

The Soundboard

You may recall, prior to attaching the back, I had positioned the soundboard and traced around the interior of the kerfing, being especially attentive to drawing a line where the Arm Bevel support contacts the soundboard.

The purpose of the pencil line now becomes evident: I need to remove the soundboard material in the area of the Arm Bevel, leaving just enough to rest on the ledge of the Arm Bevel support block. Once I have determined where the cut will be made, I am careful to reserve the waste material, as it can (optionally) be used in a later step.

Cozad Guitars - Soundboard Arm Bevel Cut

After marking the bracing pattern on the radius dish with white chalk, I sand the proper curve into the respective brace(s).

Cozad Guitars - Soundboard Brace Sanding

Shining a light behind an un-sanded, flat brace demonstrates how the material needs to be removed from both ends. Once the brace seats nicely into the radius dish without having to apply pressure to bend it, it can be glued onto the soundboard. This is what establishes and controls the arch, dome, radius, etc.

Cozad Guitars - Soundboard Brace Sanding Backlit

The braces are glued onto the soundboard using animal protein glue. These braces include a carbon fiber lamination. I want the extra assurance of a good bond. Epoxy also works very well, though it is a bit more involved. An animal protein glue provides just the right balance of adhesion and ease of application.

Cozad Guitars - Soundboard Bracing

The bridgeplate is attached and notches are carefully cut around the perimeter of the body to receive the ends of the braces.

Glue is applied along the rim of the body and the soundboard is fitted into place. The soundboard goes face down into the radius dish to mitigate against unsightly runs and drips. Left to dry overnight, waste material is routed off the edge of the soundboard, and the body is ready for binding.

Cozad Guitars - Body Ready for Binding

The Binding

Binding contributes to the guitar in more than one way. Visually, it provides a pleasing (if not stunning) ornamentation to the instrument, in the way carpentry trim sets off casework, or pinstriping details an auto paint job. Sonically, it works to seal off the soundboard / body sides joint, forming something of a wall that can seemingly reflect soundwaves back across the top. Practically, it provides a buffer against unsightly and potentially damaging dents, nicks and dings.

Purfling adds an even greater degree of visual interest, and can be seen encircling soundholes, soundboards, backs and sides, necks and headstocks in all sorts of artistic ways.

Once a binding / purfling combination is decided upon, I like to build a small mock-up for measuring and test-fitting purposes.

Cozad Guitars - Binding and Purfling Mock-up

I set the guitar onto a cradle that holds the body level. A few careful passes around the rim of both the front and back of the guitar results in a stair-step rabbet profile that will accept my binding and purfling combination. Due to the nature of my approach to creating the arm bevel, it is necessary to make a few very small adjustments with a small file to blend in the binding and purfling cuts.

Cozad Guitars - Binding and Purfling Channels Cut

Four (4) pieces of binding are needed in order to encircle the body, two around the soundboard, and two more around the back.

Cozad Guitars - Binding After Bending

In addition to outlining both the soundboard and the back with purfling, I am using purfling on the sides. It is a bit resistant to bending, so I assist its compliance using a heat gun, and hold it in place on my side bender until it is needed.

Cozad Guitars - Purfling After Bending

UPDATE: I have since engineered a cutaway accessory for my electric blanket bender. The binding in the location of the cutaway is bent by hand. There is more than one way to accomplish this. Here I use an electric hand bender, though an iron pipe and propane torch work just as well and actually heat up and cool down much faster. A wooden bending template is helpful for test-fitting. Depending upon the wood I am using, I might use a spray / spritz bottle of water, or even a damp rag. An iterative process of gently working the wood on the hand bender, and test-fitting it on a bending template results in reaching the stage where the binding follows the template without having to force it.

Cozad Guitars - Electric Hand Bender

Regarding using a (wooden) body template for hand-bending: You may experience less frustration if you take the time to size this template to the inner dimensions of your guitar body, as opposed to the outer dimensions. In other words, don’t simply trace the outline of your guitar body or soundboard template as a guide for bending. Your sides and/or binding will come out slightly too large.

Cozad Guitars - Wooden Body Template

The cutaway side of the body is bound in standard fashion, but the presence of an arm bevel on the non-cutaway side of the soundboard requires a slight change in approach. The binding will follow the contour cut into the side in an earlier step. The purfling on the surface of the soundboard, however, will separate briefly from the binding to follow the curve around the soundboard, rejoining the binding on the other end of the arm bevel. In the photo, below, you see the purfling separate and form an outline around the arm bevel.

Cozad Guitars - Arm Bevel Binding and Purfling

To shape the binding to follow the contour cut into the side, I mark the binding at the points where it will be flush with the soundboard and carefully belt sand a contour into it between those marks. This relieves a great deal of stress as the binding is bent to follow the curvature, stress that would otherwise certainly crack the binding. As you will see, the bevel will blend nicely into the binding, and this preliminary removal of material will not be detrimental to the finished appearance.

Cozad Guitars - Arm Bevel Binding

I had set aside the soundboard cutoff from when I removed the material to rest on the arm bevel ledge. Here, along with a couple of thin strips of dark wood, that cutoff is re-attached. Due to the sharp angle of this particular arm bevel, the extra material allows for an improved transition from the soundboard to the side.

Cozad Guitars - Arm Bevel Cutoff

The cutoff section of soundboard is glued in place.

Cozad Guitars - Arm Bevel Cutoff Attached

Using a wood rasp, a scraper, and sandpaper, the bevel is shaped. It is very important to remove only the necessary material and nothing else. On the soundboard that means shaping right up to, but not into, the purfling. There can be a little more flexibility on the sides, depending on how much binding is available to remove. The preliminary shaping looks like this:

Cozad Guitars - Arm Bevel Rough Shape

When doing work such as this by hand, it is easy to catch and tear material. If you envision a centerline running parallel between the purflings and work from the purflings toward the centerline you will be less apt to make a regrettable mistake.

Cozad Guitars - Arm Bevel Ready for Veneer

An arm bevel is a player comfort feature. No two players are identical and, when it comes to the optimal size and positioning of the arm bevel, that points gets drilled home! Wide or narrow, short or long, closer to the tail or the waist, rolling more onto the side or the soundboard, I have the opportunity to customize each guitar to each player’s preference. As every guitar is different, a standardized veneer template will not suffice. I am able to quickly create a template of the rough shape and size of the particular arm bevel veneer needed by smoothing a piece of aluminum foil across the bevel area of the body.

Cozad Guitars - Arm Bevel Foil Template

I (temporarily) affix the foil to my veneer stock and carefully cut out a slightly oversized piece using scissors.

Cozad Guitars - Arm Bevel Veneer

It is entirely possible to simply grab the glue and stick the veneer to the bevel. However, the compound curve creates a bit of a clamping challenge and gaps can occur. An easier (read: foolproof) method for applying the veneer is to first coat both the arm bevel and the backside of the veneer with a thin film of glue. After it dries, a light pass with sandpaper over both glued surfaces will remove any raised grain, dust, irregularities, etc. Using a hot iron (a laundry iron will work, I just happen to have a lightweight craft iron / heat sealing tool handy) instantly bonds the two glued surface together. Carefully positioning the veneer prior to touching it with the hot iron is highly advisable.

Cozad Guitars - Arm Bevel Veneer Applied

Carefully slide a razor blade along the veneer, just shy of the finished dimensions, making certain not to cut past the bond between the veneer and the arm bevel. Complete the application using sandpaper (sanding block, power sander, etc.), and you are ready for a finish.

Cozad Guitars - Arm Bevel Complete
Cozad Guitars - The Tonnerre