Many years ago, I saw one of the first all-Koa Taylor Grand Orchestra models hanging high on a wall in a Guitar Center on the West Coast. I asked if I could hold the guitar, which resulted in a scramble of employees moving amps and cases, and wheeling in a large ladder, all in an effort to satisfy a potential customer. It was fun to be a participant, and everybody did a great job. I purchased that instrument that day.
The Taylor proved to be a delightful guitar. The size, shape, weight, playability, etc. all came together in an excellent package. The designers and builders that played a role in the advent of that model have my respect. The overall feel of the Taylor Grand Orchestra truly inspired me to return to my shop and build the Canon.
This is not a "How To Replicate a Taylor" article, nor is it a "How To Build a Better Taylor" hit piece. Instead, I simply share some insight into what I was inspired to build, and how I went about doing that.
My goal for the output of this guitar is to produce a classic "slightly scooped midrange" frequency response, but have much more power from the low end. I am going to accomplish this by incorporating Rosewood into the bracing. You'll see.
I will be building a more rigid, reflective back and sides, as opposed to a more flexible, "responsive" back. I want to use a relatively neutral tonewood that doesn't steal all the credit for the overall sound of the guitar. But I also want the back and sides to be visually interesting.
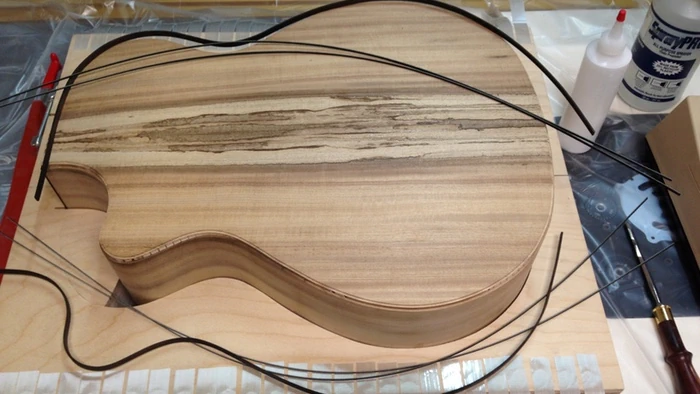
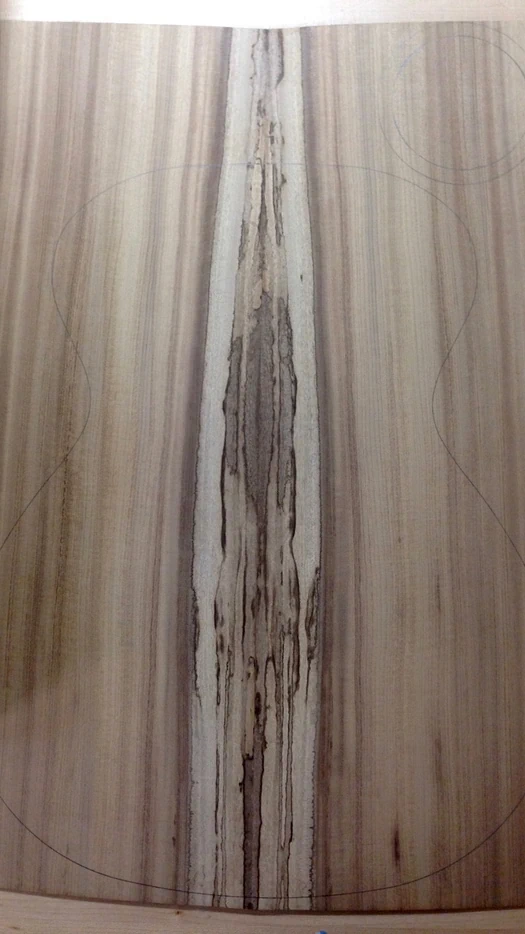
Most people would acknowledge that a given piece of wood, cut from what was once a living tree, is unique, as in, no two pieces of wood are identical. But some trees seem to offer more visual distinction than others, and I find Oregon Myrtle to be right up there at the top of that list. In fact, it is extremely difficult to create two "matching" guitars if Myrtlewood has been chosen for the back and sides. For me, that is a good thing and I revel in the distinction. The wood I selected for this particular guitar exhibits pleasing striping and has a visually interesting spalted heartwood appearance down the center.
I bent these solid wood sides on an electric Side Bender.
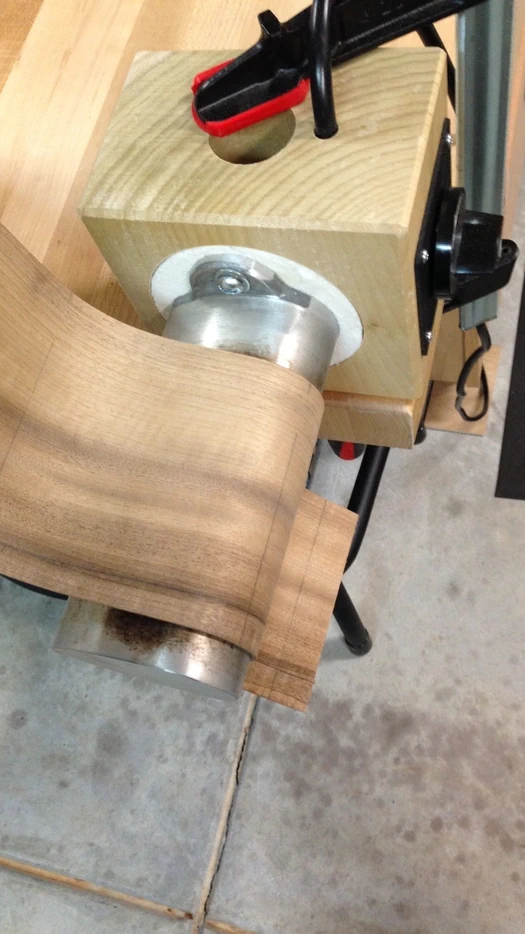
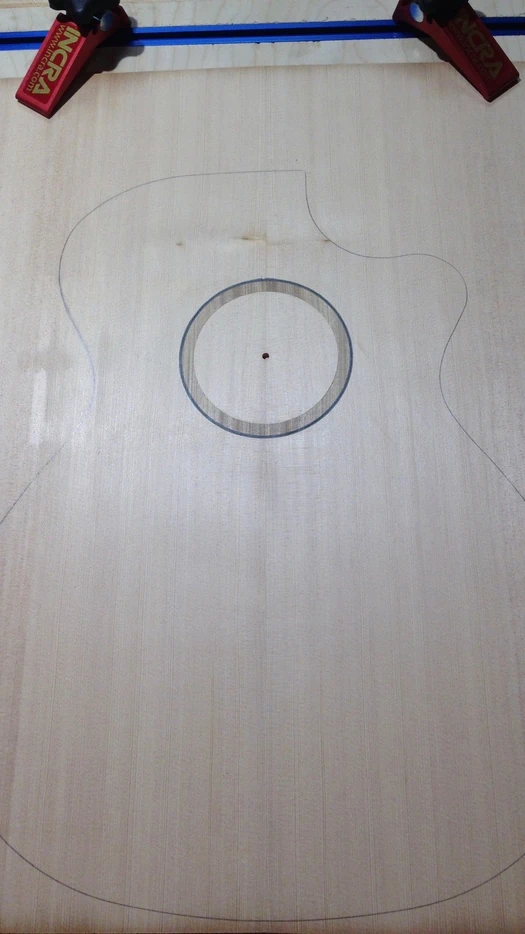
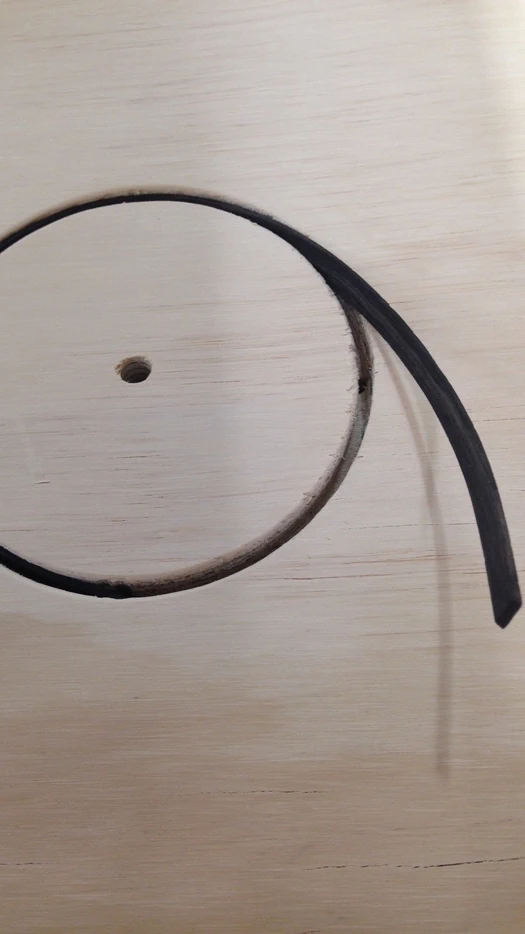
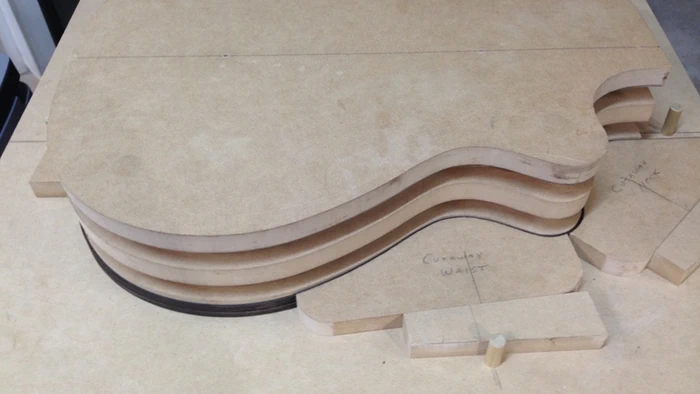
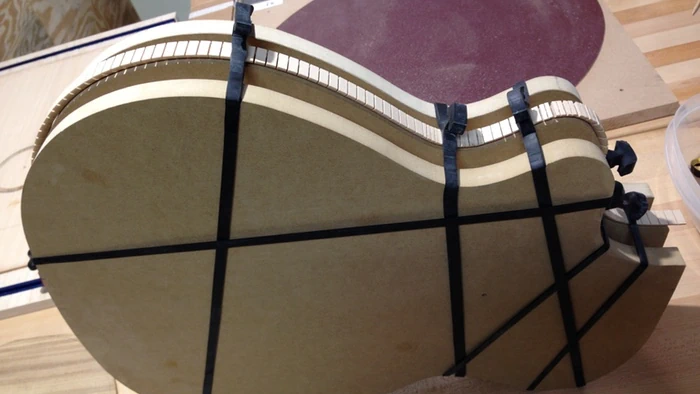
For determining the shape of the cutaway side, I rely heavily on my bending templates. Think of them as the doughnut hole, or what was removed from the inside of the guitar body mold. These are constructed separately using MDF and serve as both a model during the bending process as well as a clamping base.
Should you decide to employ a bending template, consider the dimensions involved: It should be the size of the body mold less the thickness of the sides. Do Not simply trace the corresponding body mold or soundboard template, or you will end up with sides that are too large. While you may be able to force them into your mold, you would be introducing undesirable stress on the instrument.
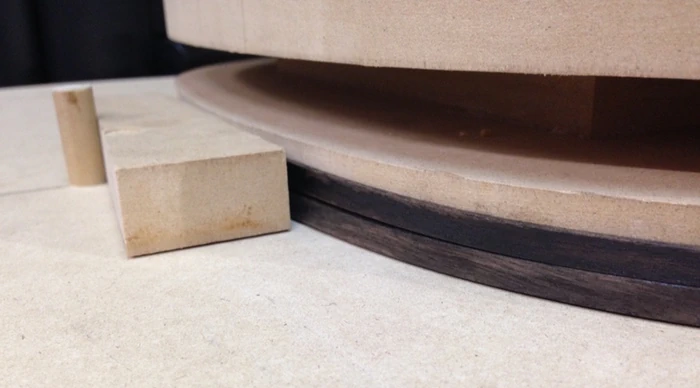
Using an iterative process of bend a little, fit a little, I am able to produce a very stable bent side.
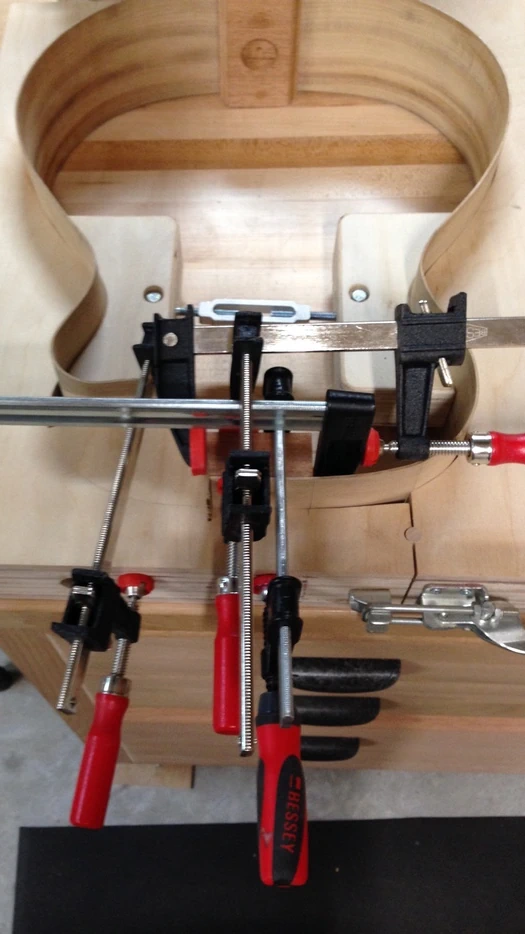
Holding bent binding tightly in place after bending, and allowing it to rest overnight, goes a long way to reducing springback after they are released from the form.
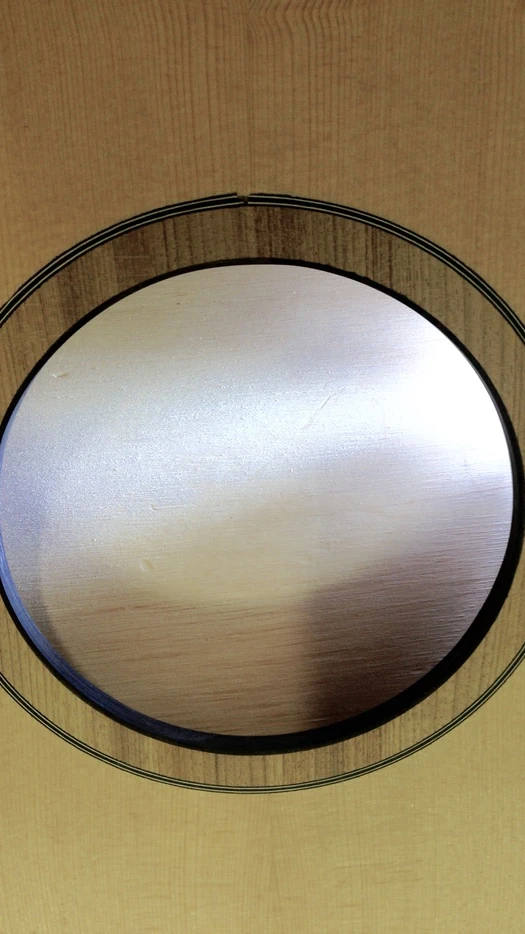
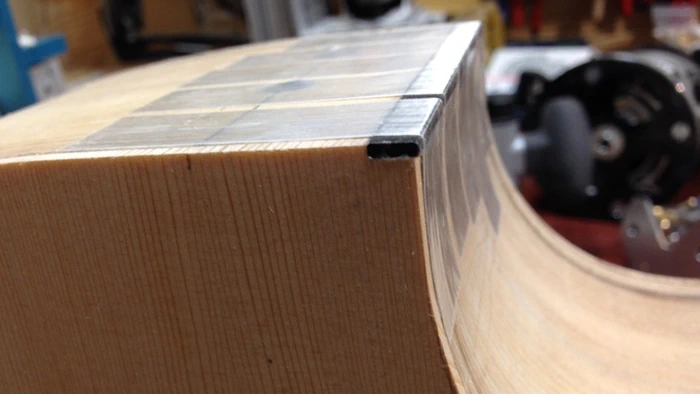
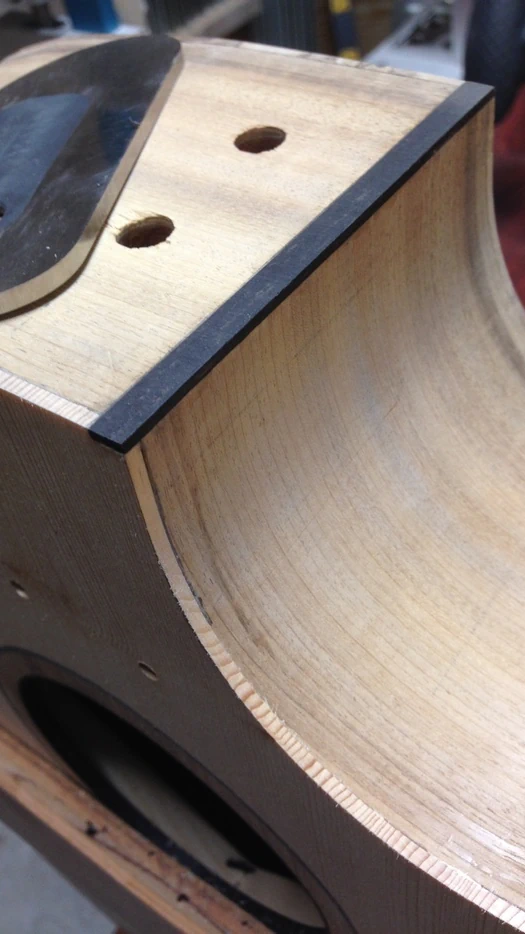
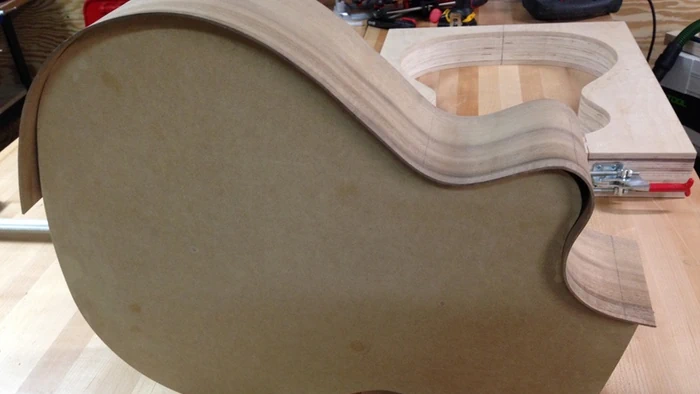
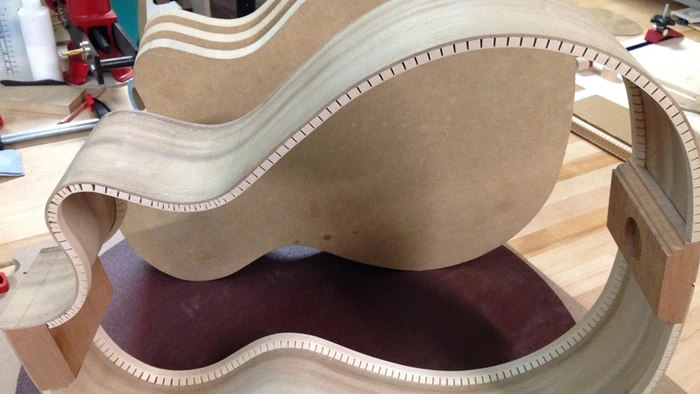
Once the sides are bent satisfactorily, they are held in place in the body mold where they will (typically) reside for the duration of the body construction. Both the tail block and neck block are cut, shaped, drilled and glued onto the sides.
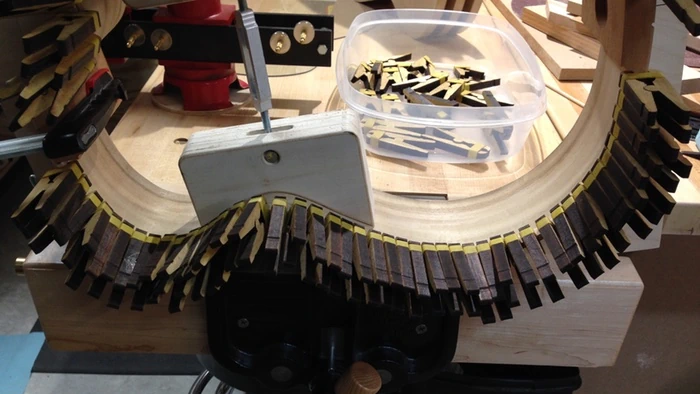
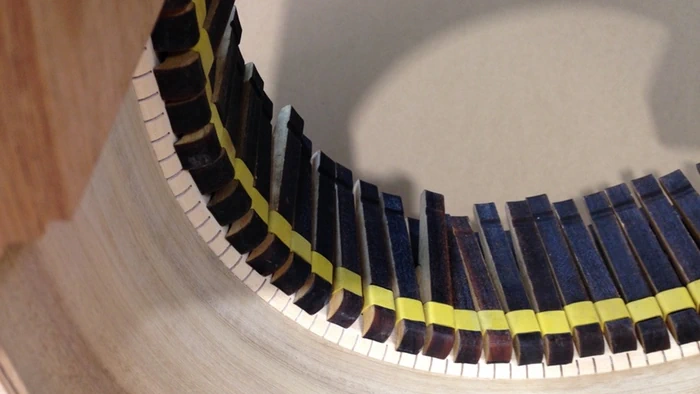
On the occasion when I will use kerfing instead of solid linings, the kerfing is bent prior to attaching. As flexible and delicate as it is, in order to prevent breakage, I have been successful in lightly wetting (not soaking) the kerfing, gently forming it around the bending template, holding it in place and allowing it to dry. Additional cuts are made to allow for tighter bends at the cutaway.
After the kerfing has thoroughly dried, it is glued into place along the rim of the sides.
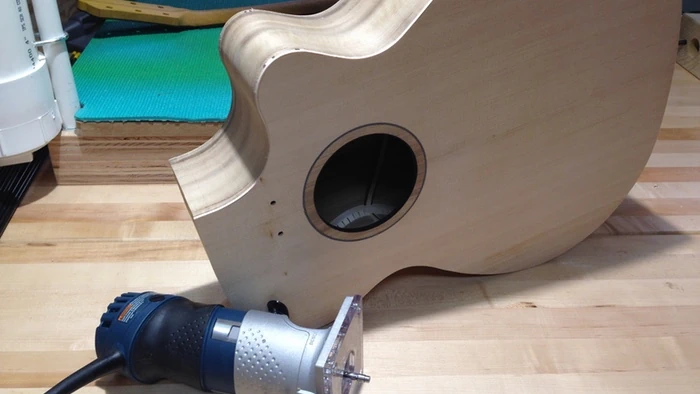
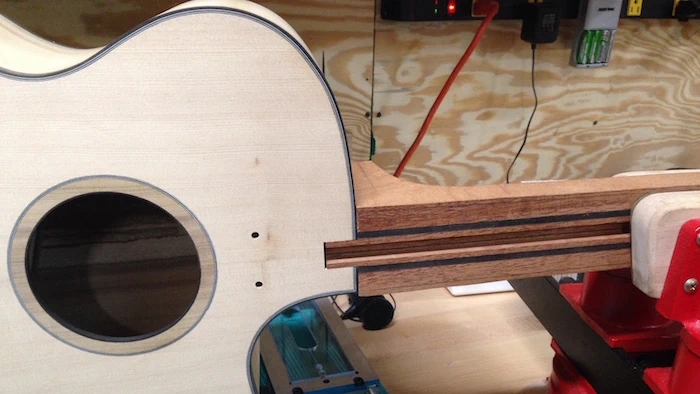
Here I have carefully removed the completed sides from the mold, to show how the guitar’s shape has been established and the sides are now ready to receive the back.
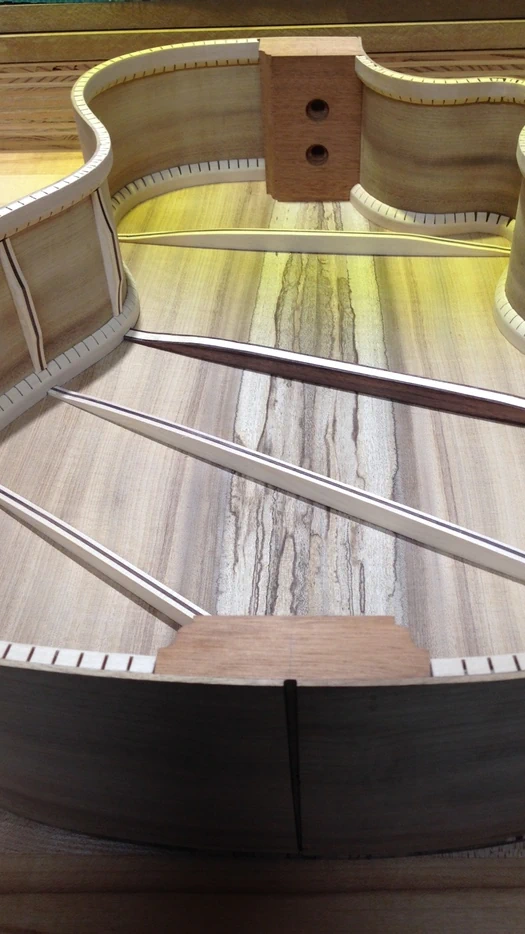
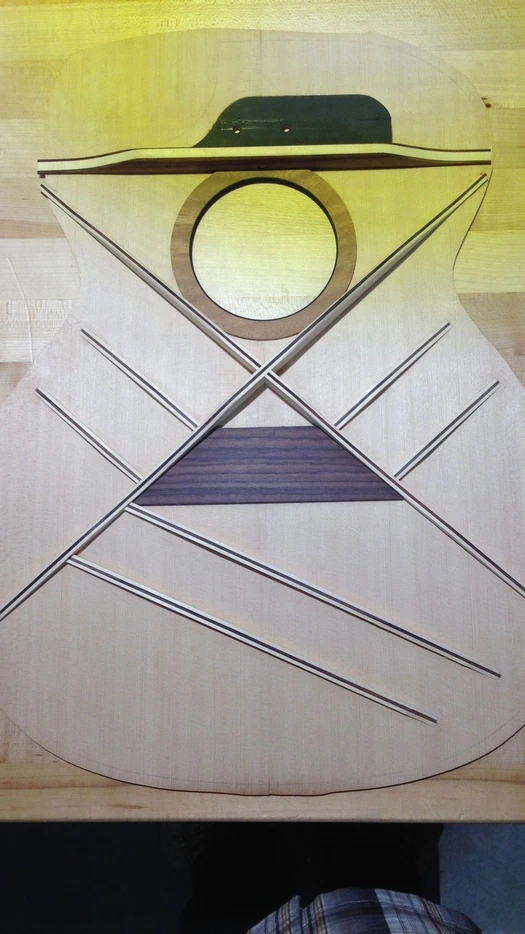
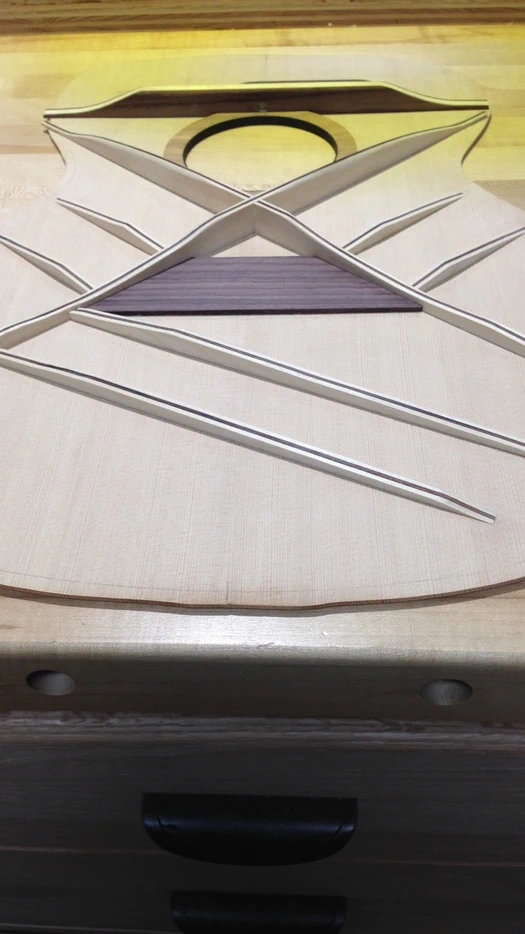
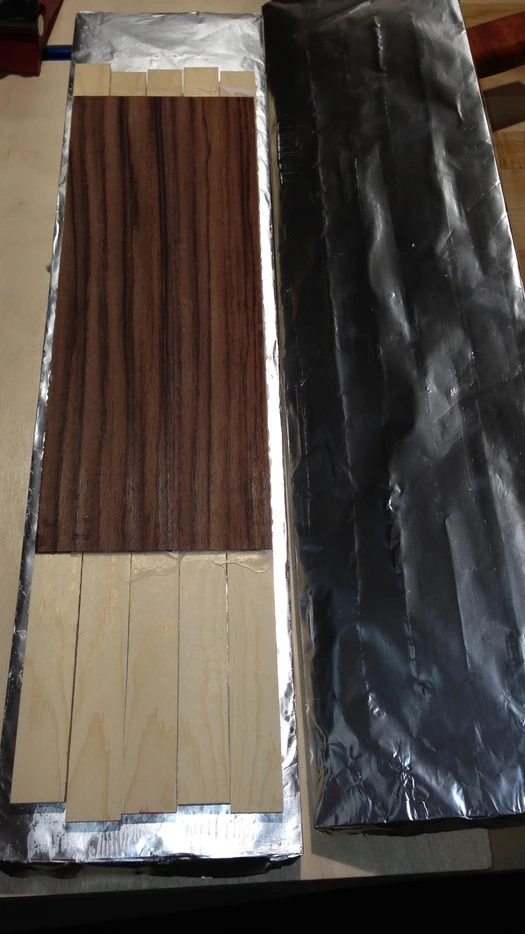
I will use a laminated brace, a combination of Rosewood and Adirondack Red Spruce. In addition to a next-level stiffness-to-weight ratio, the timbre of these braces is distinct from all-Spruce bracing. I include a primary transverse brace on both the soundboard and the back, and this is formed by sandwiching Spruce between two layers of Rosewood. The balance of this guitar’s bracing, the majority of pieces, is constructed by sandwiching Rosewood between two layers of Spruce.
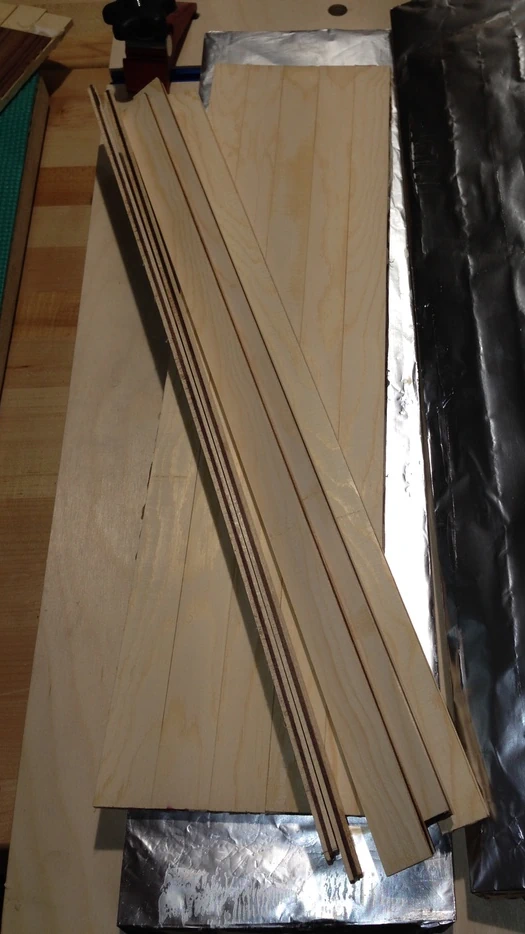
When dry, the laminated product is ripped back into individual braces. The process then continues as it would with common Spruce-only bracing, with extra care being afforded while shaping to avoid the cross-grain tearout.
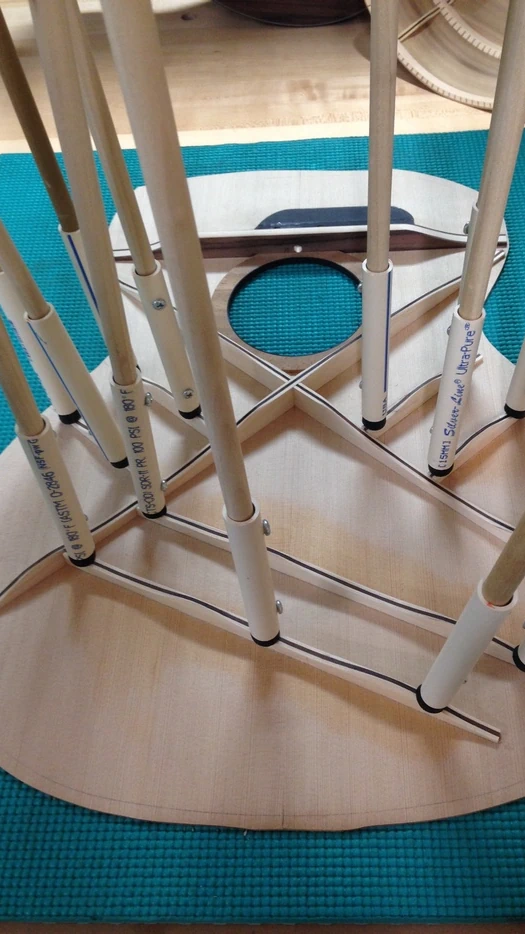
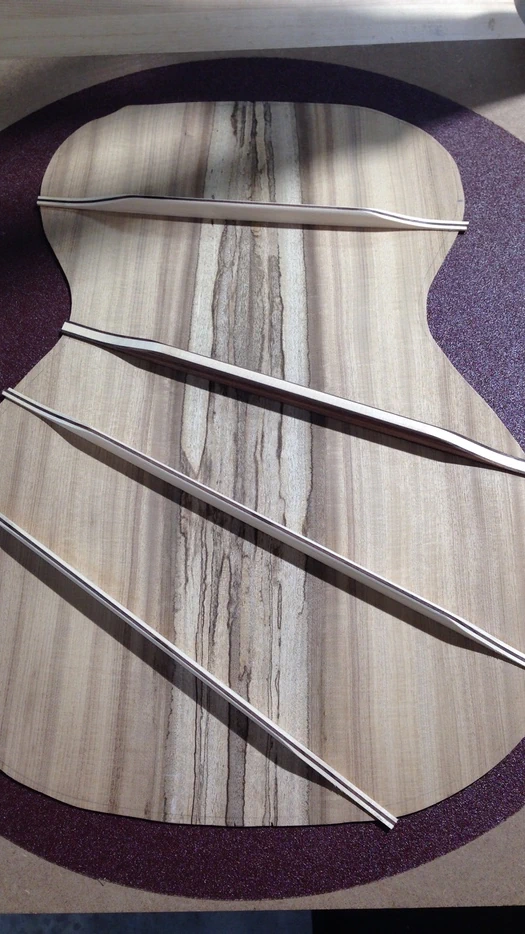
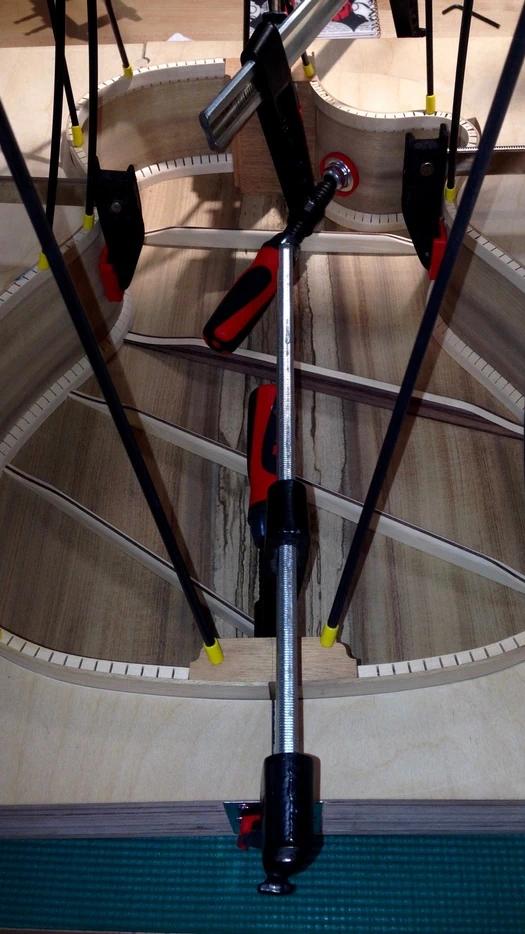
The braces are glued to the back in a fanned pattern resembling the open fingers of the hand. This pattern results in a relatively stiffly braced back, which produces a resonance that is noticeably higher than that of the soundboard.
A note on brace shaping: A commonly-used approach to shaping braces has you glue on rectangular sticks and, using a chisel, contour those rectangles into their finished dimensions. If there is a downside to this approach, it is related to the use of that chisel. To mitigate "splitting" already glued-on braces (a "no-no"), you need razor sharp chisels. If you "slip" with one of those razor sharp chisels, it is easy to gouge the soundboard (or worse).
Another approach has you rout or sand the basic contour(s) into the bracing prior to assembly, and then complete the brace material reduction process by sanding (sometimes planing with miniature tools). Sanding a brace surface laminated with a hardwood presents a color exchange challenge, where the oily dark wood dust is staining the lighter softwood. This can be overcome by using a scraper for the final pass.
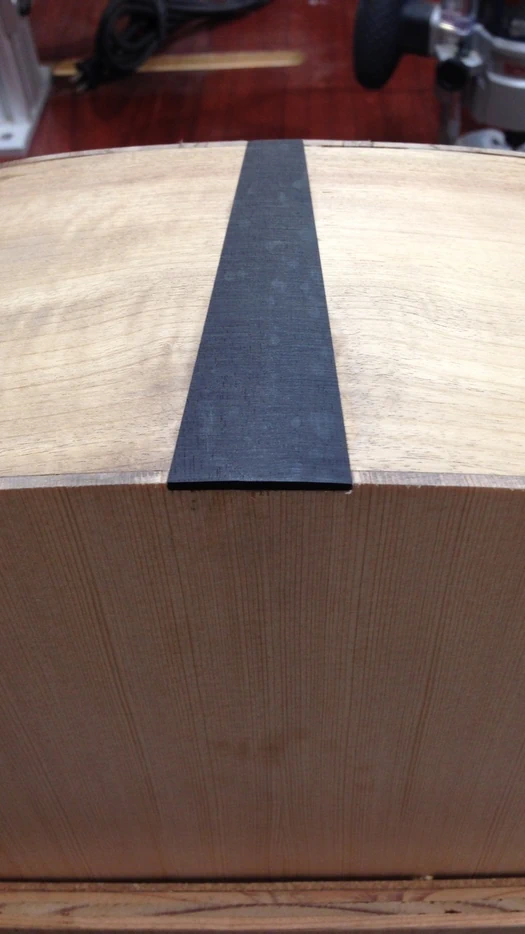
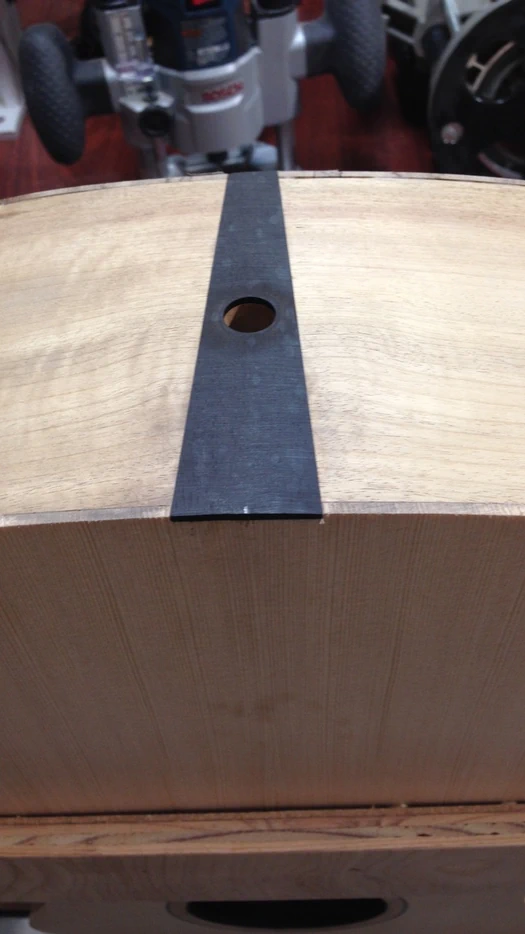
The back is glued to the sides, having carefully notched the kerfing to receive the thickness of the bracing at the edges. These braces are then resting on a ledge formed by the kerfing at the sides, akin to a joist resting on a wall.
Small braces are added to the sides at the position of the back braces. These act to support the sides and, as with tape, minimize the risk of the sides splitting along the grain. Side braces may also assist in transference of the kinetic energy generated by the strings to the back plate.
The Spruce soundboard was routed to receive a ring I had cut from an unused section of the back plate. Purfling was added around the outside edge of the ring.
Reinforcement is added to the back (inside) of the soundboard. Traditionally, small braces and/or plates are used for this purpose. This guitar will receive a hardwood ring. This serves add reinforcement to a delicate section of the soundboard while also providing support for a wider soundhole binding.
Ebony, being particularly short-grained and brittle, is not an easy wood to bend. Nevertheless, it is one of my favorite choices for binding. In recent years I have found Ceylon (Indian) Ebony to be much more forgiving when bending than Gabon (African) Ebony, and tend to use it more often. I have a repeatable method for forming it around the soundhole. First, I sand a strip of binding to approximately half the thickness used to bind the edges of the body. While this definitely aids in preventing breakage, the primary driver behind thinning this piece is my own aesthetic preference: I have come to prefer the appearance of a thinner soundhole binding.
Next, I drop the piece of binding into a pot of simmering water. A minute or two in the hot bath has proven sufficient for my purposes. I remove the now malleable strip from the water, wipe away excess water, and immediately inset the strip into a routed circle in a plywood form. The routed channel is wide enough to allow the strip to overlap where the ends meet. This is left to dry thoroughly.
Cut to size and glued in place, the soundhole binding is a welcome visual addition.
At the outset of this article I stated that I intended to build a powerful guitar with an increased bass response. What I can show you in my photos is a surefire method I have found of achieving that. I will leave it to you to experiment with dimensions, adhesives, and precise positioning measurements. I will share that I do use epoxies, and I splay the legs of the X-brace wider than is considered "conventional." Rosewood plays a big role in shaping the sound. No one picks up these guitars and thinks they are "missing" something, soundwise, especially not from the low end.
I have fashioned some fixtures that I use to rough out the contours of the braces at the router table. he braces for the soundboard, having been routed to rough shape, are positioned and glued in the go-bar deck.
Time is now devoted to shaping and/or tapering, removing unwanted bracing material. As I mentioned, earlier, I rely on sanding techniques more than razor-sharp chisels for this process, especially with laminated braces. The grain is going in all sorts of directions, and I can experience fewer surprises by sanding.
I am not removing brace material for fun. Nor am I shaping the braces in order to make them "look cool!" The primary function of these braces is to provide sufficient support to resist the forward rotation of the bridge due to the pull of the strings. With that in mind, I set out to reduce the sound-deadening, or "damping" impact of unnecessary wood. Additionally, I seek to coordinate the transference of the kinetic energy generated by the strings across the soundboard. In other words: Get rid of as much bracing material as possible without compromising the structural integrity of the soundboard. When I get this "just right," and I pluck those strings for the very first time, I am instantly rewarded for my efforts!
As the following photos reveal, my laminated bracing reduces the overall mass of wood typically needed. Aesthetically, it is a clean look. Sonically, it is stunning!
After the soundboard is glued to the sides I flush cut the excess material (plate and braces) off of the guitar body.
The end graft is added to the body.
A hole is drilled through the end graft, sides and tail block to accommodate and end pin. I can drill the hole now, and adjust my finishing techniques to accommodate an existing hole, or I wait until all my finish work is complete, and then drill the hole. Both approaches are viable, and both have their drawbacks.
This body features a cutaway. Here, I manually route and add binding where the cutaway meets the neck prior to routing the binding and purfling channels around the perimeter of the body.
Dried glue is removed and binding is carefully blended into the body using a scraper.
This body is mounted onto a sled, leveled, and rotated across a "tower-style" binding router, which is equipped with a depth stop and glides on a vertical rail. The process is the same for both the soundboard and the back of the guitar body.
Mise en place - With everything staged, the back can now be bound. This is especially necessary when applying binding in the traditional fashion, where glue is applied to the purfling strips, binding, and binding channels, all at once. The binding and purfling is carefully, but quickly, fitted to the body and held tightly in place with tape until dry. Careful attention is paid at this point to tightly securing the binding to the body and eliminating any gaps. Hopefully, that is.
This 5-piece laminated neck includes carbon fiber stiffeners. It joins to the body with a mortise and tenon, and is held securely in place with two bolts. I have routed a truss rod slot down the center.
The fretboard is inlayed with fret markers and ornamentation. Earlier, as I was constructing the body, I had envisioned simple white shell dots with Myrtle wood filigree, so I set about to create what I saw in my mind’s eye. I drew the pattern on paper and, once satisfied, transferred it onto waste sections from the back.
After installing the truss rod, the fretboard is glued to the neck. An aluminum fixture having plastic cauls is used to clamp the fretboard in place while the glue dries.
That completes this build.