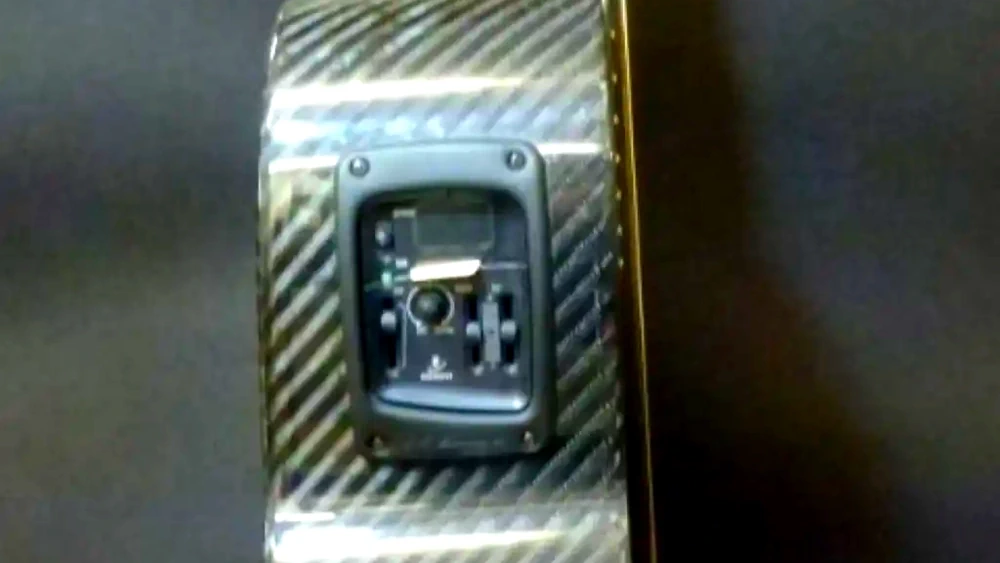
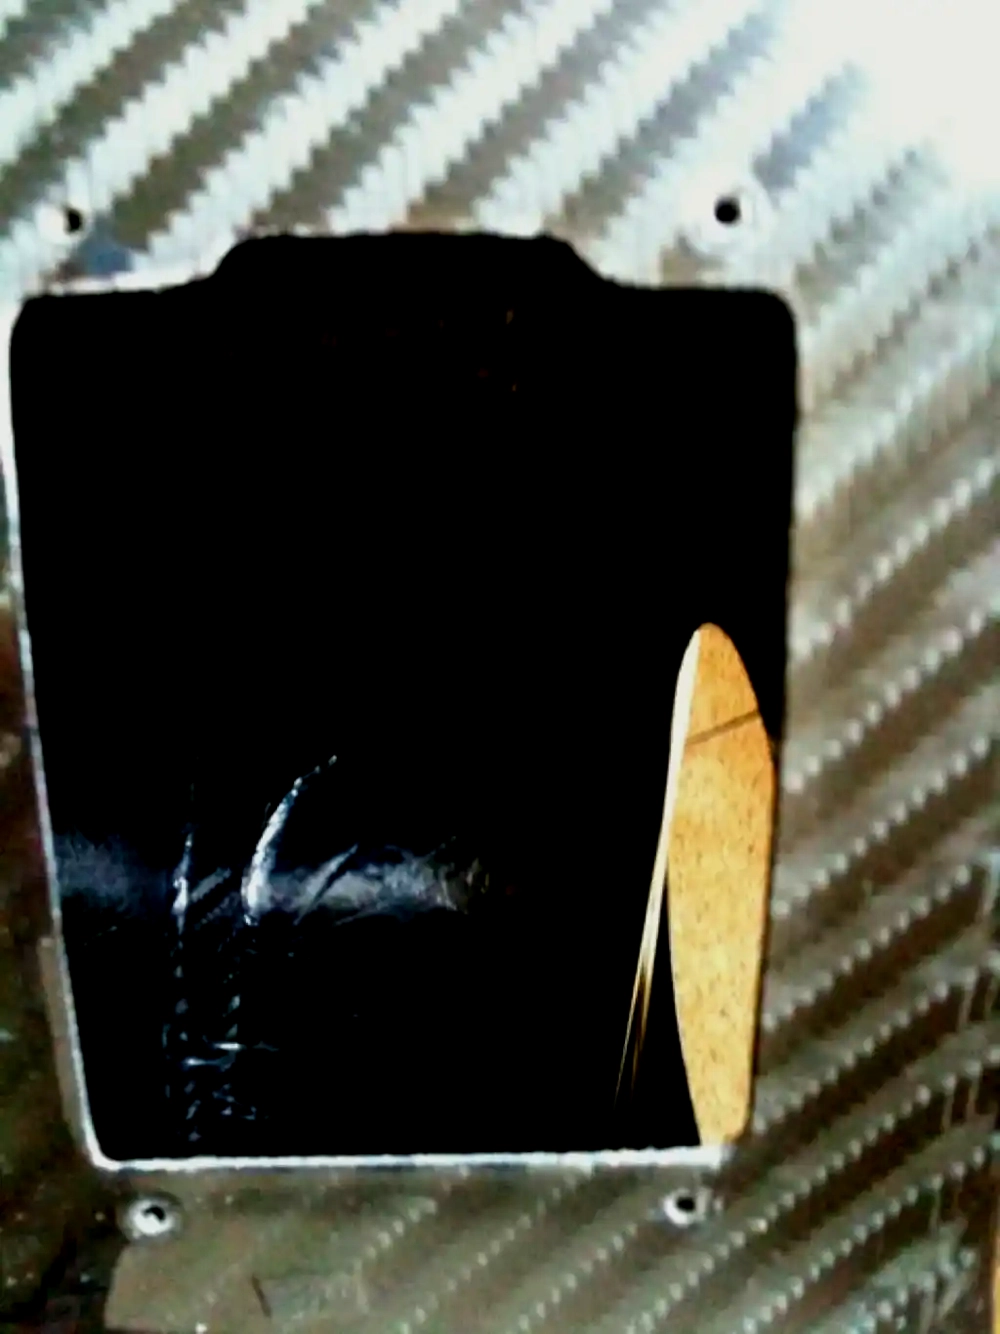
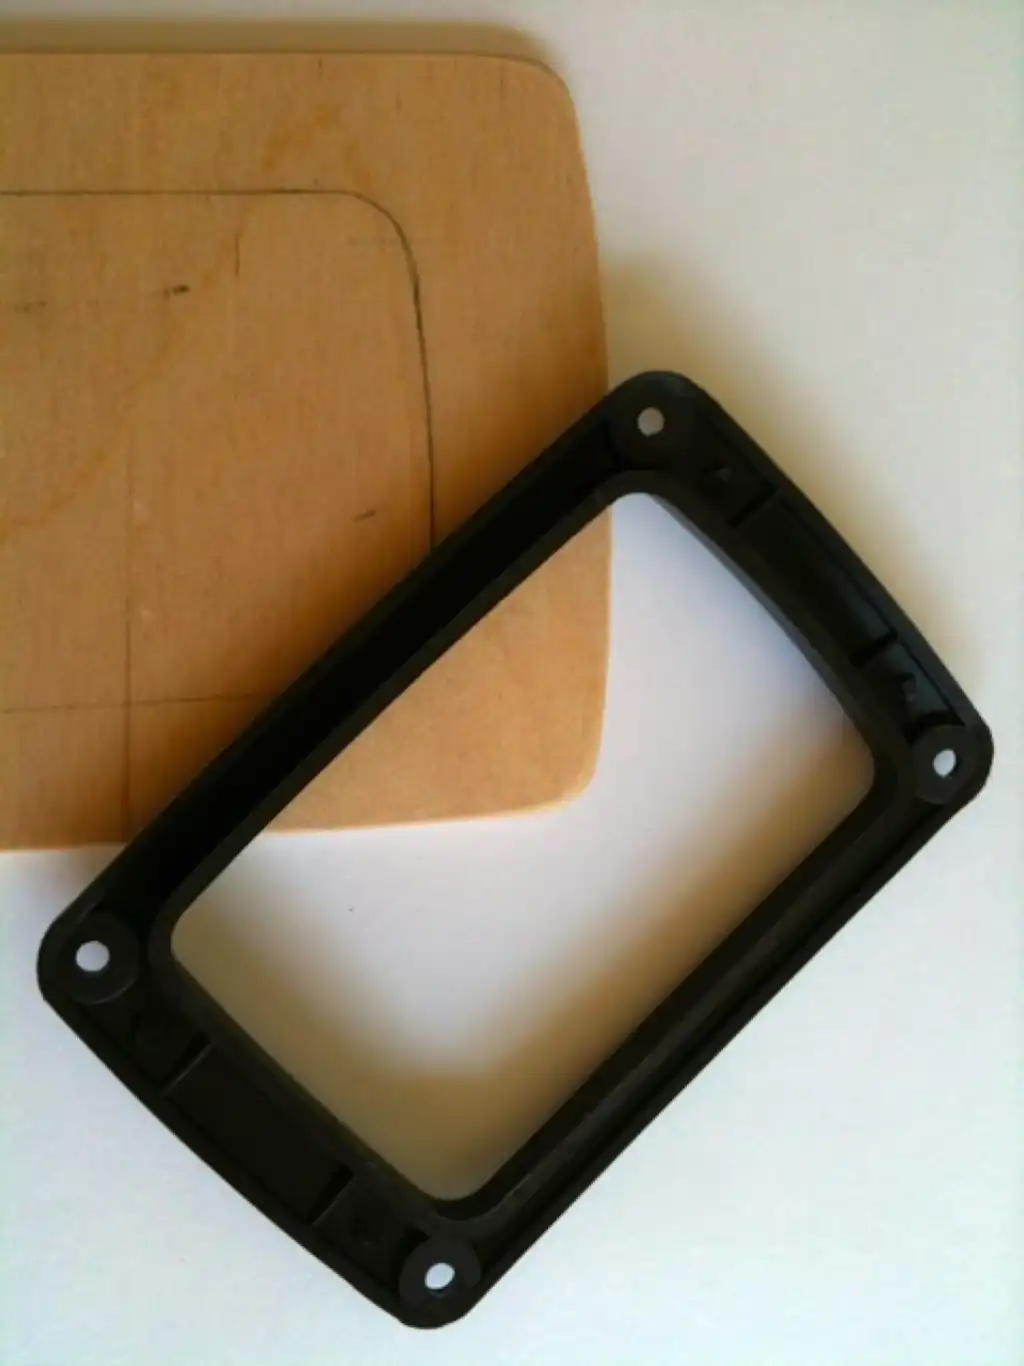
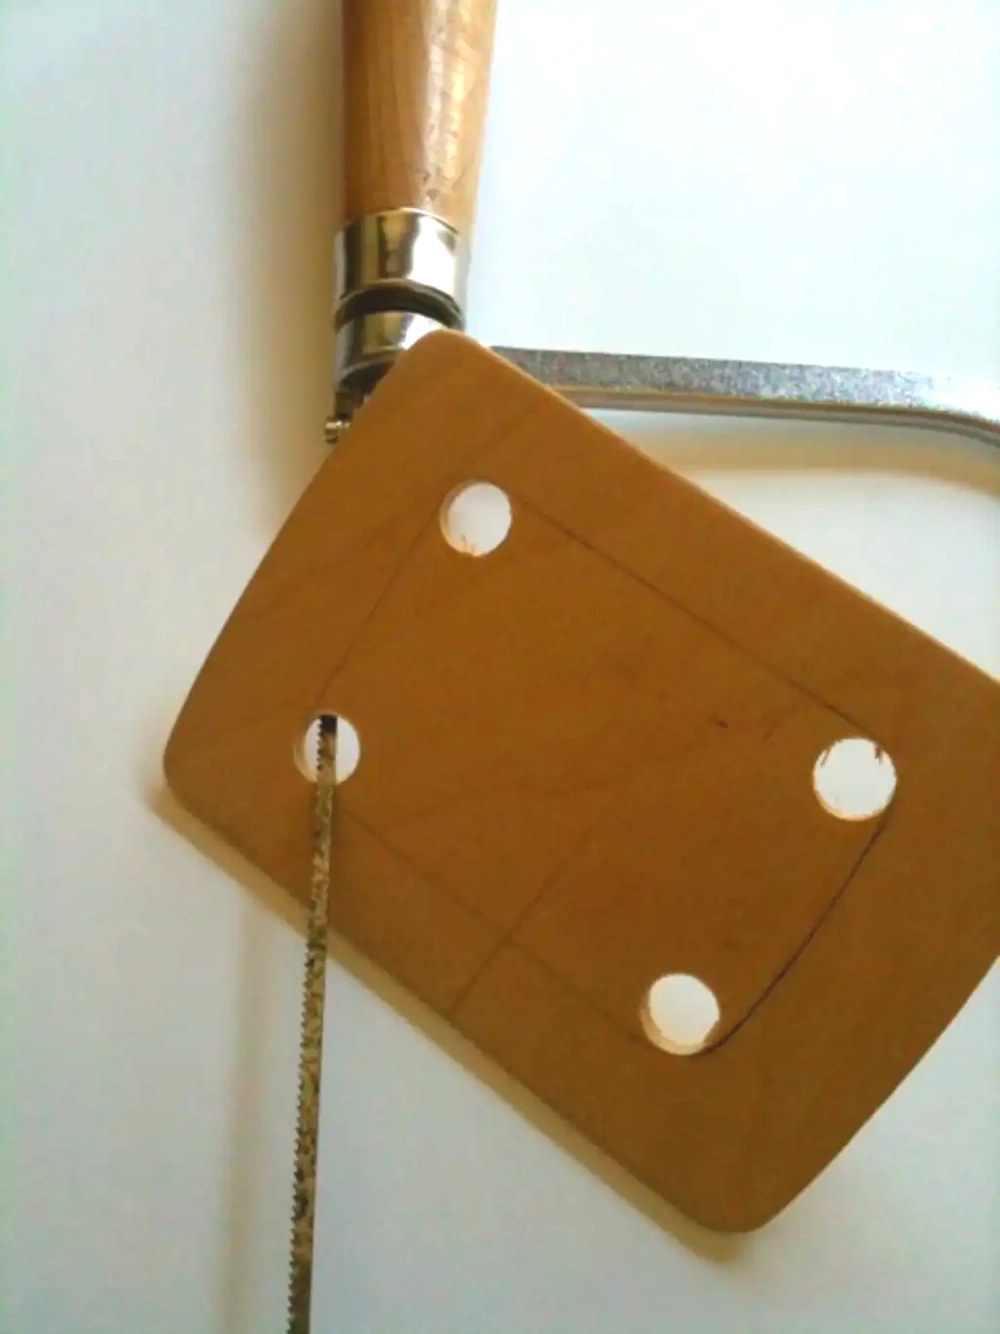
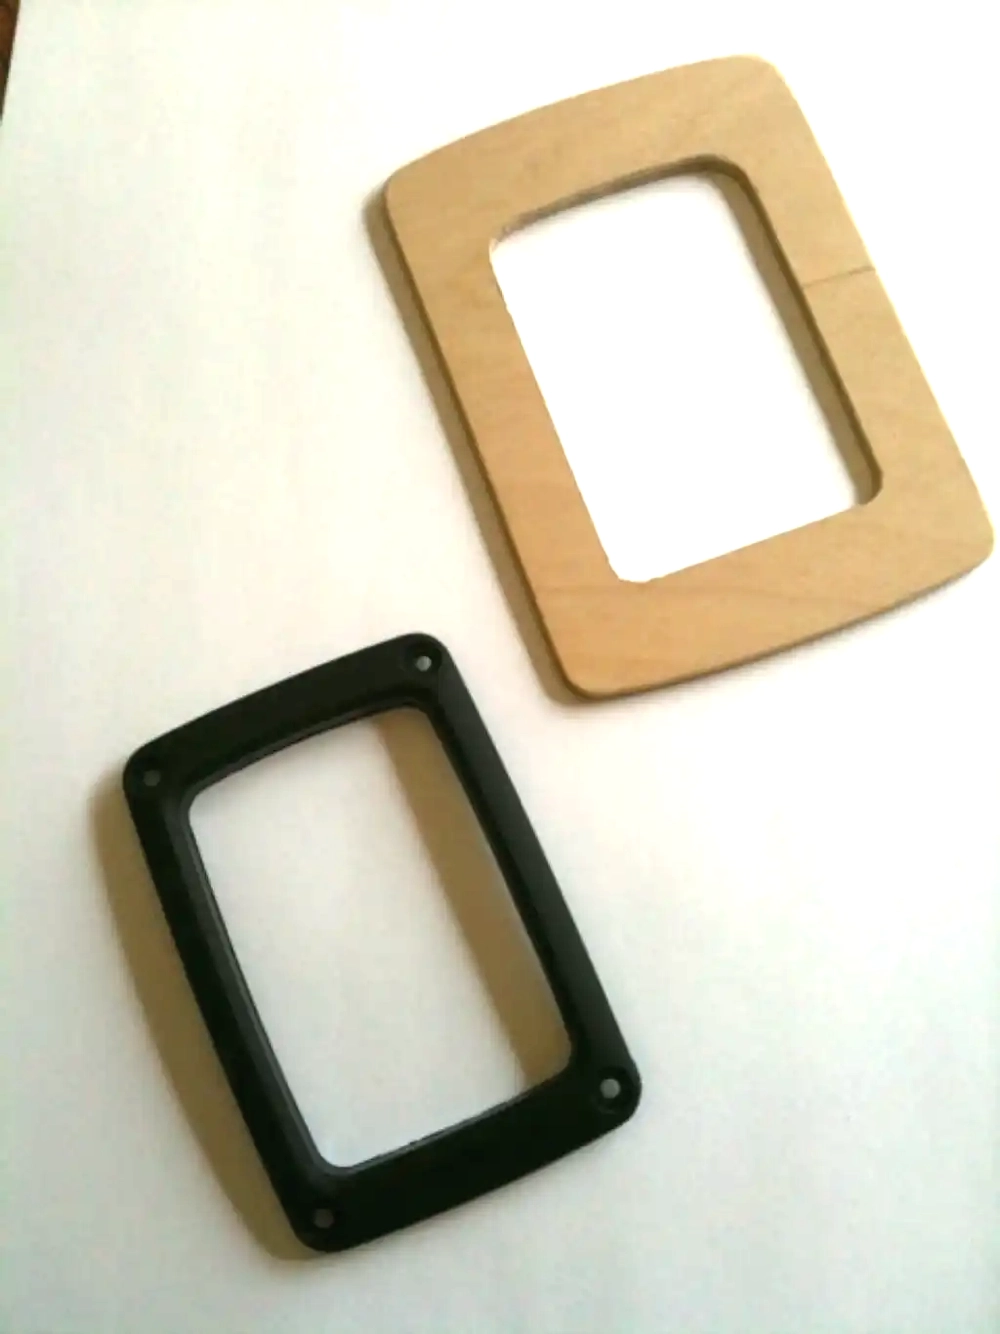
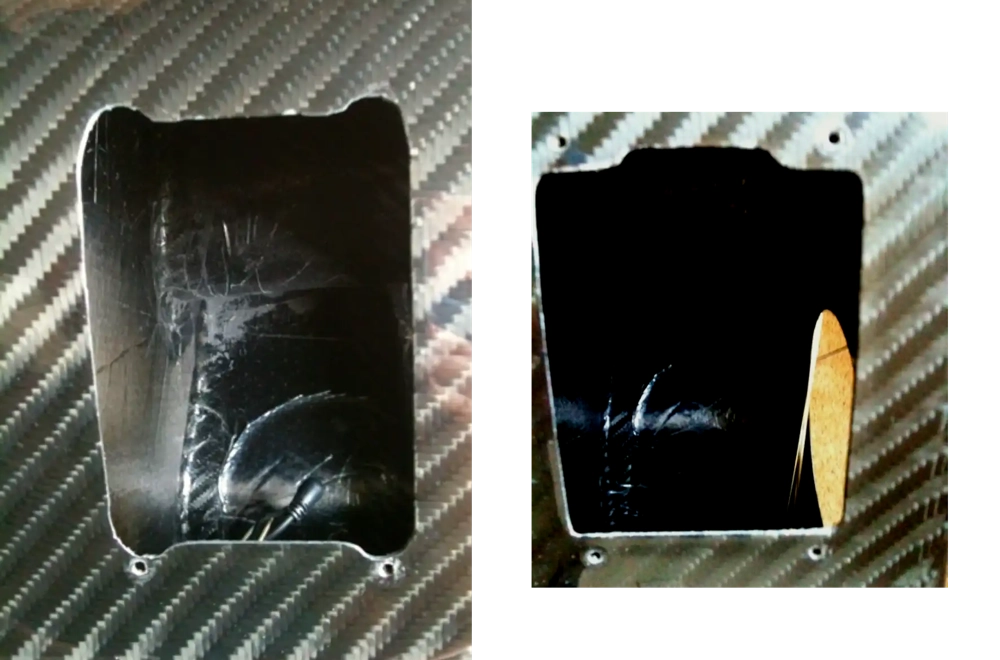
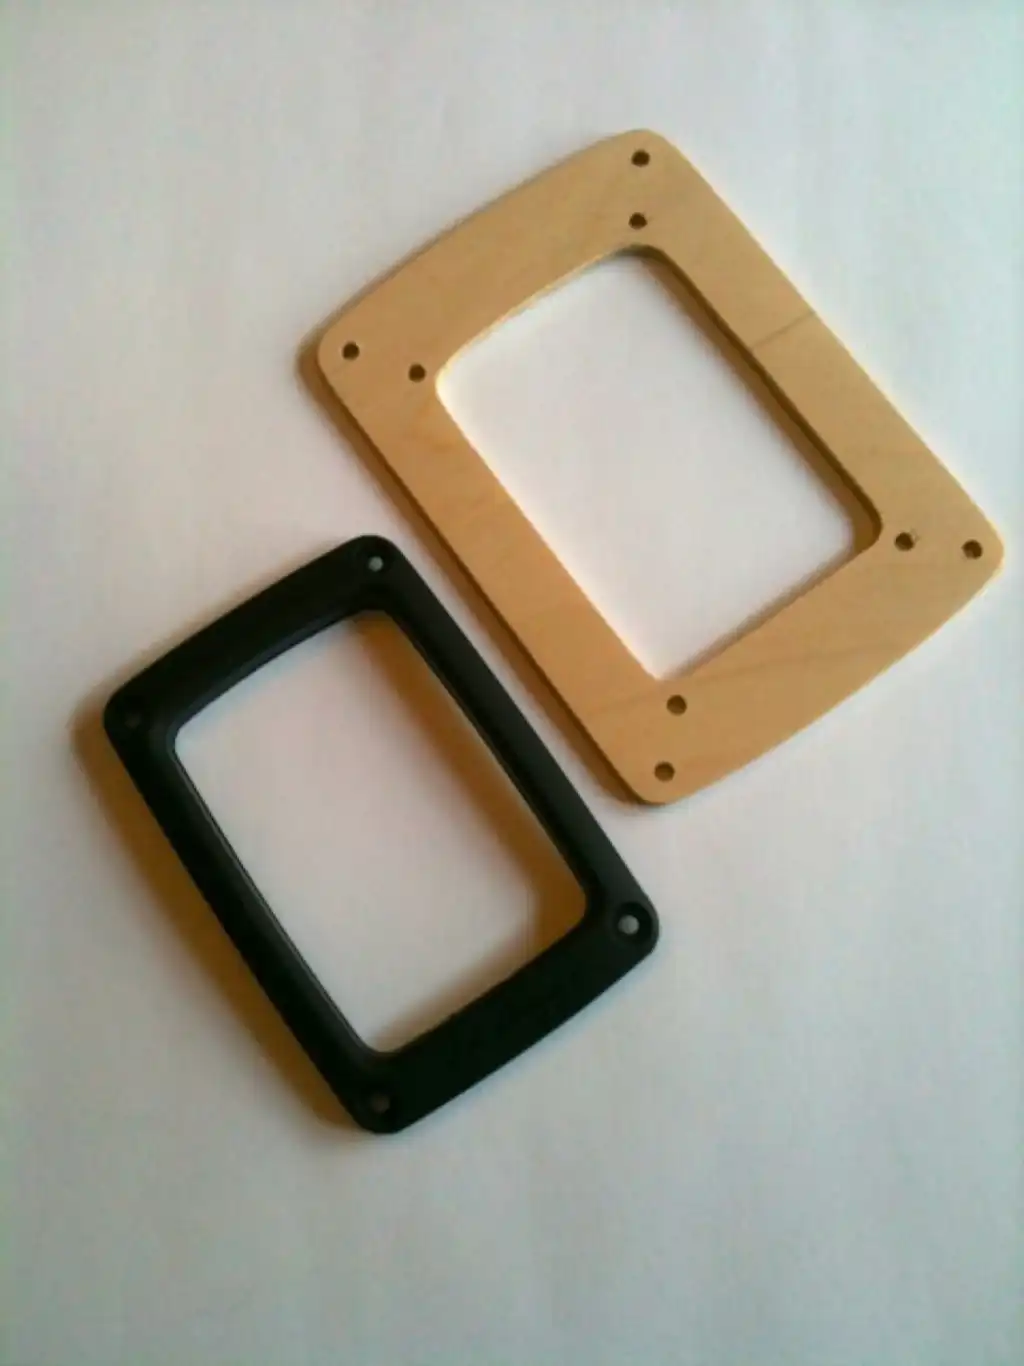
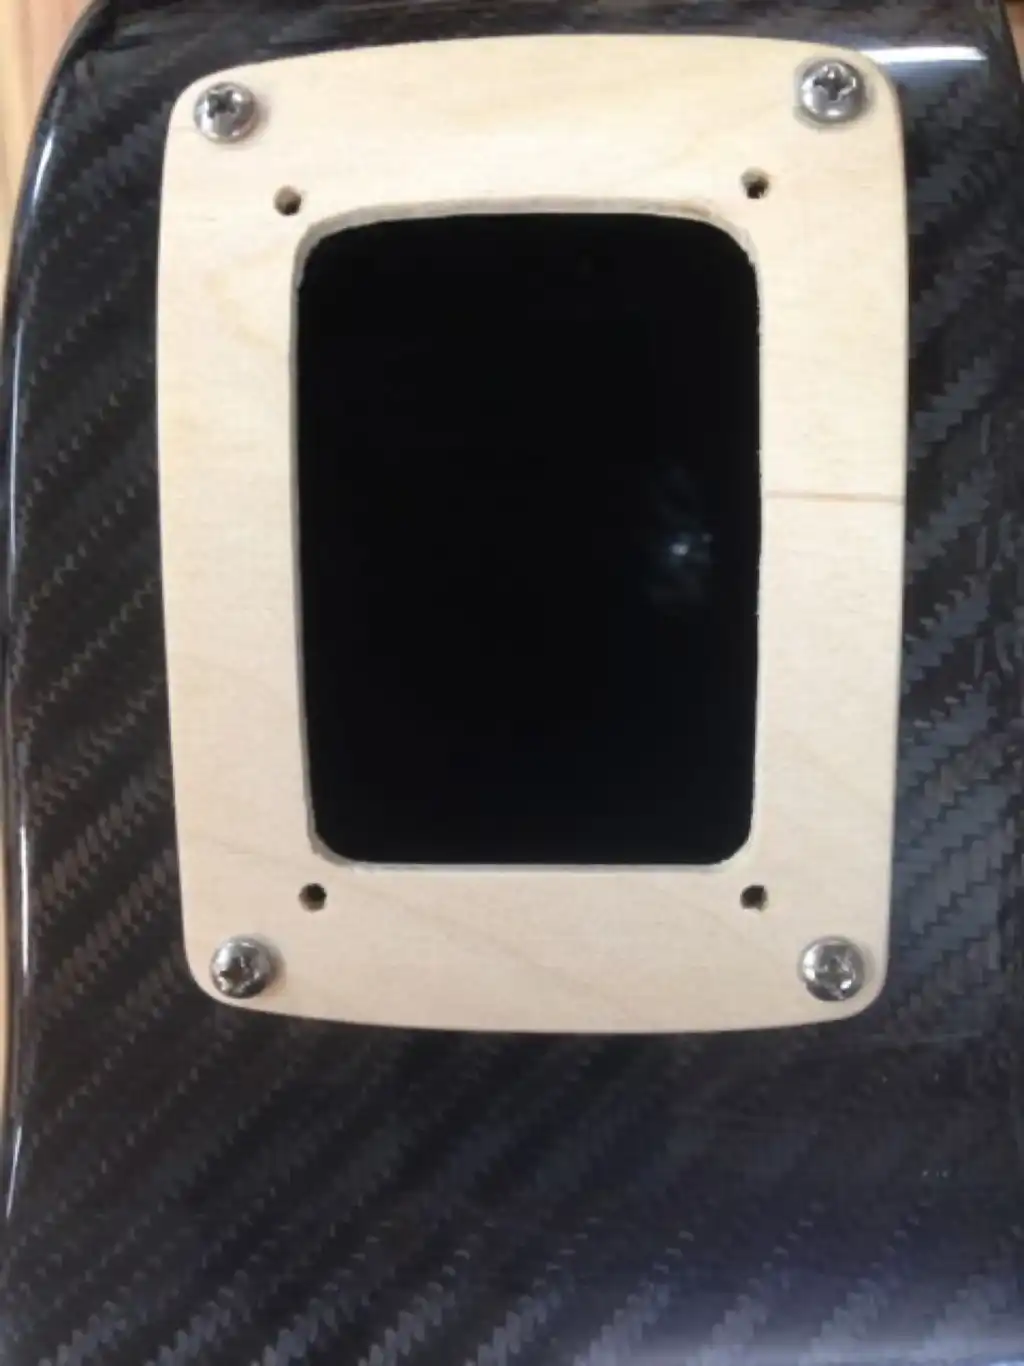
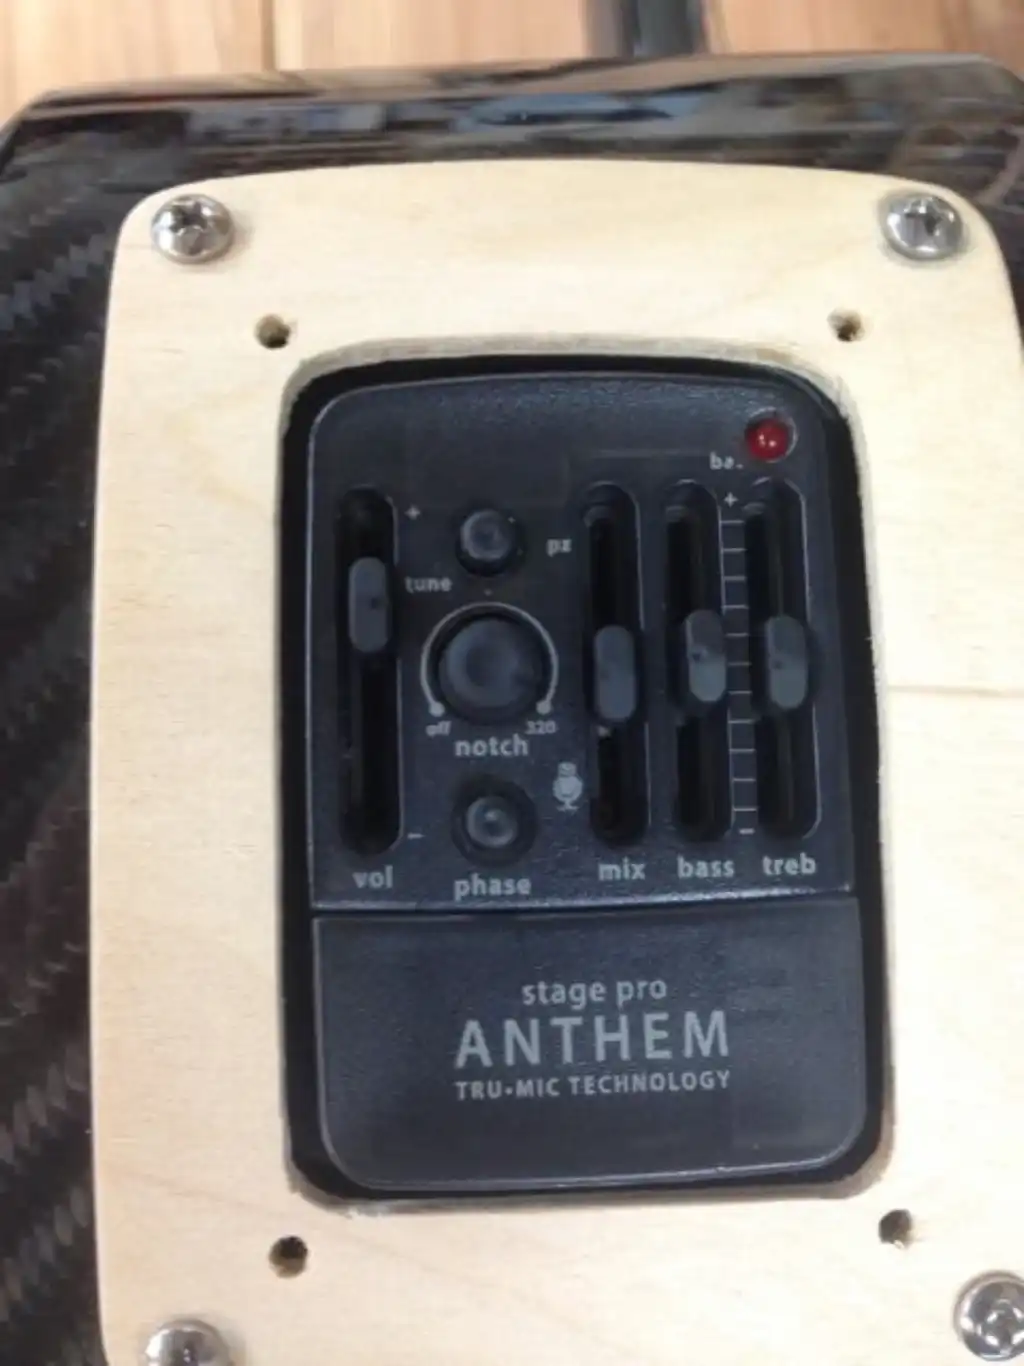
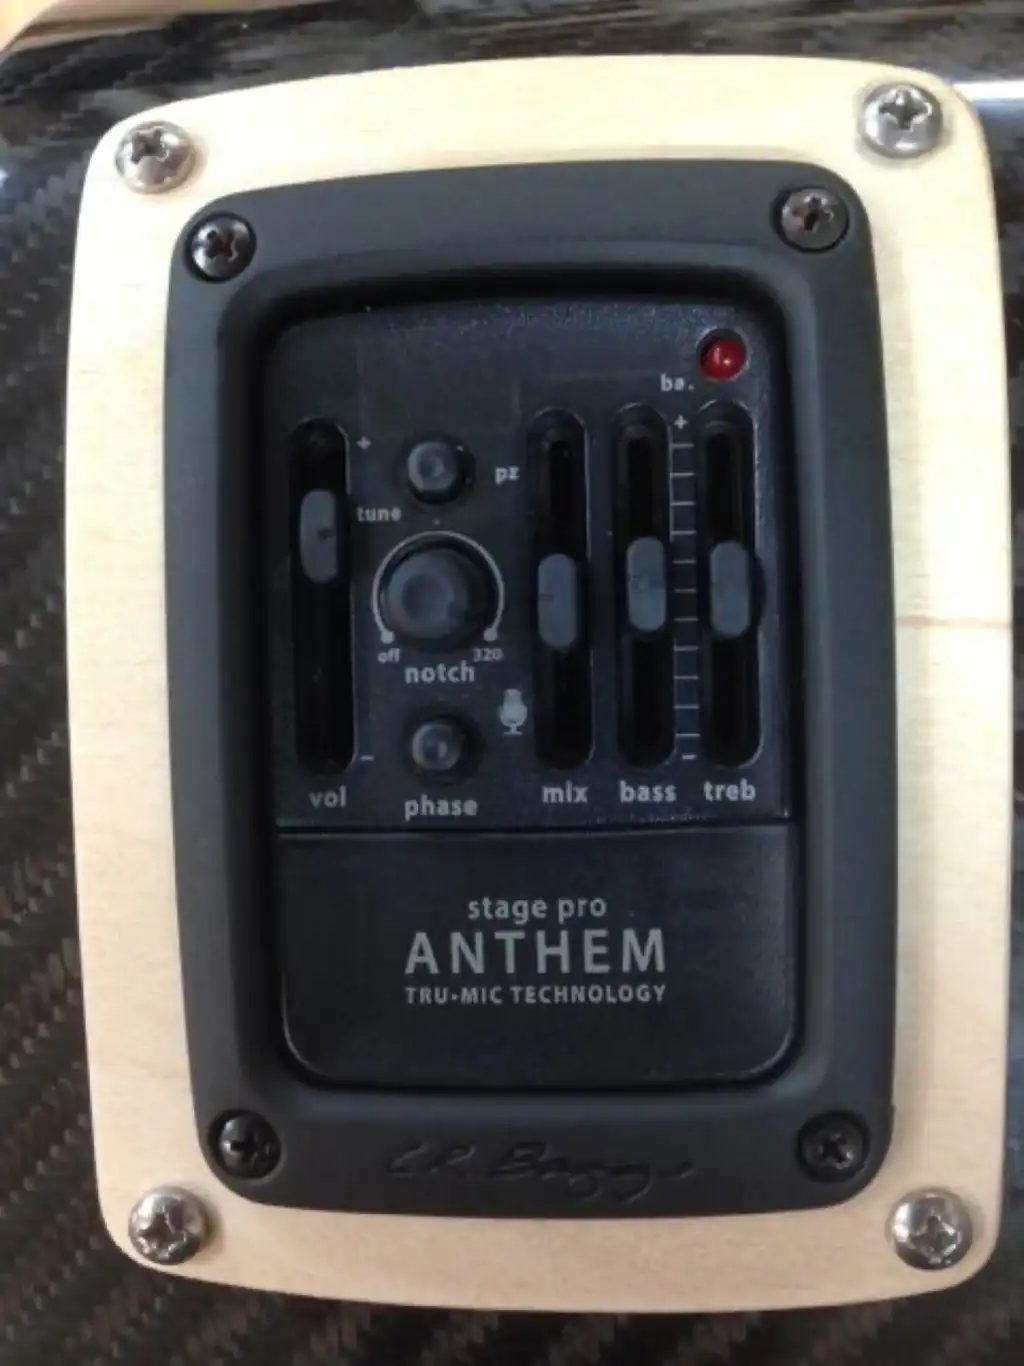
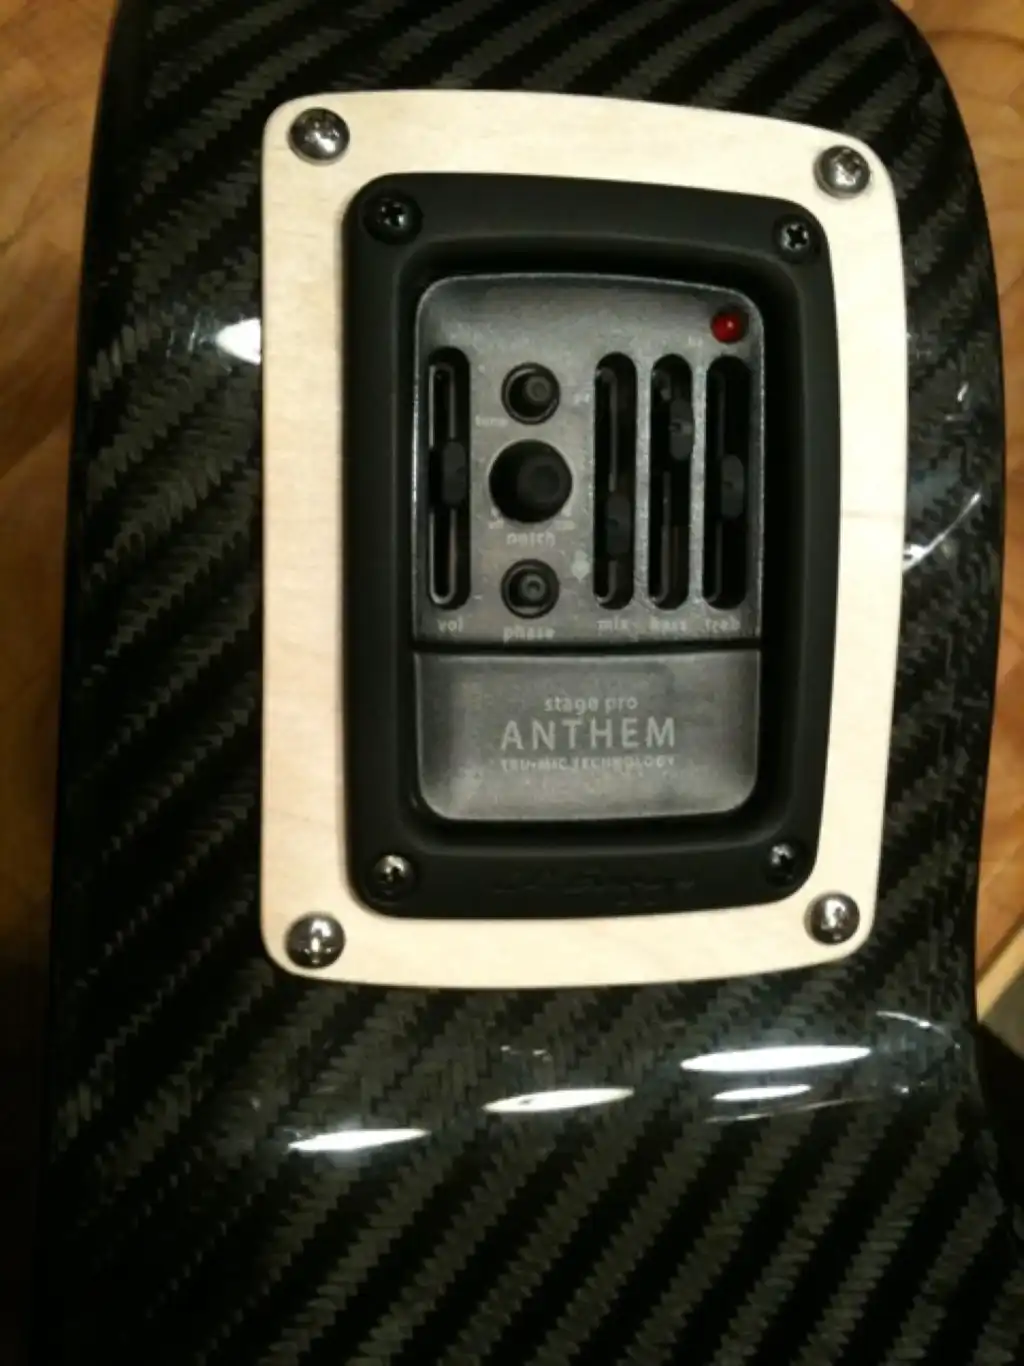
LR Baggs Onboard Element to Stagepro Anthem Retrofit

LR Baggs Onboard Element to Stagepro Anthem Retrofit
I replaced an LR Baggs Onboard Element with an LR Baggs Anthem Stage Pro. The existing opening left in the guitar from the Element was too large. What could I do?

I wanted (needed) to replace the factory-installed L.R. Baggs Onboard Element preamp / pickup system on a carbon fiber RainSong WS1000 with an L.R. Baggs Anthem Stage Pro preamp / pickup system. This article documents the steps I took to swap out the Element for the Anthem.

Introduction

The Element is a perfectly suitable pickup system, especially for loud stage performance. The pickup in this guitar happened to have suffered damage from an airline handling/mis-handling encounter, and I happened to have an Anthem StagePro available. Not to mention, the additional internal near-field microphone included with the Anthem and accompanying changes to the preamp provides for a more pleasing (acoustic?) sound than I can get from the under saddle transducer alone. And yes, the very technology that provides for a more natural acoustic sound also makes the system more prone to feedback, especially at really high volumes. Solution? I don't need to play that loud.

NOTE: My solution is a one-way trip - it is NOT reversible. But then, why would I ever want to go back?

Before - RainSong with LR Baggs OnBoard Element
Challenge - The Existing Cutout

The opening cut into in the side of the guitar to house the OnBoard Element was larger than the opening required for the Stagepro Anthem.

Cutout for LR Baggs OnBoard Element
(Existing) Cutout for LR Baggs OnBoard Element

Both pickups, viewed side-by-side. The Anthem (on the left) is a smaller overall design than the Element (on the right).

Anthem (left) and Element (right)
Solution - A Reducer

I needed to create a reducer to solidly house the new Anthem preamp, successfully span the large existing opening, and follow the contour(s) of the upper bout..

Reducer and housing rings
Reducer (blank) and housing rings

A variety of materials can be used to make the reducer, such as bent hardwood, plastic (flexible - not brittle), or even metal. For this prototype, I chose to use a piece of 1/8″ plywood (the type available at most craft stores). This material would be easy to sculpt, have sufficient strength, and be readily bendable. The first step was to size the reducer appropriately. In my example, it ended up being 3″ wide and 4.25″ long. Those dimensions were determined as an average of what was necessary to span the existing hole in the guitar, provide sufficient support for the new preamp, and look somewhat like it belonged. I gently contoured both ends of the wood following the contour of the stage pro housing ring for a pleasing appearance.

Preamp housing ring
Preamp housing ring

The flexible housing ring that is supplied with the Stage Pro must ride atop the reducer as opposed to mounting directly to the guitar, so the next step was to cut an opening in the reducer to fit that ring. This involved making a paper template to trace the opening, drilling a hole, fitting a coping saw blade through it and removing the interior wood. The dimensions for the opening are 1-57/64″ (4.8 cm) wide by 2-3/4″ (7 cm) long (note the ‘top’ is slightly radiused while the ‘bottom’ of the opening remains flat)

Coping saw
Coping saw

After sawing, the reducer begins to take shape.

Reducer and Anthem housing ring
Challenge - The (Existing) Opening is Too Small

Even though the Anthem appears to have a smaller footprint than the Element, it was necessary to resize the existing hole in order for the Anthem to fit flush with the outside surface of the guitar side.

If I was installing the Anthem into a new guitar, the new preamp would sit flush against the inside of the side of the guitar and require a MUCH smaller opening. In my case, due to the fact that a hole is pre-existing (a "wrongly-sized" hole), the new preamp needs to sit flush against the inside of the side of the reducer. The reducer rides on top of the side of the guitar, and the Anthem housing ring is sized in depth to accommodate the thickness of a guitar side (effectually sandwiching the guitar side between the housing ring and the preamp), not a guitar side plus the thickness of a reducer. I was careful to support the side material of the guitar while I used a file and some sandpaper to remove just enough material for the preamp to wedge into the opening.

Enlarged opening
Enlarged opening
Anthem (left) and Element (right)
New Anthem (left) and Old Element (right)
Installation

I fit the Anthem housing ring into the reducer and drilled 4 holes to secure the preamp to the plywood reducer plate using a 1/8″ brad point drill. It was necessary to determine a functional and aesthetic placement for the 4 additional holes that would hold the reducer to the guitar body, so I test fit the system and marked the installation position.

Reducer with cutout and holes

The next step involved drilling 4 holes in the body of the guitar. I made sure to support the guitar sides while drilling, and used the same 1/8" brad point drill used previously. This allowed me to use #6-32 x 3/8″ long stainless steel bolts with lock nuts to hold the reducer in place. The stainless steel was purely an aesthetic choice; I thought it looked appropriate on this guitar.

Reducer mounted on the guitar

The next step was to fit the preamp into place. I reached into the soundhole and pressed the preamp up against the reducer plate.

Anthem pressed against the reducer

From the outside of the guitar, I set the Anthem housing ring into place and secured it to the preamp with the 4 provided screws passing through the housing ring, through the reducer, and into the preamp. Now you can better envision the function of the reducer, and understand why it had to be created in the first place.

Housing ring secured to the preamp

Dexterity was the only skill required at this point, where everything was carefully assembled and tightened. Once in place, I connected the UST, Microphone and output jack. The strings were put back on. I ran a cable to my L.R. Baggs Venue and tuned the guitar. I released the Mute button on my Bose L1 Model II Tonematch Audio Engine (mixer) and the Anthem sprang to life, lending that extra mic’d quality to the guitar that Baggs does oh-so-very well!

The RainSong sounds great! I think the small addition of plywood to my carbon fiber guitar was just what it needed!

Glamour shot
Glamour shot
Stagepro Anthem Retrofit Complete